Sunday, March 30, 2008

Daring Bakers Party with Dorie


This month's Daring Bakers Challenge is brought to us by one of my favourite Daring Baker sisters Morven of Food Art and Random Thoughts!

To boot, Morven picked a recipe from one of my all time favourite baking cookbooks, Baking: From My Home to Yours by the esteemed Dorie Greenspan, The Perfect Party Cake.


I've been baking out of this book since I was given the opportunity to review this wonderful book in November 2006. Even back then, this cake recipe caught my eye. I've just not had a chance to make it for anyone until now. When Morven announced this was the recipe, I decided I'd be making it for a good friend at work, Courtney.

I would like to say that I loved this cake. I really and truly would because I haven't had one recipe of Dorie's that I didn't like and I own three of her cookbooks! But like all of us, even one of my favourite cookbook author can have an off day. Unfortunately, this cake just didn't work out the way the recipe described that it would.

The day before I baked the cake, I read on our Daring Baker private blog that Dorie had found out that we were doing this cake and sent Brilynn of Jumbo Empanadas giving us all some tips as others had reported to her similar problems with the cake in the past. She cautioned us to make sure we weren't using self rising cake flour (I wasn't) and Dorie even gave us the secret to her success, Swan Down Cake Flour (My preferred and the flour I used). How cool that Dorie would want to make sure we all had success!

Despite using Dorie's suggested flour and the called for buttermilk, another rising agent in cake, the thing just didn't rise to the levels that were expected, especially since we were instructed to divide the two cakes into half to make a four layer cake. I ended up only making two layers from it because I was fearful for that if I tried to cut the two cakes in half I would end up with nothing but crumbs.


Other than that I had no other issues with the cake. It just wasn't....well spectacular the way the other recipes I've made from Baking From My Home to Yours has been. In the end, it was just nice white cake with coconut and raspberries. I think I'll stick to my tried and true recipe for birthday and special occassion cakes in Baking Illustrated: A Best Recipe Classic from the folks at America's Test Kitchen.

And Dorie, I still love your cookbooks, despite my cake failure here and everyone in the office loved the cake and Courtney that it was grand that I would bake her cake.

And in the end, isn't that what a party cake is all about?

To join the party going on in the food blogosphere, go check out the hundreds and hundreds of Perfect Party Cakes out there on my fellow Daring Bakers blogs.

Saturday, March 29, 2008

Starter Watch Day Eight: I Can Name That Starter...

And, I Can Bake With That Starter!!

Day Seven probably passed uneventfully for our starters on the counter and today, Day Eight is the big graduation day!!

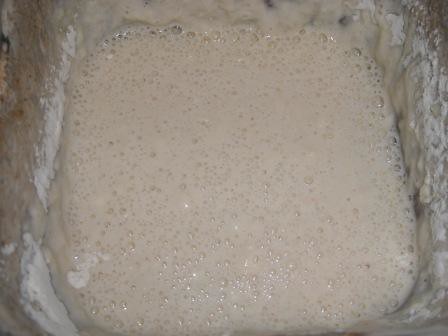
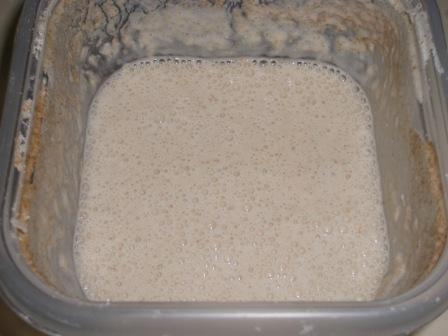
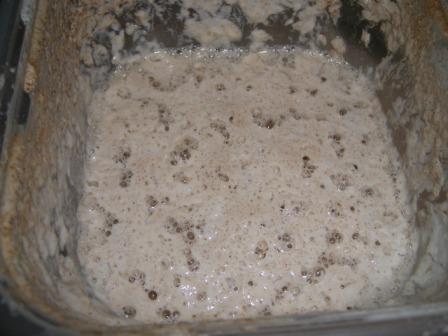
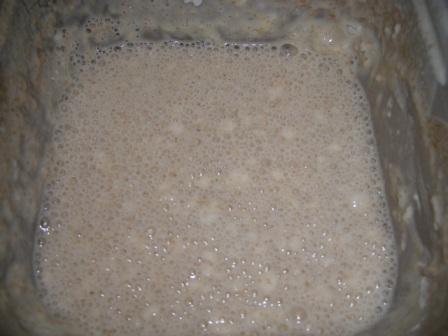
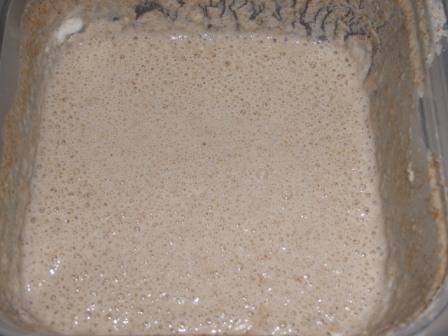
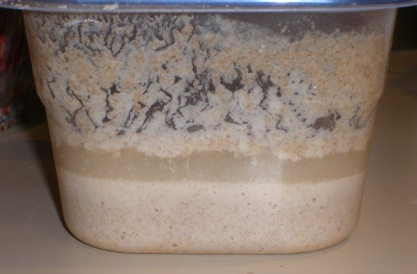
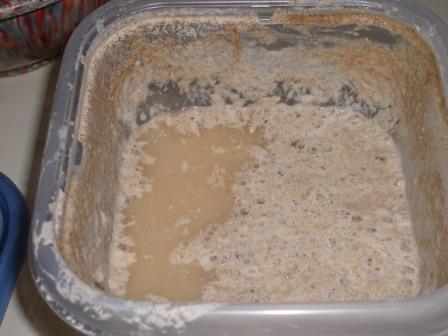
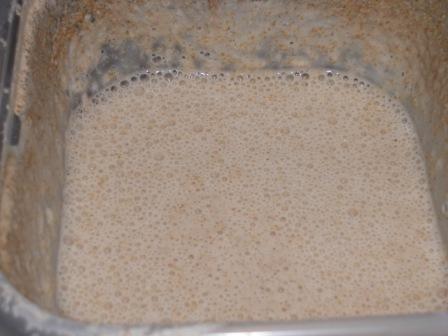
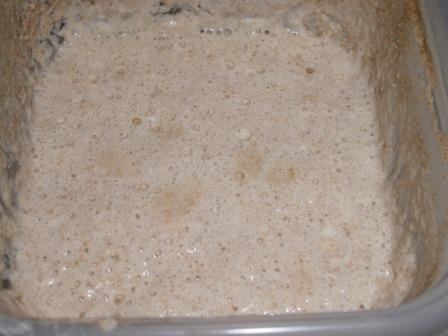
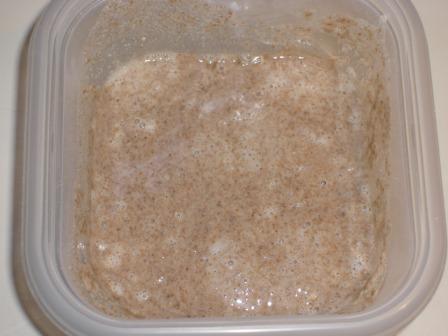
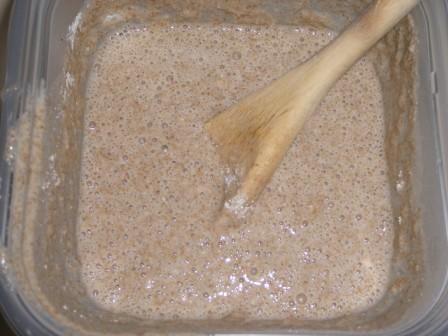
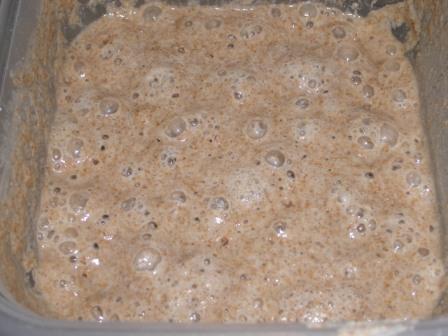
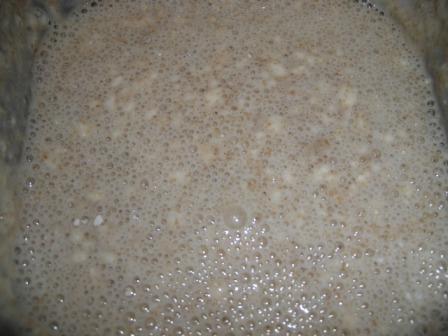
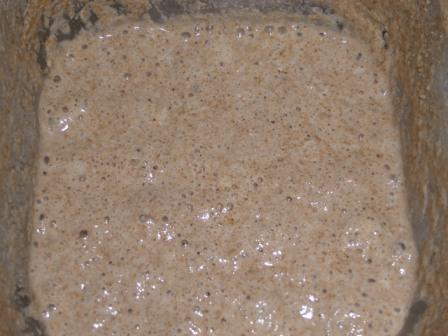
Today after your first feeding you should have noticed the beginnings of a more active starter. In fact, you may now have the type of action you saw on Days 3 and 4!

starter_day8fizzy

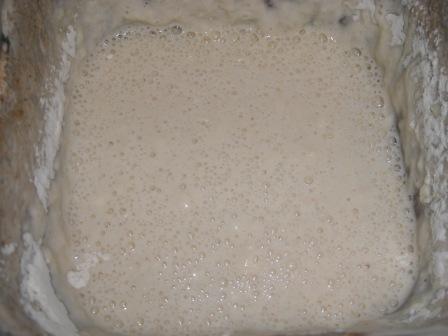
This is a sign your starter has adjusted to the all AP flour feedings. If you don't have a super active starter after today, don't panic. Your starter didn't die, it is just a late bloomer on the all AP flour diet. Sometimes it takes through Day 10 for a starter to adjust to the AP flour. However, if after Day 10 you don't have activity, there are a few things you can do to jump start your starter. I'll post about those on Monday, Day 10 when I'll also post about getting ready for the first bread try.

Another thing that happens today is, unless you are going to be baking with your starter every day, this will be the last day of two times a day feedings. Which is a good thing because with the cost of flour these days you are probably getting worried this starter child of yours is going to eat you out of 5lb bags of flour every week! Starting with tomorrow's feeding you will go to 1/2 cup of water and 1/2 cup of AP flour and wait twenty-four hours between feedings.

So, what are you waiting for??!!

Get out there, name your starter and try one of the two recipes I gave on Thursday (
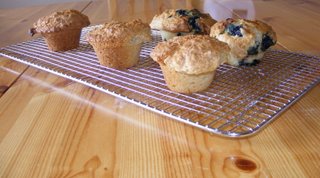
Klondike Pancakes or Quick Bread/Muffins)! If you are feeling really brave and what to see the rising power of your starter you can try my recipe for Sourdough Cinnamon Rolls.

And leave a comment telling us all what you named your starter. We're dying to know...

lienscinbuns


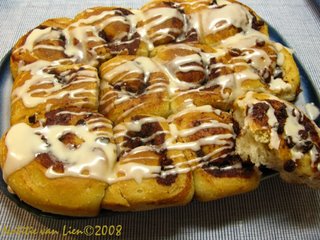
Lien's Sweet Rolls from the recipe below made with Gollum, her starter, who is now sleeping until May's BBB recipe.

Breadchick's Sourdough Sweet Rolls With Butter Cream Frosting

Prep Time: 2 Days

This recipe uses the sponge method for a first rise followed by a second standard rise before you roll out dough for the rolls. Your sourdough starter should be well established as well to give the best results. Also, the temperature of the room you are baking in should be between 75 and 80 degrees. If room is colder, double the rising times. If kitchen is warmer, use a retarded rise method by placing dough in refrigerator (this method will take some watching of dough. expect 2 to 2.5 times longer on rises). This recipe is suited for either hand mixing or standing mixers.

This recipe results in 15 - 20 good sized rolls with a tangy sweet taste.

This recipe may be used to make cinnamon, gooey caramel or pecan caramel rolls (recipes for fillings are below).

INGREDIENTS FOR SWEET DOUGH:

1 C. sourdough starter
3/4 C. sugar
1/2 C. canola or vegetable/canola blend oil
1 Tbsp. salt
1 1/2 C. warm water (80 - 85 Degrees)
6 1/4 to 6 1/2 C. bread flour (depending on stiffness of batter, hold back 1/4 cup)

INGREDIENTS FOR FILLINGS:

Cinnamon Rolls:

1 C. Sugar
4 tbsp. Cinnamon (or to taste)
1 C. Raisins (Optional)
Orange Zest (Optional/to taste if you want Orange/Cinnamon rolls)
1/4 C. Melted Butter (to brush on rolled out dough)

Gooey Caramel Rolls:

1/2 C. Light Brown Sugar (packed)
1/2 C. Sugar
4 tbsp Cinnamon (or to taste)
1/4 tsp Salt (optional or to taste)
1/4 C. Melted Butter(to brush on rolled out dough)

Caramel Pecan Rolls:

1 - 1 1/2 C Pecans (lightly toasted and chopped coarsely)
1/2 C. Light Brown Sugar (packed)
1/2 C. Sugar
4 tbsp Cinnamon (or to taste)
1/4 tsp Salt (optional or to taste)
1/4 C. Melted Butter(to brush on rolled out dough)

INGREDIENTS FOR BUTTER CREME FROSTING

1/2 stick butter very soft but not melted
1/8 Cup Milk
2 Cups of Confectioner Sugar
1/2 tsp Vanilla Extract (or other flavoring of your choice. Almond or Orange is very nice on the Cinnamon Rolls!!)

Blend well adding more sugar if necessary until frosting is creamy and very spreadable

STEP 1: MAKING THE SPONGE

Combine the starter, the water and one half the flour (without 1/4 Cup held back in reserve) in a large glass or plastic bowl(Don't use a metal bowl as the starter will "react" to the metal). Cover loosely with plastic wrap and let rise at room temperature for at least 3 hours or until almost tripled.

STEP 2: MAKING THE SWEET DOUGH

Mix the sugar and salt together in small bowl. Stir down the sponge and add the oil and 1/2 the sugar/salt mixture to the sponge. Stir well until all the oil is almost absorbed by the dough. Add 2 cups of the flour and mix well until the dough is smooth. Add the rest of the sugar/salt mixture and 1/2 cup of the flour and mix well until combined fully. You may need to switch to hand mixing here if your dough is starting stiffen or if your standing mixer is starting
to strain, switch to the dough attachment. Add remaining flour (without 1/4 Cup held back in reserve). At this point you may find you have to use your hands to combine this flour. Dough should feel sticky but stiff. If the dough feels too loose or wet, add the 1/4 Cup of flour you held back held back slowly until dough feels right. Mix well by hand until dough is smooth and elastic. Dough will still be slightly sticky. Resist the temptation to add more flour as this will result
in tough rolls.

Place dough in a very large buttered glass or plastic bowl. Cover loosely with plastic wrap and let rise for 8 - 12 hours or until at least doubled or almost tripled.

Step 3: FORM THE ROLLS

Divide the dough into 2 halves and cover the half not being worked with plastic wrap and return to bowl. Turn the half of dough you are working with onto a floured surface for rolling and form into rough rectangle. Begin rolling dough out to form 15" x 6" rectangle that is about 1/2" thick. If dough springs back as your rolling use your hand to press into rectangle and roll out slowly. You will depress air pockets out of dough and the dough will be slightly resistant to rolling.
You may also have to let dough "rest" and relax between some rolls for a minute or two. Be patient, dough will relax. Also, be careful to not overwork the dough or add too much flour as you are rolling.

When you have dough rolled out, brush dough with melted butter; not too much or the sweet roll will "fall apart" during last rise. Just enough for filling to cling to dough. Generously sprinkle the filling of your choice from one long edge to the other, leaving about 1/4" of one long edge free of filling. Roll the dough slowly to form a long "roll". Pay attention to keeping "ends" of the roll as even as possible, working the ends to be even is necessary until all that is left to roll is
the 1/4" long edge border without filling. Brush water or an egg white wash on this 1/4" and seal the roll; gently pinching the roll to seal if necessary.

Using dental floss, cut the long roll into 1 1/2" - 2" sections and place in well buttered 13" x 9" glass baking dish.

Repeat method with remaining dough. (You may need to also use a second baking dish)

Cover baking dish with plastic wrap and let rise 8 - 12 hours or until rolls are almost doubled.

Step 4: BAKING/FROSTING

Bake Rolls at 350 Degrees for 45 minutes or until internal temperature of roll is 190 degrees.

Let completely cool (1 to 2 hours) and frost.

Note: If you make the gooey caramel or caramel pecan rolls, the caramel will set. To loosen from dish, set baking dish in pan of hot water for a few minutes before serving. These two rolls are also best served a bit warm. About 20 seconds in the microwave is about right to make them warm but the fillings not too hot.

Also, don't try and halve this recipe. If it makes too many rolls for you, just bake them and freeze them without frosting them. When you want a gooey roll, take a few out of the freezer, let them come to room temperature and frost them.

Thursday, March 27, 2008

Starter Watch Day Six: A Sullen Starter and Coaxing It Out of Its Shell

Welcome to Day Six and the Tween Years, complete with the disappearing into the bedroom and not coming out for anything but dinner act. Seems just like yesterday our starter was a babe in swaddling flour and now look at him/her!


Should bring a tear to your eye because if your starter is healthy you definitely have a sour smell wafting from the container. My fellow BBB sister Lien called the smell at this stage, "strong glue smell"!

Two things you probably have going on in that container is little if any evidence of a rise or big bubbles. You also have hooch between every feeding and at the bottom, you may even have a thick gloopy flour mixture.


Don't worry about any of this. It is all part of our starter growing up. Just stir it all back in and together and go about your normal first


and second feedings.


Another part of any pre-teen is wanting to stretch their wings and try to fly. So, let's talk about what you can do with some of that toss off starting Saturday!

How to get a starter ready to bake with also called a power feed.

We need to give a starter a bit of a jump start to get it all bubbly and at peak rising capacity before we can bake with it. This is going to be especially important with our young starters. But we also need to test our starter to make sure we will have a viable starter for when we want to make a tasty boule


or baguette with it. This is called power feeding the starter. Just think of it as "carb loading" before a marathon. Depending on the recipe and when you want to bake, you will either do this 2 -4 hours before baking or right before going to bed.

Here is what you do:

Stir in any hooch back into the starter, DO NOT toss any off, you want the full Monty. Feed the 1/2 cup water and 1/2 cup AP flour. This will give you enough to starter to make something and still have starter left over to grow for the next time to bake. If you want to bake a double batch of something feed the starter 1 cup of water and 1 cup of flour. You will need to use this power fed starter within 12 hours of feed.

Now, what to bake? I like to have people make one or both of two really simple recipes that should result in fantastic food and definitely won't fail with a young starter: quick bread and Klondike Pancakes! Why something like this versus a boule or a loaf of bread? Because your young starter may or may not have enough Ompf to force a full rise and remember my motto about baking with yeast? Success breeds success. I would rather have you get comfy working with the starter AND have something yummy to eat than to end up with a flat, pale piece of baked dough.

sarasmuffins

Sara of I Like to Cook's Blueberry Muffins from her young starter, "Crater Face". Crater Face is about two weeks old and was born from this starter recipe.


Quick Bread/Muffin Master Recipe.

You can add anything you want to this recipe and you will have muffins or a loaf of quick bread

Step 1: Power Feed for Starter about 2 - 4 hours before baking (or night before). See directions above for the Power Feed.

Step 2: Master Recipe

1 egg
1 tsp vanilla
1/4 cup vegetable oil
1 cup starter
1 cup AP flour
1 tsp baking soda
1/2 cup sugar (if making a savory muffin/bread, reduce sugar to 3 TBS but don't eliminate. You need this to give the starter a little boost!)
1/2 cup fruit, nuts or anything else you want to add

Pre-heat oven to 400 degrees. Prepare muffin tins or 8 x 4 loaf pan with light coating of cooking spray, even if using paper muffin cups.

Combine dry ingredients in small bowl. Stir in fruit, nuts or what ever you are going to add to the muffins/bread. Combine wet ingredients in medium bowl. Add dry ingredients to wet ones. Mix until all the ingredients are just combined

Bake for 15 - 20 minutes or until golden brown or 35 - 40 minutes for quick bread or until a tooth pick inserted comes out clean. If tops start to brown too fast, cover with a sheet of foil

lienspancakes

Lien of Notitie van Lien Klondike Pancakes made with her young starter, "Gollum". Gollum is about two weeks old and was born using this starter recipe!

Klondike Pancakes
Originating in a Alaska during the Gold Rush, this was popular in the late 1800s, when a sourdough starter was the common and reliable way to provide leavening for bread products.

Preparation begins the night before.

1 cup sourdough starter
1 cup all-purpose flour
1 cup warm water
1 large egg
1 tablespoon vegetable oil
1 tablespoon granulated sugar
1/2 teaspoon salt
1/2 teaspoon baking soda

Place the sourdough starter in a nonreactive mixing bowl, add the flour and water. Stir and leave, loosely covered, overnight in a warm place.

The following morning, stir the mixture and remove 1/2 cup, adding it to your sourdough starter in the refrigerator or on the counter (This is called "paying the kiddie).

To the prepped sourdough mixture, add remaining ingredients, stirring well. Wait 10 minutes for baking soda to activate. For each pancake, pour scant 1/4 cup batter onto a hot griddle. Cook pancakes until dry around edges and the bubbles formed on top have "popped". Turn and cook other sides until lightly golden brown.

Serve hot with butter and syrup (maple syrup or Lyle syrup)

Finally, if you want to try something really savory, go visit Tanna of My Kitchen in Half Cups and check out the onion rings she made with her starter.


Tanna hasn't shared her starter's name with us yet but it too was born from this recipe.

One last thing, speaking of names, tomorrow you can name your starter!!! Can't wait to read what you come up with for you little yeast beast on the counter...

Wednesday, March 26, 2008

Starter Watch Day Five: Top Starter Connecticut

I've been working on a bit of bread business tonight, a rye version of The Croc


that ironically started from some of Bob's toss off!


Today is Day Five with our starters. You may have noticed this morning it probably didn't have the huge rolling bubbles of the past few days.

starter_begday5

Also, if you didn't have a layer of hooch yesterday, your probably had one today.

starter_begday5hooch

The smell of the starter should also be definitely sour and vinegary. After you stir in the hooch and give him/her the first feeding, it will be bubbly but again probably not as foamy as in previous days. Don't worry, this is still all normal. As long as you don't have odd colors or really awful smells (spoiled chicken, wet gym socks) your starter is just starting to settle down while it adjusts to the AP flour.
starter_day5after2ndfeed

Before the second feeding, the starter may have developed another layer of hooch.

starter_day5b42ndfeed

Again, just stir it back in and give the starter its second feed.

starter_day5after1st

You will notice in my second feed that I didn't completely stir the flour smooth. The lovely thing about sourdough starters is even if the flour isn't stirred in smooth, the yeasties will still attack it. Take a look tomorrow morning! Not a lump of flour will be in sight.

Tomorrow, we'll talk about what to do with toss off because on Friday night you can prep it to make something on Saturday. I'm also going to answer a few questions from the comments on the previous Starter Watch posts.

OK, Judges Table on Top Chef Chicago is happening so time to kiss your starter good night.

Tuesday, March 25, 2008

Starter Watch: Four Days and Seven Hours Ago, Our Starters...

Were born. When our starters came into the world, they were 100% rye flour starters. Today is graduation day from rye flour to all AP flour. Today, our starters become toddlers.

When we woke up and took a peek at them, we probably noticed they were topped with a layer of tiny bubbles

starter_begday4

and we may have even noticed that hiding just underneath that top layer of bubbles was a layer of hooch!

starter_hoochlayerday4

This probably was your first layer of hooch.
starter_hoochtopday4

If you didn't have a layer of hooch, don't worry. It doesn't mean anything is wrong. It just means your yeasties aren't eating through the flour super fast. You will get some sooner or later. We want to stir any hooch back into the starter. This will make the starter very foamy and frothy.

starter_afterhoochday4

After feeding the starter its first full 1/2 cup feeding of all AP flour, your starter will get those big roiling bubbles we've become accustomed to with the rye flour feedings. What you may notice though is the "rise" doesn't seem to be as vigorous. It may take it longer to get the roiling bubbles.

starter_day4firstfeed

After we have a second feeding of all AP flour there will be few if any huge roiling bubbles. This is normal as the starter adjusts to AP flour.

starter_after2ndfeeding4th

Also notice how different in color the starter is from the first day

starter_beginningday2

A heads up, we are now entering a more placid and less active period the next few days while the starter finishes digesting the rye flour and begins to get used to an AP diet. Between now and through Day Seven and possibly until Day Ten, you may notice your little yeast friend isn't a lively as he/she has been. Don't worry that your starter has died, it's just going through a phase.

Just like a toddler gets used to solid food...

Monday, March 24, 2008

Starter Watch Day Three: Double, Double Toil and Trouble; Fire Burn and Cauldron Bubble

How's everyone's starter doing? I've been getting lots of good questions and comments and I'll try and reply to each and every one of you personally. If you don't hear directly from me, check the comments because I'm trying to answer there first as others who are in the process of birthing their first starters will probably have the same question.

Day Three of a healthy starter should bring you a real witch's cauldron of roiling bubbles and the beginning of a sour smell and taste.

starter_begday3

Yes, I said taste. I want you to taste your starter from time to time. Don't worry, it won't hurt you and I want you to know what a healthy starter tastes like at all the stages. Go ahead, dip your finger in and taste it. Wash your hands first. I'll wait. (doh, doh, doh, doh.....)

OK, that should have had a bit of a sour vinegary tang with a definite whole grain overtone.

So, about two hours after the first feeding you should have lots of bubbles and it should look like a rolling boil

starter_after1stfeed3rdday

It will settle down to foamy, tiny bubbles before the second feeding

starter_bfre2ndfeed3rdday

and then it will get big bubbles, like when you blow air through a straw in a milk shake after the second feeding.

starter_after2ndfeed3rdday

By now you should be feeding a mix of rye and AP flour. In the next three days we will be taking this starter completely to AP flour. In about ten days, there will be no trace of the rye flour left.

Notice, how in the next two days it gets lighter and lighter in shade.

Again, feel free to drop me comments or emails if you have any questions. If you want to send me photos of your starter, please compress them and zip them up before sending them to me.

I can't wait to hear about all your starters. Thanks a bunch!

Weekend Cookbook Challenge #26: My Crock Pot, My Hero

It has been a long time since I've had time to participate in what is still one of my favourite blogging events, Weekend Cookbook Challenge. This wonderful event was created by my best friend and right hand bread baking buddy, Sara of I Like to Cook over two years ago making it one of the longest running food blogging events. So, when I found out my super friend, Lisa of La Mia Cucuina was hosting this month and she had chose Crock Pots, Dutch Ovens and Pressure Cookers as the theme, well it was just the theme to bring me back into the fold!

As you may remember from earlier posts, I've been working really long hours, six or seven days a week for about a month. This hasn't left me much time to fix myself dinner, let alone lunch and this is where my crock pot has been a life saver! Since Lisa announced this month's theme, I've used my crock pot at least once a week. My 1975 edition of Mable Hoffman's classic Crockery Cookery hasn't been off my counter.

I've made Chicken Cacciatora and the aptly named Busy Woman's Roast Chicken. I've made Pot Roast


and then Hamburger Soup.

Last week, I made Corned Beef and Cabbage


And tonight, I came home to the lovely smell of Stuffed Cabbage Rolls.

This is one of my often made recipes from this cookbook. What is even better is the recipe for the stuffing mix always makes enough extra that I can make a little meat loaf to put in the freezer and save for the next time I don't have time to make a good meal for myself.


That is the best part about cooking with the crock pot, lots of left overs for lunch the next day!

Thanks Lisa for picking such a perfect theme for me this month! Without your theme, I would have been eating M&M's and pretzels out of the vending machine noon and night!

Keep your eye out on Lisa's blog La Mia Cucina for a round-up later this week. If you want to participate in this month's Weekend Cookbook Challenge, you have one more day to get your entry in to Lisa.


Swedish Cabbage Rolls
From Mable Hoffman's Crockery Cookery

12 large cabbage leaves
1 beaten egg
1/4 cup milk
1/4 cup finely chopped onion
1 tsp salt
1/4 tsp pepper
1lb lean ground beef (I used 97% fat free ground sirloin)
1 cup cooked rice
1 (8 oz) can tomato sauce (I used salt free)
1 Tbsp brown sugar
1 Tbsp lemon juice
1 tsp Worcestershire sauce

Immerse cabbage leaves in large kettle of boiling water for about 3 minutes or until limp; drain. Combine egg, milk, onion, salt, pepper, beef and cooked rice. Place about 1/4 cup meat mixture in center of each leaf; fold in sides and roll ends over meat. Place in slow cooker. Combine tomato sauce with brown sugar, lemon juice, and Worcestershire sauce. Pour over cabbage rolls. Cover and cook on low 7 to 9 hours. Makes 6 servings of two rolls each.

Sunday, March 23, 2008

What About Bob?

For those of you who are planning on baking the May Bread Baking Babes bread with us and started your sourdough starters in the past day or two, or for those of you just playing along and taking the first plunge into making a starter of your own, let's see how we are all doing!

I've been snapping pictures of Bob, who has been bubbling away on my counter for the past twelve days, like a proud parent; documenting each feeding so you can check and see how your starter is doing.

Day 1 - Rye Soup: There isn't much that happens on either feeding one or two other than foamy bubbles about two hours after the feeding. You may not even get many of these. Don't worry if it just looks like brown, grainy soup.


Day 2 - It's Alive? : About twelve hours after the second feeding of the first day, you may notice that there are pockets of foamy areas. This is yeast attacking the last remaining bits of flour. This is good, showing the yeast is ravenous and ready to be fed again.


After the first feeding of the day, you should notice lots of bubbles and it should be frothy when you stir it up.


About six hours after the first feeding it will look pillowy and puffy and have large bubbles


Again, after the last feeding of the day before you go to bed, the starter will be frothy and foamy.


If you taste the starter at the end of the second day, it should taste like a very mildly sweet whole grain pancake batter.

Over the long weekend, I baked quite a few loaves of bread! I baked three sourdough cinnamon loaves on Friday. On Saturday, I played with a recipe I've been working on for a soft and rich bread for a friend who can't eat eggs.


I got the airy crumb I am looking for


but I'm still not happy with the texture of the bread. It's close but not quite as soft and springy as the egg bread she loves but can't have anymore. I've never played with egg substitutes before in bread but I have to place an order for some specialty whole grain flours from Bob's Red Mill later this week so I may order some of their's and give it a try. Has anyone used egg substitutes for egg bread before? How did it turn out?

And today, I baked a loaf of white wheat bread using the recipe for 100% Whole Wheat Sandwich Bread from King Arthur Flour Whole Grain Baking: Delicious Recipes Using Nutritious Whole Grains cookbook with a few modifications that I prefer to the original recipe. I also tried something new today and split them on top and poured melted butter into the split before putting them in the oven. It resulted in a super buttery taste with a soft tight crumb.


I think it will make a great peanut butter and grape jelly sandwich that I'll take to lunch tomorrow.

100% Whole White Wheat Sandwich Bread
adapted from the King Arthur Whole Grain Baking book

Makes one 8 1/2 x 4 1/2 inch loaf

1 cup and 2 Tbsp lukewarm water (about 80 - 90 degrees)
4 Tbsp melted butter
3 cups White Wheat flour
3 Tbsp sugar
1/2 cup instant potato flakes
1/4 cup dry milk
1 1/4 tps salt
1 3/4 tsp instant yeast
1 Tbsp melted butter

Sponge: Combine water, 1 1/2 cups flour, and 1 tsp yeast in a 2 quart plastic container with tight fitting lid. Let ferment for 2 hours until bubbly and frothy.

Dough: Combine sponge and remaining ingredients to form a shaggy dough ball. If using stand mixer, combine with dough hook on medium-low speed (2 - 4 on Kitchen Aid). For both hand and stand mixer, on lightly floured counter, knead by hand dusting shaggy dough ball with small hands full of flour until slightly tacky and springy dough ball is formed. Let rest for 10 minutes on counter. Lightly grease a 4 quart bowl and place dough in, turning dough so as to lightly grease dough ball. Cover and let rise until double, about 2 1/2 hours.

Forming and Baking Loaf: Punch down risen dough and press out on floured counter in a rectangle about 10" long by 6" wide by 2" thick. Fold one short end over to about the middle of the rectangle, fold the other short end over so it rests on top of the other short end (like a business letter), seal top and ends and place seam side down into a prepared glass loaf pan. Loosely cover with plastic wrap and let rise until dough is about 2" taller than edge of loaf pan.

Pre-heat oven to 350 degrees. Gently slash lengthwise down the center with a lame or really sharp knife. Melt 1 Tbsp butter and pour into slash. Bake uncovered for 35 minute, tenting the top with foil after about 15 - 20 minutes. Bread will be finished when top is is golden brown and internal temperature is between 200 - 205 degrees. Let cool for at least 30 minutes before slicing.

Family Heirlooms

Today is Easter in all of Christendom. It is also the first major holiday in over fifteen years that I've not spent with family or friends but rather spent alone. I got up early this morning, put on warm clothes, and walked down to the Sound to watch the sun come up. After a brisk jog back to the house, I fixed myself coffee, some toast from Friday's sourdough cinnamon bread, and set about doing some spring cleaning that included switching out the winter weight bed clothes to the spring weight.

I sleep on an antique bedstead that is part of a bedroom suite that has been in my family for over a century.


It belonged to my great grandparents on my father's side and was purchased as a wedding gift for them. It was the first manufactured furniture my great grandmother had ever owned and while it wasn't an expensive set; family lore says it was purchased from the Montgomery Ward Company Catalog and came to Northern Michigan via a Great Lakes schooner from Chicago in 1903, it is a lovely set of furniture that includes the bedstead, a tall boy chest of drawers, a triple mirror dressing table with a cane bench, and a night stand.

During the winter, I like to keep flannel sheets on the bed along with a heavy down comforter. During the spring, summer, and fall, I switch to pressed cotton sheets and a white chenille bedspread. But all year long, I keep a quilt made for me when I was a little girl by my great grandmother, the same woman the bed was purchased for as a wedding present.

My great grandmother made me two quilts before she died when I was about seven. The first quilt was a crib quilt that is a riot of rectangles from different fabrics she had collected over the years and backed by a lovely pink piece of cloth scattered with roses.


She embroidered my name, month of birth and her name on the corner of the backing to commemorate my birth.


The other quilt she made for me when I graduated to a "big girl" bed. It is a lovely blue and white checked quilt with a pink backing of bluebells and roses.


It is this quilt that I keep on my bed all year long. It is warm during the winter and cool during the spring and fall and the perfect weight during the summer to throw over myself when the air conditioning is on. Even LB likes to curl up and sleep on it given the chance.


This Easter afternoon, lying on the freshly made-up bed was the perfect place to curl up to take a nap and be surrounded by one's family in spirit if one couldn't be with them in person.

I only have one recipe from my great grandmother and it is for her chocolate icebox cookies. It is the only food memory I have of her. She would make these year round. She kept rolls of them in the freezer and she would take a roll out, let it slightly thaw on the zinc counter in her back kitchen and then bake them for the grandkids when we came in from running down by the river and chasing each other through the corn field.

I haven't made them years but maybe later this week, when things have settled down a bit at work, I'll have to make a batch to put in the freezer for when company comes.


Chocolate Icebox Cookies

Makes about 28 cookies

1/2 cup shortening
2/3 cup sugar
1 egg
1 tsp vanilla
1 1/2 cups AP flour
6 Tbsp cocoa powder
1/2 tsp baking soda
1/4 tsp salt

Sift together flour, cocoa, baking soda and salt and set aside. Cream the shortening and sugar together and then add the egg and vanilla and beat until fluffy. Stir flour mixture into the sugar and shortening mixture until smooth. Divide dough into two balls and chill for 10 minutes. Form two logs about 2" in diameter with slightly chilled dough and wrap in wax paper, sealing the ends with freezer tape.

If baking them that day, place in refrigerator for 2 - 4 hours until completely firm. Otherwise the cookie rolls will keep in the freezer for up to 3 months.

To bake the cookies, pre-heat the oven to 350 degrees. While oven is pre-heating, remove a roll from the fridge or freezer and let come to room temperature. Slice cookies to about 1/2 inch thick and bake on prepared cookie sheet for 8- 10 minutes. Let cookies rest on cookie sheet for 1 - 3 minutes until set and then cool on racks. You can dust them with powdered sugar after they have cooled if you wish.