Saturday, January 31, 2009

We Interrupt This Plan....

To tell you that I have been working obscene and I mean obscene hours the past three days and today as no exception as I was in the office.

My Office Space Swag
(umm....yea....I'm going to need you to come in on Saturday...)

I've got what is starting to feel like the project from hell taking up all the space on my desk right now

Blueprints on My Desk

and it just won't die despite the pins I keep sticking in the voodoo doll

My Executive Toy Shelf

that I've lovingly named after the architect responsible for all the "funness" I'm having.

Needless to say this has put me completely behind in not only the Cookbook Casting Call menu since Wednesday night but I also haven't even had a chance to go check out and comment on my fellow Daring Baker's tuiles! (Thanks to everyone who stopped by to check out my savory version. I promise to get over to your place to check your's out. Promise!)

I have plans to make a dish from The New Basics tonight that wasn't on the original menu. It looks good and I don't have to work too hard in the kitchen and clean up looks to be breeze. Which is good because all I really want to do is crawl into bed with LB and the Netflix DVD I've had for three weeks but haven't had a chance to watch.

Regular programming will return tomorrow with a wrap-up post about The New Basics and the new cookbook and menu.

Hopefully, I'll actually be able to cook out of it....

Thursday, January 29, 2009

Daring Bakers Shape Up for the New Year

This month's challenge is brought to us by Karen of Bake My Day and Zorra of 1x umruehren bitte aka Kochtopf. They have chosen Tuiles from The Chocolate Book by Angélique Schmeink and Nougatine and Chocolate Tuiles from Michel Roux.

When my fellow Bread Baking Babe, Karen and good bread baking friend, Zorra were announced as the co-hosts for this month's Daring Baker Challenge, I was all excited because I was pretty sure we would making bread and you know how I feel about bread.

So, imagine my surprise when I logged onto our private Daring Baker forum and found out that we were making tuiles!

While from a recipe standpoint tuiles aren't really that difficult, the shaping is a bit tricky and takes some practice. You have to form or mold the slightly baked dough while it is warm and then finish baking it and let it cool completely.

Believe me when I say you will have asbestos fingers when you are done making tuiles.

Karen and Zorra gave us the options of not only forming our tuiles into any shape we desired but to make either sweet or savory and to adapt the recipes to our particular flavor tastes. I chose savory and, using Thomas Keller's wonderful recipe but omitting the black sesame seeds and adding a small palm full of finely grated parmesan cheese, I used one of the large scallop shells I have for Coquilles St Jacques as a mold.

Then I made the chickpea puree from "Adventures of an Italian Food Lover", steamed some shrimp in stock and thyme, and used the Scallop Tuile for the top shell of my seafood treasure.

Yum!!


Thomas Keller: Savory Tuiles for Jan DB Challenge

To see sweet and other savory versions of these wonderfully flexible treats, go visit my fellow Daring Bakers.

Savory Parmesan Tuile
Adapted From Thomas Keller's "The French Laundry Cookbook"

1/4 cup plus 3 tablespoons AP flour
1 tablespoon plus 1 teaspoon sugar
1 teaspoon kosher salt
8 tablespoons unsalted butter, softened but still cool to the touch
2 large egg whites, cold
2 tablespoons finely shredded Parmesan Cheese


In a medium bowl, mix together the flour, sugar, salt and cheese. In a separate bowl, whisk the softened butter until it is completely smooth and mayonnaise-like in texture. Using a stiff spatula or spoon, beat the egg whites into the dry ingredients until completely incorporated and smooth. Whisk in the softened butter by thirds, scraping the sides of the bowl as necessary and whisking until the batter is creamy and without any lumps. Transfer the batter to a smaller container, as it will be easier to work with.

Preheat the oven to 400 degrees F.

To make them shaped like a cornet:

Make a 4-inch hollow circular stencil. Place Silpat on the counter (it is easier to work on the Silpat before it is put on the sheet pan). Place the stencil in one corner of the sheet and, holding the stencil flat against the Silpat, scoop some of the batter onto the back of an offset spatula and spread it in an even layer over the stencil. Then run the spatula over the entire stencil to remove any excess batter. After baking the first batch of cornets, you will be able to judge the correct thickness. You may need a little more or less batter to adjust the thickness of the cornets.

There should not be any holes in the batter. Lift the stencil and repeat the process to make as many rounds as you have molds or to fill the Silpat, leaving about 1 1/2 inches between the cornets.

Place the Silpat on a heavy baking sheet and bake for 4 to 6 minutes, or until the batter is set and you see it rippling from the heat. The cornets may have browned in some areas, but they will not be evenly browned at this point.

Open the oven door and place the baking sheet on the door. This will help keep the cornets warm as you roll them and prevent them from becoming too stiff to roll. Flip a cornet over on the sheet pan and place 4-1/2 inch cornet mold at the bottom of the round. If you are right-handed, you will want the pointed end on your left and the open end on your right. The tip of the mold should touch the lower left edge (at about 7 o'clock on a clock face) of the cornet.

Fold the bottom of the cornet and around the mold; it should remain on the sheet pan as you roll. Leave the cornet wrapped around the mold and continue to roll the cornets around molds; as you proceed, arrange the rolled cornets, seams side down, on the sheet pan so they lean against each other, to prevent from rolling.

When all the cornets are rolled, return them to the oven shelf, close the door, and bake for an additional 3 to 4 minutes to set the seams and color the cornets a golden brown. If the color is uneven, stand the cornets on end for a minute or so more, until the color is even. Remove the cornets from the oven and allow to cool just slightly, 30 seconds or so.

Gently remove the cornets from the molds and cool for several minutes on paper towels. Remove the Silpat from the baking sheet, wipe the excess butter from it, and allow it to cool down before spreading the next batch. Store the cornets for up to 2 days (for maximum flavor) in an airtight container.

Fill them with any savory filling like smoked salmon mousse and serve.

Wednesday, January 28, 2009

The Life and Death of a Cloverleaf Roll

Fridge Dough from VBoAWCB


Cloverleaf Rolls in Dough Ball Stage


Sshhh!  Cloverleaf Rolls Sleeping!


Perfect Cloverleaf Rolls After Rise


The Perfect Cloverleaf Roll


Death of a Cloverleaf Roll


What Every Girl Wants...

The New York Times Magazine this past weekend had a long expose on what women really want when it comes to sex. I could have told them in one sentence.

To come home from a long, rough day at the office to find a copy of Cooking Light and some Spotted Dick waiting for her...


What Every Girl Wants!


(The tin of pudding was a fun gift from my neighbor, Chris, who knows I love all things British.)

Tuesday, January 27, 2009

A Loaf Straight From the Heart

"Bread so that your house may never know hunger."

House Blessing from It's A Wonderful LIfe

That is one of my favorite lines from It's a Wonderful Life. It is one line from an age old blessing for a new home. The full blessing is:
Bread! That this house may never know hunger.
Salt! That life may always have flavor.
Wine! That joy and prosperity may reign forever!
So, tonight is with great joy that I help my really good friend, Jenny of All Things Edible celebrate her new home

All Things Edible's House Warming

with a loaf of fantastic bread.

victoryoatmealbreadOatmeal Bread from VBoAWCB

Jenny is a bread freak. She loves to bake breads of any type and even has a sourdough starter named Marvin. I love to check in on her and Marvin and see what they are up to.

I made this bread on Sunday and it is just about the best bread I've ever made. The office agreed It is made from simple ingredients: steel cut oatmeal, molasses, yeast, salt and flour. The crumb is soft and tender. The crust is thick and chewy. The taste sweet without being overpowering. The oatmeal just melts away but leaves that nutty taste behind. This bread is fantastic on it's own, toasted with a little jam or great as a sandwich.

The recipe came from my Wartime Wednesday tome, The Victory Binding of American Woman Cook Book. The bread recipes from this cook book are rock solid. I'm not sure what the ladies knew back then, but they sure knew their yeast!

Jenny, may you and your family have joy, peace and security in your new home.

I'm also submitting this bread for Susan at Wild Yeast's weekly round up of all things yeast bread, Yeastspotting.


Note: I've been a fresh yeast kick lately. Working with fresh yeast versus active or instant yeast requires a bit more patience. You have to proof it first and it is a bit more temperamental than active or instant dry yeast. Rise times also typically are a bit longer than with the active or instant. But, I've also noticed that my breads seem to have a more delicate crumb and intense flavors.

Inside of Oatmeal Bread from VBoAWCB


Oatmeal Bread
adapted from the 1943 version of the Victory Binding of the American Woman's Cook Book

Makes two (2) loaves

1 cup cooked rolled or steal cut oats (not quick cooking)
1 cake yeast (.6 oz cube) (If you don't have fresh yeast, substitute 1 package active or 2 tsp rapid rise)
1/2 cup luke warm water
1/3 cup molasses
pinch of sugar
1 tsp salt
1 Tbsp butter, melted
2 1/2 cups ap flour
1 cup bread flour
1 cup KA white wheat flour or whole wheat flour

Cook oats per instructions, remove from heat and allow to cool completely and absorb any excess water. You want a big "glob" of oats.

Proof yeast in lukewarm water and pinch of sugar. Allow to sit for 5 - 10 minutes until foamy.

In bowl for stand mixer or large bowl, break up cooled oatmeal into medium chunks, and using the dough hook (if using stand mixer), stir in proofed yeast, molasses, salt, and melted butter until oatmeal is completely broken up.

Add in bread and wheat flour and stir until wet dough formed. Add in 1 1/2 cups AP flour until shaggy dough ball is formed. Add in remaining flour 1/2 cup a time until soft dough ball that cleans bowl if formed. Allow dough to rest for 10 minutes to absorb excess flour. If using stand mixer, hand knead for 5 or 10 quick turns.

Dough should be soft and very slightly tacky. If clumps of dough stick to hand, knead in additional AP flour on palmfull at time.

Place dough in greased bowl, cover and let rise until double (about 2 - 2 1/2 hours). Punch down, form 2 loaves, place in 8 1/2 x 5 greased loaf pans, lightly grease top of loaves, loosely cover, and allow to rise until dough is about 1/4" above edge of loaf pans.

Slash top of loaves down center if desired.

Place loaves in preheated 350 degree oven and bake 30 - 35 minutes or until internal temperature reaches 190 degrees.

Allow to cool completely before slicing.

Monday, January 26, 2009

But Wait! That's Not All!!

It plays music AND cools bread...

Ginzu Wave Radio Bread Rack

Sunday, January 25, 2009

Change of Plans and Change of Menu

I was suppose to go into work today to do some designing on a rush project but the day was just too pretty even if it was a bit brisk.

Instead, I went for a nice long drive through the snow covered woods listening to Celtic Crush, sipping my coffee, just going where ever the road took me. While wandering the far back roads, I found an open winter farm stand selling the best vegetables of the winter and late fall crops.

If you were confronted by these lovely winter root vegetables,

Winter Farmer Stand Root Vegetables

I'll bet you would shift the Savory Mashed Turnips planned to accompany the Tuscan Pork Chop on tonight's menu to Wednesday too!

Instead we're having roasted root vegetables along with a sneak peak at Mark Bittman's How to Cook Everything .

Roasted Winter Root Veggies ala Mark Bittman

Oven Roasted Root Vegetables
adapted from "How to Cook Everything"

Makes 4 servings

6 Tbsp extra virgin olive oil
3 small red beets
2 small rutabagas
2 small turnips
1 medium yellow poatato
1 cup baby carrots
1 clove garlic
2 small yellow onions
3 - 4 Springs of thyme and rosemary,stripped of leaves
2 Tsp crushed sage leaves (optional)
Kosher Salt
Fresh Ground Pepper

Pre-heat oven to 425 degrees.

Wash and scrub the vegetables. Peel the rutabaga, turnips and beets (where latex gloves with beets to prevent turning your hands red. Cut all the root vegetables to chunks of equal size. I like 2 - 3" chunks and set aside.

Peel and cut the onion into wedges and break apart the head of garlic into cloves but leave in the cloves unpeeled.`

Line a large roasting pan or the bottom of a broiling pan with heavy duty foil (Not necessary but makes for easy clean up, especially with the beets). Coat with 3 Tbsp of olive oil. Evenly distribute vegetables only (hold back garlic, it will be added later) and drizzle with remaining olive oil. Season with Kosher salt, pepper,thyme, rosemary and sage (if using).

Stir vegetables around the pan, turning over the vegetables until all are coated with seasoned oil.
Bake for 30 minutes, stirring the vegetables occasionally until vegetables begin to brown. Add garlic and continue to cook vegetables, stirring the vegetables about once every 10 - 15 minutes until they are fork tender.

If vegetables start to over brown before they soften, add a few tablespoons of water and turn down the heat to about 375 and cover loosely with foil. Once vegetables start to soften, remove foil and allow to finish cooking.

Note: Depending on the type of vegetables, this roasting may take up to 1 hour to 1 1/2 hours.

Saturday, January 24, 2009

Cookbook Casting Call: Report Card for Betty Crocker's Cookbook and A New Week's Book and Menu

Just like last week, we've ended the second week of the Cookbook Casting Call on a pretty high note with a lunch of the Curried Tuna

Cookbook Casting Call: Curry Tuna

and leftover Herb Biscuits from the 1986 edition of the Betty Crocker's Cookbook.

Cookbook Casting Call: herbed biscuits open

I ended up making it for lunch owing to a last minute invite last night to go see "Slumdog Millionaire" with a friend at the absolutely delightful Garden Cinema in downtown Norwalk. The movie was pretty good and the scenes of India amazing. It seems this week has been Oscar nominee week for me as I just returned from seeing "The Reader" (one of the best movies I've seen in a long time) with another friend and I've already made plans to see "Revolutionary Road" and "The Wrestler" next week. Before Oscar day, I'd like to see "Milk" and "Frost/Nixon", which I saw when it was on Broadway.

But you didn't come here for Breadchick's movie reviews now did you? You came here to see how my week with Betty Crocker went and to find out what cook book we will be auditioning next week.

All in all, I would say my week with the den mother of American cooking and her namesake cookbook would rate a solid A.

The spinach mushroom salad was light but filling and the au gratin potatoes rate almost as high as the butterscotch pudding.

Cookbook Casting Call: Betty Crocker Cookbook Butterscotch Pudding

Both are foods that we have grown accustomed to fixing from a box or package but once you make them from scratch, I just dare you to go back to the packaged version. Even the making of a cheese sauce for the au gratin potatoes won't feel like a chore when you put a fork full of these cheesy, creamy potatoes with their crunchy top in your mouth.

Cookbook Casting Call: Au Gratin Potatoes

The recipes in Betty Crocker's Cookbook may not be considered exotic but they are rock solid in every way, shape and form.

The Winter Pantry Plan grocery total for last week was: $11.57. The only ingredients besides milk and half and half I bought were potatoes and green peppers. That total includes four freezer friendly containers for the left over soups that I have made and will be making over the next few weeks.

This week we are going to spend with some more ladies who in their own right are credited with changing the way American's cook, Julee Rosso and Sheila Lukins of Silver Palate Cookbook fame, by exploring their cookbook The New Basics Cookbook.

Cookbook Casting Call Week 3 Book: The New Basics Cookbook

I'm anticipating a week of savory, fresh foods and some old favorites with a twist, especially with the menu I have planned. As usual for the Cookbook Casting Call, recipes from the The New Basics Cookbook are noted with an "*".

Menu for 1/25 - 1/31: Week Three of the Cookbook Casting Call and Winter Pantry Plan

Sunday 1/25:
Dinner: Tuscan Pork Chops* with Savory Mashed Turnips (From McCall's Coast-To-Coast Cooking )
Dessert: Kay's Cookies* with Vanilla Ice Cream

Monday 1/26:
Lunch: Tuna Salad with Grapes & Eggs*
Dinner: Cream of Tomato Risotto* with Garlic Toast

Tuesday 1/27:
Lunch: Leftover Risotto with leftover rotisserie chicken (in freezer)
Dinner: Market Street Meat Loaf*
Dessert: Blueberry, Raspberry, and Strawberry Cobbler*

Wednesday 1/28:
Lunch: Leftover Tuna Salad with Grapes & Eggs on a bed of spinach
Dinner: Tuscan Chicken* with Marinated Mushroom Salad (From McCall's Family-Style Cookbook ) and Wartime Wednesday Oatmeal Bread.

Thursday 1/29:
Lunch: Leftovers - Meat Loaf Sandwich with Marinated Mushroom Salad
Dinner: Thrifty Thursday - Oven Baked Chicken Hash (From 1959 Good Housekeeping Cookbook) with Stracciatella*

Friday 1/30:
Lunch: Leftovers
Dinner: Movie Night Out with Friends

Saturday 1/31:
Lunch: Leftovers
Dinner: Baked Winter Squash Soup* with Julia's baguette

I'll be shopping tomorrow for a few things more than I wish to as the New Basics Cookbook's recipes I've selected call for a few items I wouldn't normally have on hand like fennel and green grapes. But, I still think I can keep the bill under $30.00 as I don't need any milk or half and half. Let's hope!


Cookbook Casting Call: Herbed Biscuits

Herb Biscuits
From the 1986 edition of the Betty Crocker's Cookbook

1/2 cup shortening, chilled (really needs to be shortening and not butter)
2 cups AP flour
1 Tbsp sugar
3 tsp baking powder
1 tsp salt
3/4 cup milk
2 Tbsp Herbs de Provence

Pre-heat oven to 450 degrees. Mix flour, sugar, baking powder, and salt and herbs de Provence in large bowl. Cut shortening into flour mixture until mixture resembles crumbs. Stir in milk until dough leaves sides of bowl and forms a shaggy dough ball.

Turn dough onto floured surface and quickly knead about 10 times and gather into loose ball. Pat dough out gently until it is about 1/2" thick. Cut with floured round cookie cutter. Place cut out biscuits on ungreased cookie sheet about 1" apart.

Bake until golden brown about 10 - 12 minutes. Immediately remove from cookie sheet and serve warm.

Friday, January 23, 2009

Blog Party #42: Tiki Two

When Stephanie announced that the theme for this month's Blog Party would be Tiki Two,

Blog Party #42:  Tiki Two

I immediately ran for my bookshelf and pulled out my 1959 copy of the Better Homes and Garden Holiday Cookbook.

BHG Holiday Cook Book

and flipped to the section on a Polynesian luau where I knew I would find a proclaimed "Island Feast" courtesy of the king of Polynesian fare, Trader Vic.

Trader Vic's Polynesian Luau Menu circa 1959

Unfortunately, after perusing the recipes and settling on the Kona Chicken in a Coconut smothered in Trader Vic's Susu Curry Sauce, I realized that I didn't have half the ingredients on hand. Meaning that dish, no matter how good it sounded, was not going to be able to be made for Blog Party #42 as I'm in the middle of the winter version of The Pantry Plan.

As it turns out, I had the perfect dish to bring already on my Cookbook Casting Call menu for this week, sweet and sour meatballs from the 1986 Betty Crocker's Cookbook!

Blog Party #42:  Sweet and Sour Meatballs

These meatballs are a remembered family meal from my childhood. I would often come home from evening swim team practice in the middle of the winter and walk into the house to smell that sweet pungent smell of the sauce wafting from the kitchen. I would toss my bag with my wet towels and swim suits down on the floor and sprint into the kitchen to make sure bubbling in the pan would be one of my favorite dishes my mother made.

To be fair to the Cook Book Casting Call, the sweet and sour sauce used for this dish is actually found in the 1968 version of the Betty Crocker's Cook Book as by 1986, sweet and sour and for that matter "Polynesian" cooking was so yesterday. But, the meatball recipe in the 1986 version of the BCCB is the same as from the 1968, the only difference is that the 1986 version recommends using very lean ground beef, as by then, healthier ways to cook old favorites were starting to make their debut in main stream American cooking.

Instead of serving these meatballs over rice, I'm going to put them in a big 1950's chafing dish,

1950s Style Copper Chaffing Dish


and put a tiki glass

Tiki Glass

full of bamboo skewers next to it for you to spear a meatball, a piece of pineapple and a piece of green pepper!

The cocktail I'm bringing to the Tiki Two Blog Party is the Aloha Bubbly; basically, a poor man's champagne. It doesn't photograph really well, especially when you stick it in front of a big red towel with a big white tropical flowers on it!

Blog Party #42: Aloha Bubbly Cocktail

But it was pretty tasty and I'm not a huge a fan of pineapple juice. I made this by reserving some of the pineapple juice from the can of pineapple chunks I used in the sweet and sour meatballs.

I can't wait to see what other Polynesian delights I get to sample at the party. There is still a little time for you to show up and delight us all. All you need to do is post something by midnight tonight in the Tiki Theme and email a link to your post to Stephanie!


Sweet and Sour Meatballs
from the Betty Crocker Cookbook (meatballs from 1986 version, sweet and sour sauce from 1968 version)

For Meatballs:
1lb hamburger
1/2 cup dry bread crumbs (I used some plain panko I had in the pantry)
1/4 cup milk
2 Tbsp finely chopped onion
1 tsp salt
1/2 teaspoon Worcestershire sauce
1 egg

Mix ingredients; shape into twenty 1 1/2" balls. Cook in a large frying pan over medium heat, turning occasionally, until brown, about 20 minutes. Or cook in ungreased 13 x 9 x 2 baking dish, in 400 degree oven until light brown, 20 - 25 minutes.

For Sweet and Sour Sauce:
1/2 cup packed brown sugar
1 Tbsp cornstarch
1 large can (20oz) pineapple chunks in own juice
1/3 cup cider vinegar
1 Tbsp + 1 tsp low sodium soy sauce
1 small green pepper, coarsely chopped

Mix brown sugar and cornstarch in large and deep 12" skillet with lid. Stir in pineapple and juice, vinegar and soy sauce. On medium heat, heat to boiling, stirring constantly and reduce heat. Add meatballs. Covver; simmer, stirring occasionally for about 10 minutes or until sauce has reduced and thickened. Stir in green pepper. Cover and simmer until green pepper is tender but still crisp, about 5 minutes.

Serve over steamed rice, brown or white.


Aloha Bubbly Cocktail
2 ounces pineapple juice
1/2 tsp powdered sugar
2 ounces club soda
2 ounces dry white wine

Pour pineapple juice, powdered sugar, wine and club soda into an ice filled cocktail shaker. Shake to mix and pour into champagne flute. Garnish is pineapple and orange wedge.

Wednesday, January 21, 2009

Wartime Wednesday: Change of Heart and Ham

If you are following along in your Cookbook Casting Call menu for this week, you probably see that today's menu calls for a Wartime Wednesday entree of Surprise Ham Croquettes. But as I got home very late from these excruciating meetings in NYC with a client, the idea of spending an hour in the kitchen AND deep fat frying something on top of it all has led to a change in the menu.

We're still doing Wartime Wednesday, and like the croquettes, this menu change will take advantage of using some of the country ham my freezer is full of and the items in my pantry to keep this meal in line with the winter version of the Pantry Plan.

It seems, as I flipped through the VBotAWCB (Victory Binding of the American Woman's Cook Book), that there are a lot of recipes for various types of main dish loaves using any manner of meat and in a case or two no meats. I suspect this is because main dish loaves make the most of kitchen left overs and being wartime, complete with rationing, that these dishes almost guaranteed no scrap of food would go unused. So, it should be no surprise that there is a recipe for something called Spiced Ham Loaf.

Wartime Wednesday:  Ham Loaf

This recipe is simple beyond belief and contains only seven ingredients: bread crumbs, milk, ground ham, ground pork, brown sugar, cloves, and eggs. Since I didn't have any ground pork unthawed, I skipped using this ingredient. The dish went together in about 10 minutes and was in/out of the oven in less than one hour. Like with the salmon loaf from a few weeks ago, I didn't need a huge loaf, so I reduced the recipe to fit in a mini loaf pan. I paired the hamloaf with some leftover au gratin potatoes from Monday's menu.

Wartime Wednesday: Ham Loaf with Betty Crocker Cookbook Scalloped Potatoes

I have to admit, I wasn't blown away by the ham loaf. In fact, I kind of hated it. It was a bit overpowering on the clove side of things; which reminded me of why I hate seeing cloves stuck in a piece of ham. I had forgotten about that because no one in my family is a huge fan of cloves and ham. The au gratin potatoes were the best part of this meal.

Well, sorta....the butterscotch pudding rocked my world!

Cookbook Casting Call: Betty Crocker Cookbook Butterscotch Pudding

There really is no comparison to real pudding made by standing over a stove and stirring milk, corn starch, eggs and brown sugar and the pudding you get out of the box, even the cooked pudding from a box.

First, there is the incredible pudding skin, that gelatinous film that forms on top of pudding and is probably George Costanza's best food packaging idea. Second, despite the idea that pudding is hard to make, it is really easy and doesn't take much longer than the box type. Finally, there is the creamy taste. Once you make pudding from scratch, I can promise, you will never go back to canned and box pudding again.

Tonight, I'm giving you both recipes because I don't want my dislike of cloves and ham to not give you the chance to try this economical dish and because I also want each and every one of you to have the opportunity to eat the best pudding you will ever have!

Did I mention pudding skins?

Spiced Ham Loaf
From the VBotAWCB

Serves 2

3/4 cup bread crumbs
1/4 cup milk
1 1/2 cup ground ham
2 teaspoons brown sugar
1/8 tsp cloves
1 egg

Soften crumbs in milk. Combine ham, sugar, softened bread crumbs, and egg. Mix well and pack into prepared mini loaf pan. Bake for 50 minutes in a 350 degree oven.

Butterscotch Pudding
from the Betty Crocker Cookbook, 1986 edition

2/3 cup packed light brown sugar
2 Tbsp cornstarch
1/8 tsp salt
2 cup whole milk (while 2% and even 1% will work for this, trust me, use whole milk. It's dessert for Heaven's sake!)
2 egg yolks, slightly beaten
2 Tbsp butter
1 tsp vanilla

In medium bowl, slightly beat egg yolks and set aside.

Mix sugar, cornstarch, and salt in 2 quart saucepan. Gradually stir in milk. Cook over medium heat, stirring constantly until mixture thickens (about 8 minutes) and boils. Boil and stir 1 minute.

Gradually stir into egg yolks, about 1/2 the hot mixture. Stir tempered egg yolk mixture into saucepan with remaining hot mixture. Boil for about 1 minute and remove from heat. Stir in butter and vanilla. Pour into dessert dishes or large serving bowl and refrigerate.

Note: If you want pudding skins, allow pudding to cool for about 10 minutes on counter uncovered. A skin will form that you can peel from the top. You can get a second batch of skins if you leave it on the counter but this second batch of pudding skins isn't as good as the first batch.

Tuesday, January 20, 2009

An Old Favorite Bread Re-created for a New President

Today, America celebrated one of the most anticipated changing of power in a generation, the inauguration of the 44th President of the United States, Barack Obama.

Barack Obama Takes The Oath of Office of President

To say that I was excited would be an understatement and I was glad to share the event with my colleagues at the office over lunch in a local watering hole. We laughed, cried and cheered. It truly was a historic day. Tomorrow we ALL have to roll up our sleeves and get to work on the problems we face but today we are celebrating.

When I was growing up there was this small local bakery that my family frequented since I could remember. Besides incredible pies and donuts, they had a sweet bread filled with pineapple, coconut, and marciano cherries and then topped with this delicious thick white glaze. They called it Hawaiian Bread. (Note: This bread wasn't the well known Hawaiian Bread) When the bakery changed hands a few years ago, one of the recipes that they didn't keep was the recipe for the Hawaiian Bread and my mom and I have missed that bread ever since.

My mom and I were chatting about the upcoming inauguration and that not only would this inauguration represent the changing of generations leading this country but this President would be first President born in one of the states not one of the contiguous forty-eight. Somehow, this chat about Barack Obama's upcoming Presidency and our hope for it led to talking about the Hawaiian bread and a seed was planted in my mind to try and replicate the recipe this past weekend.

I knew that the bread was a more tender than typical sweet bread so that led me to believe that it was egg based. I also remembered that it was slightly sweeter than the typical sweet dough. All this made me to think about a orange cinnamon swirl bread that I like to make from the Better Homes and Gardens Bread Cook Book.

Better Homes & Gardens Bread Cook Book

This bread is soft, sweet with just a hint of orange. In other words, the perfect base to add coconut and pineapple as part of the filling. I was skipping the Marciano cherries as I didn't have any and frankly, I'm not a huge fan of them.

First, I proofed the yeast

freshyeast

in warm water and a pinch of sugar.

proofedyeast

Next, I combined the ingredients called out in the recipe but I substituted 1/4 cup of pineapple juice in place of 1/4 cup of the one cup of scalded milk. After kneading the dough, which had a lovely orange pineapple scent while I was working it, I put it in my slightly warm oven to rise. Two hours later I had this lovely risen dough

proofedhawaiianbread

all ready to be rolled out and filled with cinnamon, sugar, coconut and crushed pineapple.

After forming the loaf, I let it rise again

Risen Loaf of Hawaiian Loaf

and baked it for about 30 minutes in a 350 degree oven.

The glaze required some consultation with my mom about what she thought the glaze components were. After a little back and forth, we were pretty sure that corn syrup was part of the glaze because we remembered it being glossy and thick. My only fear was that with the combination of corn syrup and confectioners sugar that the glaze would be tooth numbing sweet. My fears were getting justified by finding corn syrup glazes that called for up to 1/2 a cup of corn syrup on top 2 and 3 cups of confectioners sugar. Finally, I found a recipe for a vanilla glaze that included just 2 Tbsp of corn syrup on a website about donuts. A few adjustments to this recipe and I was sure I had a good place to start.

After the bread cooled, I placed it on a cookie pan and poured the glaze on top

Glazed Hawaiian Loaf

and let the glaze set before slicing into the bread. So far, the bread looked exactly right. Now for the taste test.

When I took the first bite, I knew instantly that I had re-created the Hawaiian Bread from our local bakery. I can't wait to get home to Michigan again to bake it for my mom and get her opinion!

Since this bread is known in my house as Hawaiian Bread and since our new President hails from that lovely island state AND I'm blogging about it on the day he was sworn in to lead our nation, I'm renaming this bread Inaugural Bread in honor of Barack Obama and the hope that has returned to my country despite the tough times we have ahead.

I'm also submitting this bread to Susan at Wild Yeast for inclusion in this week's Yeastspotting.

hawaiian Bread


Hawaiian Bread aka Inaugural Bread


Makes Two (2) 8.5" x 5" loaves

For Dough:
1 package active dry yeast or 1 0.6oz cube of fresh yeast
1/4 cup warm water (90 degrees)
pinch of sugar
3/4 cup milk, scalded
1/4 cup pineapple juice
1/2 cup sugar
1/4 cup butter
1 tsp salt
1 Tbsp grated orange peel
3/4 cup orange juice
1 egg, slightly beaten
6 - 7 cups All purpose flour

For Filling:
1 16oz can crushed pineapple, drained with 1/4 cup of juice reserved for dough (make sure your pineapple is in juice and not heavy syrup
2 cups shredded coconut
1 cup Marciano cherries (optional)
1 1/2 cups sugar
4 Tbsp cinnamon
dash cardamom

For Glaze:
2 1/2 cups sifted powdered sugar
2 tablespoons milk
2 tablespoon light corn syrup
1 teaspoon pure vanilla extract.

To Make Dough:
Completely dissolve yeast in 1/4 cup of water and a pinch of sugar. Set aside to proof, approximately 5 - 10 minutes (yeast will be bubbly and/or slightly foamy when proofed).

While yeast is proofing, melt butter in scalded milk and stir in sugar. Combine pineapple juice, orange juice and orange zest and egg and set aside.

If using Stand Mixer all the following will be done using the dough hook(s):

In large bowl whisk together 4 cups of flour and salt. Pour in juice, zest and egg mixture and combine with flour. Add yeast and mix until completely combined. Finally, add milk and sugar mixture and mix until fully combined. This should result in a very wet dough.

In 1/2 cup increments, add remaining AP flour until a soft, slightly tacky dough ball is formed. To test, if using stand mixer, stop mixer and touch dough. It will leave little clumps of dough to your hand. If it leaves large chuncks, add more flour until dough is soft and tacky.

Place dough on very lightly floured surface and allow to rest 10 minutes to absorb flour. Dough will be soft but not tacky. If the dough is tacky, knead in more AP flour one tablespoon at a time until dough no longer feels tacky. If you add flour, allow dough to rest for five minutes before continuing.

Knead by hand for approximately 2 - 3 minutes or until dough is elastic and velvet feeling and place in large greased bowl and cover. Place covered bowl in a warm place (70 - 80 degrees) and allow dough to rise until double, about 2 hours.

To Make Filling:
Combine sugar, cinnamon and cardamom (if using) in a bowl and set aside. Combine coconut and crushed pineapple in a bowl and set aside.

To Form Loaves:
After dough has risen, punch dough down and place on lightly floured surface. Divide dough into 2 even chunks. Set aside one chunk and cover until ready to use.

Roll out each chunk of dough into 18" x 10" rectangle. Sprinkle cinnamon and sugar filling over rolled out dough, leaving 1/4" edge along 18" sides of rectangle. Sprinkle pineapple coconut filling the same way.

Starting with one 10" side of rectangle, roll dough into tight roll making sure the fillings stay inside the rolls of the dough. Seal the roll so that no filling will leak out and place seam side down in prepared loaf pan.

Lightly grease top of loaves, loosely cover, and place in warm place to rise. Allow bread to rise until bread has risen about 1" above rim of loaf pan.

To Bake Loaves:

Pre-heat oven to 350 degrees. Bake loaves for 30 minutes or until inside of bread reaches 180 degrees. If loaves start to brown too much on top, tent with foil.

Remove from oven and allow to cool completely before glazing.


To Make Glaze:

Whisk together powdered sugar, milk, corn syrup and vanilla into a smooth glaze. If glaze too dry, add more a few more drops of milk and corn syrup or, if too thin, add more sifted powdered sugar.

When right, the mixture should be bright white, quite thick and very smooth and shiny.

If it starts to set, re-warm briefly, in the microwave, uncovered.

To Glaze Bread:
Place loaves on a cooling rack over a edged baking sheet and pour 1/2 of glaze over each loaf. Allow glaze to set before slicing.

Bread will stay fresh for about 3 days.

Monday, January 19, 2009

Viva Le Croissant! Babe Style...

BBB January Logo: Croissants

I ask you, is there anything more wonderful in the morning than biting down on a warm, just from the oven flaky croissant spread with butter and jam? I would have to answer absolutely not unless you are biting down on the croissant in your favorite boulangerie watching the morning Paris traffic go by.

My Favorite Place to Get Croissants in Paris

When Katie of Thyme for Cooking presented us at the end of last month with a recipe for croissants she found in a British lifestyle magazine called "France" I have to admit even I was a bit freaked out. You see, I know how hard they are to make and more importantly, how hard finding a good recipe that results in the croissants like the ones I eat in Paris is to find.

Now, would it be a Bread Baking Babe recipe if there wasn't some trial and error caused by flour types and hydration ratios? Further, does it surprise you that a few of us Babes (Tanna, Lien, Karen) made this recipe more than once trying to unlock the secret?

After the first round of baking, overly dry dough with acceptable but not great flake was reported. So, in preparation of Sara and my bake day last Sunday, I started to do some research into flour types used for croissants in France and looking at some well thought of recipes for croissants. I pulled out all the stops including consulting my good friend and master of all things pastry, Helen of Tartlette.

Last Saturday evening after much reading and working out some hydration formulas and averaging some weights between all the recipes, I came up with a few adjustments and emailed them to Sara. We had decided to make the dough late on Saturday evening so we could let it rest in the fridge overnight and go do turns and shaping on Sunday morning.

Sunday morning dawned bright and early and before I knew it, I was slapping the butter block into the middle of the dough

BBB Croissant: 84% Milk Fat Butter Block

and starting the turns.

BBB Croissant Dough: Turn #2

After the three turns that recipe that Katie had found called for, I had a good amount of layers in the dough.

BBB Croissant Dough: Layers!

Since I was making both plain croissants and pain au chocolate with some pain au chocolat sticks I purchased during my last order from King Arthur Flour, I divided the dough into half and started about forming my plain croissants. My croissant forming skills need some practice I can tell you!

Regardless, I got both the plain and pain au chocolat formed and set them aside to rise.

BBB: Risen Pain au Chocolat

See the melting butter? That is what 84% milk fat butter does when rising in a moderately warm place, it leaks out...

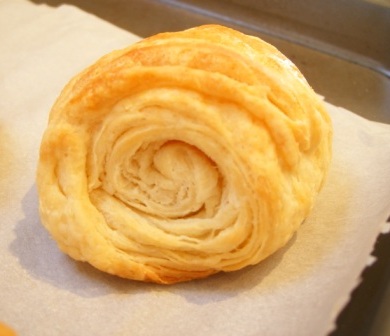
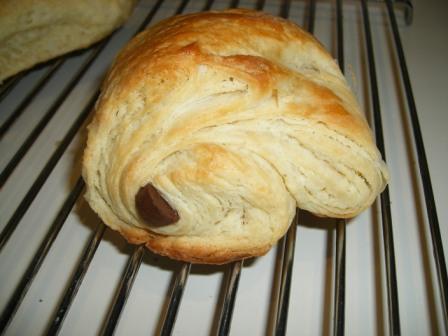
When the croissants came out, I have to say I was quite happy to see all the layers in both the plain croissants

BBB Plain Croissant

and pain au chocolate.

BBB Pain au Chocolat

They were flaky and the top layer of the plain ended up on my keyboard when it shattered as I bit into it while typing to Sara on Skype.

While they weren't quite as good as the ones I get when I visit Paris, they were the best croissant I have had this side of the Pond. Of course, my taste testers at the office snarfed them down in about twenty minutes.

Go check out my fellow Babes croissants over there on the sidebar but take a cup of tea or coffee with you!

To be a Bread Baking Buddy this month, you have until February 2, 2009 to make these croissants and post about them. Then email our Host Kitchen, Katie at Thyme for Cooking, with a link to your post and she'll email you a cool Buddy Badge for your blog.

OH and to my really good friend Stephanie, who also made some really great looking croissants this week: I about choked on my morning tea when you started emailing and tweeting me about croissant recipes. It took all my super yeast powers not to tell you what the Babes were making this month!

Adapted Bread Baking Babe Croissant Dough Recipe
from Katie's original BBB Recipe, Tartine
(without preferment), Joy of Cooking: 75th Anniversary Edition, Gourmet Magazine, and Pains Viennoiseries (my French bread book I made that wonderful classic couronne from last week)

Note: This recipe was made by weights and I used my scale. There is a link in my The Pantry sidebar to a good website for conversion to volume (cups, tsp, etc).
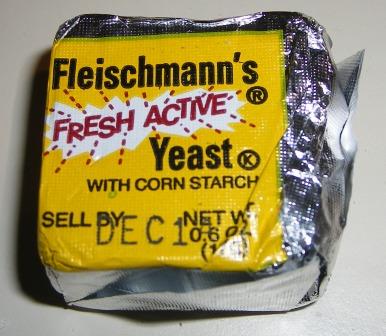
18g active yeast
360ml whole milk, heated to about 90 degrees
500g plain flour
12g fine salt
50g sugar
275g butter, cold but not too hard
12g flour
Egg Wash - 1 egg yolk mixed with 1 Tbsp Water

For the Butter Block:
Combine butter and 12g flour and shape into a square about 10" x 10". Place in fridge overnight or until ready to use.
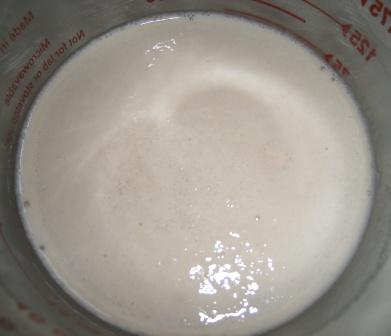
For Croissant Dough:
Dissolve the yeast in the milk. Put flour, salt and sugar in the bowl of
an electric mixer with dough hook and mix on low. Gradually pour in the
milk/yeast mixture.

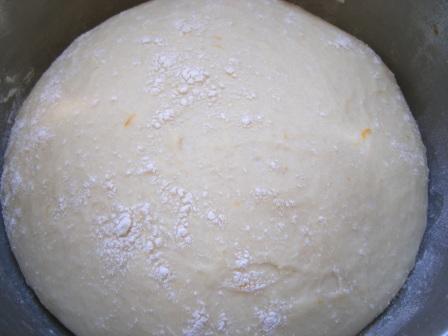
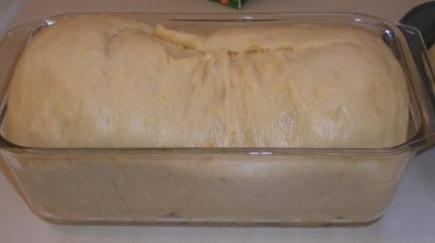
Combine until sticky dough ball is formed and dough is pulling away from bowl in stand mixer. Let rest for 20 minutes, cover and place in a warm place and allow to rise until double (about 1 1/2 hours).

Punch down and then allow to rest in fridge overnight or at least 8 hours.

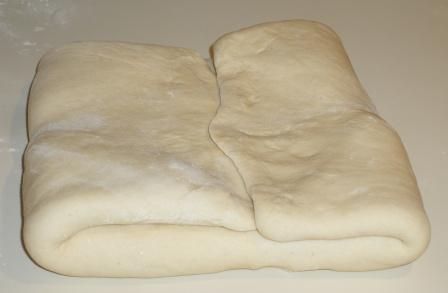
Shape the dough into a ball and cut a 3cm (1 1/4") cross in the center. Roll out the 4 sides to make flaps leaving a center section big enough to hold the butter block. Place butter block in center, and fold the flaps over to completely enclose the butter. Bash the butter into the dough with a rolling pin and roll out to form a large rectangle, 24" X 12".

First Turn: Fold dough in thirds by taking far right third over center third and far left third over top of far right third. Wrap in cling film and refrigerate 30 minutes.

Second Turn: Give the chilled dough a quarter turn, roll out into the rectangle, fold same way as first turn, wrap and refrigerate as above, 30 minutes.

Third Turn: Roll the dough in the opposite direction as before, into the rectangle, fold wrap and refrigerate at least 30 but no more than 60 minutes.

Dough is now ready to use.

To Form Croissants:

Cut a cardboard template, 9cm (3.5") base, 18cm (7") to the point. Lightly flour work surface and roll dough out to 65 X 40cm (26 X 16") rectangle. Lift it slightly off the surface to aerate it to keep it from shrinking. Trim sides with a sharp knife to make straight edges, then cut in half, lengthwise. Using the template as a guide, cut into triangles.

Lay 1 triangle on the work surface. Make a 1cm (1/3") cut in the middle of the base and pull the 2 base points slightly to separate; then pull the top point slightly. Roll the croissant from the base to the point. Place on a baking sheet and turn the base points to form a crescent (You could lay a piece of ham on the base before rolling for a savory croissant) Repeat with the rest of the triangles.

Lightly but thoroughly brush with egg wash.

Put the croissants, on a baking tray, in a warm, preferably slightly humid, place (24 - 30C, 75 - 86F) to rise for 2 hours, or until almost doubled.

Brush with egg wash again, and bake in a preheated 375 degree oven oven for 12 - 14 minutes or until croissant is golden brown.

Serve immediately with butter and jam.
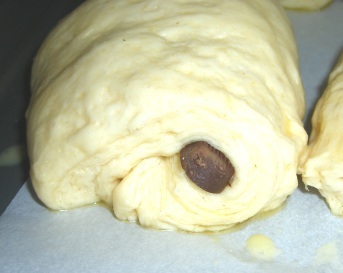
To Make Pain au Chocolat:

40 - 44 sticks of dark chocolate, 4g each

Roll dough into 52 X 46cm (21 X 18") rectangle (It will be a bit thicker than for croissants) Trim rectangle to make straight sides then cut, lengthwise into 4 long strips, about 11cm (4 2/3") wide. Cut across every 7cm (2 3/4") to make small rectangles.

On 1 rectangle, place 1 stick of chocolate on the short end, about 4cm (1 1/2") from the edge. Roll the dough over the chocolate once. Place another stick at the edge of the roll and roll the dough over again. Roll over again. Place on try and brush with egg wash. Let rise, brush again and bake as for croissants.

When done, cool on a wire rack, without touching, before serving. (The chocolate would be very, very hot)

Things I'm going to change for next go around with this recipe:

A. The 84% milk fat butter was a bit over the top and I think contributed to some "runny" butter during the last rise of the formed croissants. I'm going to go with an European butter with less milk fat like 78% to 82%.

B. Less salt. My dough was bit salty

C. More turns. I think 2 more turns would have made the difference in the inner layers of the final product. The inner layers of the croissants and pain au chocolate weren't as flaky as I wanted them to be.