It's that time of the month again. The Bread Baking Babes have been in the kitchen again and this month, our host kitchen
Astrid at Paulchen's FoodBlog gave us a fabulous hearty bread for the cold month of February, Swedish Rye.

I'm a sucker for all rye breads. If you had to ask me what is your favorite bread, I wouldn't hesitate to say OH rye. I love the little pumpernickel loaves we see around the holidays here in the US with a bit of a ham and mustard. There is nothing in this world like a big pile of pastrami piled high on a thick slice of Jewish rye bread from a deli in NYC. I love rye bread toasted and spread with marmalade and a cup of tea.

In keeping with the new me and because when I made this bread, I was a little "ingredient challenged", I made a few changes to the recipe to suit my needs.
I halved the recipe. I didn't use the anise seeds as I had used all mine for some other bread. But, the biggest was I didn't have enough honey to make the bread AND have honey on my peanut butter sandwiches for my golf bag for the week that was ahead, so I used a mix of molasses and honey.
Things I noticed about the recipe: It took a very long time to get the dough to come together, almost 20 minutes of mixing/rest/mixing in a bit more flour/rest. I expected this because of the amount of rye flour in this recipe. Rye flour tends to absorb liquid slowly.
But if you haven't baked with rye a lot (I love rye and used to bake rye bread all the time before the "new me") don't think because it looks like it will need a bunch more flour after a few minutes of mixing and/or kneading, you do. If it looks like it still needs flour after 4 or so minutes of continuous mixing. Let it rest for a few minutes and if it is still really wet, loose, shaggy, or tacky, add a little more of the whole wheat flour the recipe calls for.
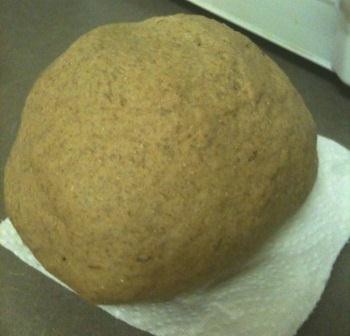
The dough was very tacky after I kneaded it but again, after resting for about 5 minutes I had the nice dough ball the recipe describes.
It took 80 minutes to bake to an internal temperature 200 degrees. The recipe doesn't call out a temp but my experience with rye breads is that if you don't get the internal to 200 degrees, the bread will be just barely baked inside or even still doughy. So, check your bread temps along with the time.
This is what my boule looked like when it came out of the oven
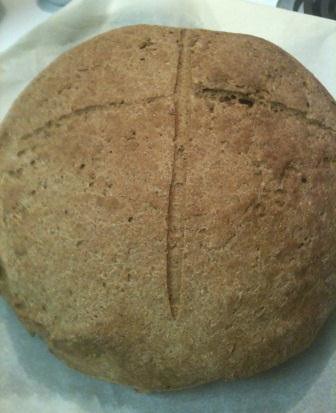
I LOVE this bread. It was fantastic tasting, the right combo of caraway with the citrus of the orange. I loved it so much after having a slice with marmalade the morning after I baked it, that I ventured out in 21 degree temps (Brrrrrr) to get a corned beef brisket to make for dinner that night just so I could make Rueben sandwiches all the next week.
In the land of rye breads, this one is a keeper...
To bake along with the Babes this month and be a Buddy, bake the Swedish rye, blog about it or post it to your facebook page, or any other place you want to post it to and
contact Astrid via her email with a link to your post. She'll send you nice badge to put on your post.
Swedish Rye Breadadapted from Tassajara Bread Book by Edward Espe Brownhttp://www.blogger.com/img/blank.gif
1.
3 cups lukewarm water
1 1/2 tablespoons dry yeast (2 packets)
1/3 cups honey
1 cup dry milk
grated peel of 2 oranges
2 teaspoons anise seeds
2 teaspoons caraway seeds
4 cups unbleached white flour
2.
4 teaspoons salt
1/4 cup oil
4 cups rye flour
1 cup whole wheat flour (for kneading)
Method:
- Dissolve the yeast in water. Add the honey and dry milk plus the oranges and seeds
- Add the flour to get a thick batter.
Add one cup of flour at a time, stirring good after each addition. The more flour you add the more you knead to go into a beating mode with your spoon. Best way is to stir up and down in a circular mode from the bottom of the bowl to the surface of the dough. Don't forget to scrape the sides of the bowl from time to time. After the 4 cups of flour you should have a thick mud-like dough. - Beat well with a spoon (100 strokes).
Continue to beat until you have a smooth dough. Again pull your spoon under the dough and bring it up to the surface again in a circular mode. The batter will be more elastic while you are doing this as more and more air gets incorporated. - Let rise for 45 minutes.
Cover the bowl with a damp towel and let rise in a warm place.
- Folding in the remaining ingredients. Do not stir! Do not cut through the dough, this will improve the elasticity and strength of the dough.
- Sprinkle on the salt and pour on the oil. Stir around the side of the bowl working carefully your way towards the center. Rotate your bowl a little with every stroke you do. Repeat until all of the salt and oil is incorporated.
- Sprinkle the flour 1/2 a cup at a time onto the dough. Again fold it in while rotating your bowl.
- Continue until the dough comes away from the sides of your bowl. Now the dough is ready to give it a good knead!
- Plop your dough on your kneading board and scrap all remainings from the bowl onto the dough. Keep in mind that your surface should be floured enough to prevent the dough from sticking to much on the board.
- Flour your hands and the top of the dough. From the middle of your down stretch it away from you and then fold it back onto the remaining part of the dough. Continue to push down and forward.
- Turn the dough a quarter turn. Again continue with the pushing and folding.
- Turn, fold, push. Rock forward. Twist and fold as you rock back. Be careful not to stretch the dough too much and tear it. Add flour to the boards as needed.
- While you continue with the kneading the dough will become more and more elastic, smooth and shiny.
- When you are finished, place the dough in your lightly oiled bowl smooth side down, then turn it over so the dough ball is covered lightly with oil. This will prevent the dough from forming a crust on the top while rising.
- Cover the bowl with a damp towel again and set aside to rise in a warm place. (50.60 minutes until doubled in size)
- Punch down your dough with your fists steadily and firmly about 15-20 times.
- Let rise again 40-50 minutes until doubled in size again.
- Preheat your oven at 350°F.
- Turn your dough onto the board again.
- Form the dough into a ball. Cut the dough into two even pieces and form smaller balls again. Let rest for 5 minutes.
- Knead the dough and fold it about 5 times, this gives the dough added spring. After the final push turn the dough a quarter turn.
- Roll up the dough into a log shape. Seam at the bottom, flatten the top of the dough. Square the sides and ends. Turn the dough over and pinch the seams all the way.
- Put the dough seam side down into your pan. Press it down into the pan with your fingers.
- Cover and let rise again. This will take 20-25 minutes.
- Cut the top with 1/2 inch deep slits to allow the steam to escape.
- You and brush with eggwash and sprinkle with poppy seeds or sesame if you want!
- Bake for about 50-60 minutes.
- Remove from pan to cool down completely.