Tuesday, October 31, 2006
Ask Breadchick: Your Questions Answered
Andrea over at "A Small Group of Thoughtful Citizens" wrote to ask why her bagels were shaped "wonky" (great word!) by doing the "fling-the-dough-around-your-finger thing" and "soggy and bland" after she bakes them. Andrea, there are three key things to getting tasty, chewy bagels vs. bland and soggy bagels. First, you need to use a special high gluten flour used in pizza dough (+14% protein) not bread flour or all-purpose flour. The only place I know to easily find this type flour in small enough quantities for the home baker is at King Arthur Flour through the Baker's Catalogue. You will want to order the Sir Lancelot flour. Second, you need to let the bagels "retard" overnight in the refrigerator. Retarding is a very slow raise that happens when you use cold instead of heat to let the yeast do it's job. This slow process lets the flavour really develop and the yeast ferment, giving off sugar and gasses that escape through the dough leaving tell tale signs by way of little broken bubbles on the surface of the bagel. When you are ready to bake the bagels, pull them out of the refrigerator and let them sit at room temperature about 20 minutes. This will give you time to preheat the oven (you want to make sure your oven is ready to go) and get your water to boiling for the Bagel Bath. Which leads us to the third and final step to chewy bagels, the boiling. This is the step that gives bagels that smooth, shiny look. The trick is to not over boil them (which will lead you to soggy). For chewy bagels boil them for only 30-45 seconds on each side and not for the four or more minutes I see in quite a few recipes. Then you can bake them as called for in your recipe. One other little thing that you should keep in mind when making bagels this way, because you are letting time do all the work, you may not need as much yeast as your recipe calls for. Whenever I do a really, long slow rise with my bread, I typically cut back on my yeast by a 1/3 to a 1/2 depending on how long the slow rise will be. You may have to play around a bit with this to figure out what works best for your recipe. Now let's fix Andrea's "wonky" shaped bagels.
A few years ago, I was in NYC and watched a guy in a small bakery making bagels. I asked him how he got the shape right and here is what he told and showed me: after you make the dough, divide it into 8 equal pieces. Let the dough rest for about 20 minutes by loosely covering with a towel or plastic wrap. Take a piece of dough and roll it out between a flour dusted surface and the palm of your hand until you have a dough rope about 6 - 8" long, making sure you don't taper the ends too much. Form a circle with the dough rope overlapping the ends about 1/2". Slip the bagel over your fingers with your hand palm down, making sure the overlapped ends are between your palm and the flour dusted surface, gently roll your palm back and forth to seal the ends. Place the bagel on a lightly oiled baking pan or parchement paper. Repeat the process until you've shaped all the bagels. After learning this little trick, my bagels never looked like funny O's again. Let us know how these tips turn out Andrea!
Andrea also sent in a question regarding panini and whether she needs to buy a special grill or if she can use her "George Foreman". I don't want to steal Sara over at "I Like to Cook" thunder for Weekend Cookbook Challenge #10, but I'll let you in a sneak peak of the round-up...don't buy a special grill, George will work just fine and you can use any bread you would like. If you you don't feel like dragging the GFG out (or you don't have one), you can do this: take a large, flat bottomed grill pan, place your panini in the grill pan, and place another, heavier pan on top (I use my stockpot with a brick in it) and press down on the sandwich. Then let the weight of the pan keep the sandwich flat until golden brown. When the grill down side of the sandwich is toasted, you can flip it over and repeat the process. Works great and I have a good use for my behemouth grill pan.
Brilynn at Jumbo Empanadas (what a yummy name for a food blog) wants to know why some of her bread recipes, like her hamburger bun recipe, don't call for much kneading and turn out light and fluffy and others call for long term kneading and she ends up with "bricks". Well, there isn't a really easy answer for this problem because knowing how long to knead isn't just about time but also about feel of the dough. When we knead dough, we are developing gluten in the dough and it is the amount of gluten that determines how dense a bread will be. The longer you knead, the more gluten is developed, the denser the bread. Rolls like hamburger buns are suppose to be less dense than say a whole wheat bread, which because the flour doesn't contain a lot of protein needs longer kneading times to develop the gluten (that and a little bit of vital wheat gluten). Two little tests to try Brilynn. First test is called the "window pane" test. You will know your bread has been kneaded long enough and developed the right amount of gluten when you can take a small amount of dough, stretch it out between two or three fingers until it is so thin you can almost see through it but the dough doesn't "break". This is a really good test for breads like crusty boules/baguettes and French/Italian bread which will typically get to this stage in about 7-9 minutes but you may never get to this stage with whole grain breads. So, my sure fire way of knowing when to stop kneading is this: when I get a bit of a "spring" back while kneading and the dough has a silky/velvetly feel to it, I stop kneading. The glutens are developed and the bread is ready to go to it's first rise. I also rarely do a second "kneading" unless I'm doing a whole grain bread because if you do this second kneading (even if the recipe calls for it) and you had the velvet doughball the first knead, you will over knead your bread and end up with one of those 'bricks'. Hope this helps Brilynn and thanks for writing in!
Last but not least, Sara over at "I like to cook" sent in a question about Belgian waffles a few weeks ago and wondered if I have a good recipe for them. I don't have a Belgium Waffle maker but I love using the ones at the Courtyard by Mariott chain of hotels when I travel for business. So, I did a little research for Sara and here is what I found out. Belgium waffles have yeast in them and it is the fermented yeast that gives them their puff and their "zing". Basically, just like Andrea's bagels, you have to let Belgium waffle batter retard overnight in the refrigerator. The day that Sara sent me her question, my random recipe of the day from the folks over at Cook's Illustrated was for Belgium Waffles. I have never had any problems with their recipes and I don't think you would either. Their recipe can found here. Sara was going to give the recipe a try and let me know how it turned out. I'll report back as soon as I know.
Well, that wraps up this edition of "Ask Breadchick". There is only one little bit of business left to attend to: the free year subscription to Cooking Light from this post. Andrea from " A Small Group of Thoughtful Citizens", whose question on panini was selected from the submissions for this installment of Ask Breadchick is going to recieve a one year gift subscription to Cooking Light. Congratulations Andrea!
Thanks everyone for writing in and asking such good questions. It was fun. Keep the cards and letters coming!
Saturday, October 28, 2006
Weekend Cookbook Challenge #10: Neglected Kitchen Appliances/Gadgets
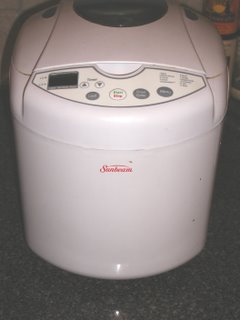
This was a hard installment for me. Not only because I had no idea how much pressure there is to come up with a really good post as co-hostess (Sara, my hat is off to you as you do this every month...whew), but because every drawer I opened all month reveled yet another implement I don't use nearly enough. After much gnashing of teeth and changing of my mind, I finally settled on a small kitchen appliance I don't use very much at all, my bread machine.
I have a love/hate relationship with my bread machine. I love the idea and convenience of a breadmachine. You throw all the ingredients into a pan, plop the pan into the bread machine, push a few buttons and in a few hours with little effort, Voila! Fresh baked bread. If you have a "fancy" bread machine, you can even hit a time delay and come home from work or wake up in the morning to a fresh, warm loaf of bread. The problem with bread machine bread is that it isn't really all that good when compared to hand made fresh bread. Yes, they smell the same when they are baking BUT there is always this slightly yeasty taste to bread machine bread that I just can't ignore and the texture just isn't the same; not to mention the therapeutic value of hand kneading the stress of your day away.
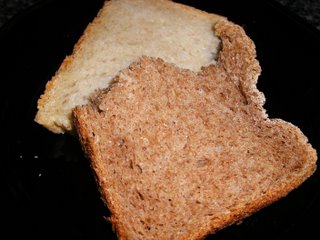
Recently, both MBH and I have had very hectic schedules that start very early in the morning and don't end to very late in the day. My crockpot has never been neglected and has recently seen action at least one or two times a week. A few weekends ago, while pulling the crockpot down from my appliance cabinet yet once again, I spied behind it my Sunbeam bread machine. I had used it for the first time in over two years about a month ago when I made Clam Chowder for the last WCC but back up to the top shelf of the cabinet it had promptly gone, to be forgotten about once again. This time the thought of fresh baked bread to go with our meal that I didn't have to come home from work to make was too good to pass up. So, down came the bread machine. I decided to make a whole wheat loaf from Bread Machine Magic to go with the pot roast I was fixing in the crockpot and decided to be really brave and use the delay bake function. Heck, I thought if I leave the crockpot on all day so why not have TWO appliances fixing dinner at the same time. It would be like having Rosie the Robot Maid from the Jetsons in my kitchen. So, with the mental image of us walking into the house to the lovely smell of pot roast and fresh, homebaked bread, I put all the ingredients into the pan. Using some weird complex math, I figured out the loaf needed 3 hour and 50 minutes to go through it's cycle and if I wanted the bread to be done about the time we were walking through the door which was 14 hours later I needed to add that many hours to the time and then subtract the cooking time to account for the baking time. I ended up using my fingers to count up hours and imagined the bread machine having some diabolical overload and the house burning down so decided to do a test run of the timer and have it bake the loaf overnight to be done about the same time we got up to start our day. The next morning, MBH and I woke up to the smell of fresh baked bread. "mmmm...that smells good", I thought. MBH came out from his shower and told me he thought the machine had "misfired or you figured wrong". The bread was good but not great. The loaf was a bit heavy since 100% wheat flour doesn't develop gluten the way good bread flour does and this was even more noticeable in the breadmachine loaf. The final consensus from MBH was "it was ok but I wouldn't want a lot of it. I liked that round loaf you made a few days ago better".
The very next night, I decided since we both like waking to the smell of fresh baked bread and I was fixing spaghetti for dinner, to try a loaf that should be closer the boule MBH liked so much. The manual that came with my bread machine had a recipe for French Bread. Once again, I put all the ingredients into the baking pan, used my fingers to count out how many hours I needed to delay based upon the machine cycle time for a crusty bread, and turned the machine on. Like the morning before, we woke to the smell of bread but the results were even more disappointing. The loaf was crusty but the flavour of the bread was extremely yeasty. We both ate the bread but the loaf was not finished. "You know", MBH told me, "I really like your hand baked bread better" and I agree.
Thus, I suspect that once again, my bread machine will find itself back behind the crockpot to languish and gather dust until the next time I'm too lazy to make bread by hand.
Heavenly Whole Wheat Bread
from "Bread Machine Magic"
Makes a 1 1/2 pound loaf
1 1/8 cup water
2 cups whole wheat flour
1 cup bread flour
1 1/2 teaspoons salt
4 tablespoon butter softened
2 tablespoon sugar
1/4 cup potato flakes
1 1/2 teaspoon bread machine yeast
Place all liquids in pan (including butter), combine all the dry ingredients in a bowl and place into baking pan, make indent on top of dry ingredients and place yeast into indent. Select Light crust, whole wheat setting on machine. After bread is done allow to cool for one hour before slicing.
French Bread
Sunbeam Breadmachine User Manual
Makes a 1 1/2 pound loaf
1 cup + 2 tablespoon warm water (75-85 degrees)
2 tsp. butter softened
3 1/4 cups bread flour
1 tablespoon sugar
1 1/2 tsp salt
2 1/2 tsp bread machine yeast
Place the ingredients (except the yeast) into the baking pan in the order they appear in the recipe. Make an indentation into the dry ingredients and place yeast. Select crust color and if your machine has a French bread selection use this (machine cycle should be 3 hours and 50 minutes). If your machine doesn't have a setting for French bread or one that is
3 hours and 50 minutes, select the dough setting. If using dough setting, preheat oven at 400 degrees. Form a large baguette, boule, or torpedo, let rise until double for 30 - 45 minutes in a warm, draft free place and bake on a lightly greased and floured baking sheet.
Monday, October 23, 2006
Oh Goodie! A Giveaway!!
MBH devours his magazines within a few days, gleaming new little tricks and new snippets of code for many projects. I, on the other hand, hoard mine; waiting for my business trips to lose myself in a few hours of Saveur, Cook's Illustrated, Cooking Light, Gourmet, and Bon Appetit.
Of course, with so many subscriptions, come lots and lots of special "renew now" offers. Most of these we just toss into the recycle bin but right before I left for this week's travel to St. Louis and Kansas City, I received an offer I just had to keep. Cooking Light is offering me a "2 for 1" renewal, a one year renewal for me AND a free gift subscription for me to share with someone. Who better to share this gift with than one of my readers!
I'm looking for questions for the next installment of "Ask Breadchick" so send me your questions before Sunday, October 29 at my email address. I'll answer your questions and announce the recipient, chosen randomly by MBH from the submissions, of a gift subscription to Cooking Light magazine on Monday, October 30.
Tuesday, October 17, 2006
Finding My Grandmother in a Cookbook
Both MBH and I had a long list of errands to run in downtown Boston. He had just ordered a new suit and blazer that needed to be picked up from the tailor and wanted to look at new Pocket PCs. I had the shortribs for the Braised Beef Shortribs I talked about in the last post to pick up from Deluca's Market and most importantly, I had to run by the Brattle Bookshop.
I have a very soft spot in my cookbook collecting heart for mid-Twentieth Century cookbooks. You know, the ones from the late 40's until the mid 70's. I think this stems from long summer visits to my grandmother's house in Cadillac, MI when time I didn't spend in the lake was spent sitting on the sun porch reading. My grandmother wasn't much of a "from scratch" cook other than cookies and pies but give her one of the Pillsbury Bake-off Cookbooks from 1960-something and she would cook up a feast. I would always pack three or four books to read during my visits but inevitably I would devour the books I brought with me in the first week. After a few years, I had read most of the books in her house and the small library down the street that interested me. One rainy afternoon, having nothing to read and being a Sunday, no opportunity to go to the library, out of desperation I turned to my Grandmother's cookbooks. I was fascinated by the pictures of 1940s and 50s housewives in their crinolines and pearls mixing cakes with a hand beater and slicing carrots with their perfect manicured nails. The chapters on how to be a good hostess and how to please your family were like reading science fiction to me, a snapshot of life in a galaxy far, far away. When my grandmother died, my mother took her collection of Pillsbury Bake-off cookbooks (she had every one from the very first bake-off in 1949 until her death in 1982) and her original Betty Crocker but no one wanted her set of Woman's Day Encyclopedia of Cookery.
I didn't find out that no one in the family had the set until a couple years ago and in fact, had forgotten all about the set until during my recent vacation, when I stumbled upon Vols. 1-2 and 7-9 on one of the dollar a book carts in the bargin book courtyard of the Brattle Bookshop. Standing in the sunshine, flipping through someone else's stained copy of Volume 1 brought back powerful memories of sitting in the worn chairs on the sunporch at my grandmother's. I could hear the rain hitting the roof and smell the lake on all the damp swimsuits and towel hanging to dry. If I closed my eyes, I could almost hear my grandmother puttering around in the kitchen opening cans of this and boxes of that while making some Grandprize winner's recipe for dinner. It was then that I knew that I had to have the entire set of Woman's Day Encyclopedia of Cookery and I didn't care how long it took me to track down all twelve volumes. I bought those volumes of the set right there and then. Towards the end of my vacation, I went back to the Brattle and found that they had put Vols. 3 - 5 out on the three dollar a book carts. I snagged those as well; leaving only Vols. 6 and 9-12 to locate.
As luck would have it, two weekends ago while MBH and I were at the Brattle for something else on one of our "must have" out print book lists, I noticed on the five dollar a book cart Vols. 9-12. Ever frugal and knowing that the likelihood of anyone else desperately in search for this dated series was slim, I decided to play the odds and wait for them to be marked down to the three or one dollar carts. This weekend, I hit pay dirt. Not only did the Brattle still have Vols. 9-12 BUT they also had Volume 6 and they were all on the one dollar cart. I would have missed them had it not been for MBH's eagle eye. By 3pm on Saturday, I was happily home munching on some homemade bread and eagerly reading about "exotic" Swedish food in Volume 11; content knowing that someone in my family once again owned the entire series of Woman's Day Encyclopedia of Cookery.
Monday, October 16, 2006
World Bread Day: Crusty Boule with Braised Beef Shortribs
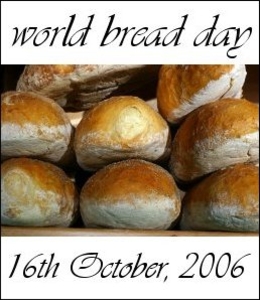
Today, October 16, has been declared World Bread Day by the International Union of Bakers and Bakers-Confectioners. To celebrate, Kochtopf is hosting a bread baking food blogging event. Of course, since my deepest food passion is bread; both the eating of and baking of bread, I have to participate. This event also gave me the chance to use my newest kitchen gadget, a Brotform.
A brotform (also known as brotformen or banneton) is a breadmold made of cane that is used to form and shape artisan loaves during the proofing/raising stage. When you see those hearth style breads with indentations in the crust, they were raised in a brotform. I have always wanted one, especially since I bake a lot of sourdough starter based breads and what better excuse to buy one than to make it the ultimate souvenir from a visit to King Arthur Flour in Norwich, VT during my recent vacation or BWOF (Big Week of Funness) as MBH called my week off from the salt mine.
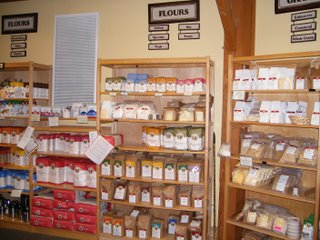
The Baker's Store at King Arthur is overwhelming to say the least. Every flour they make is available in 3lb and 5lb bags with their most popular flours like the unbleached all purpose and whole wheat also available in 10lb, 20lb, and 50lb bags. I could have put one bag of everything on the wall of flour in my cart but knew that would also mean renting a box truck to get it home. Of course with such a selection not to mention an in-house bakery, I couldn't leave without purchasing a little bit of flour as well a little treat to snack on during the two and half hour drive home, a slice of Vermont apple pie with a super flaky, buttery crust.
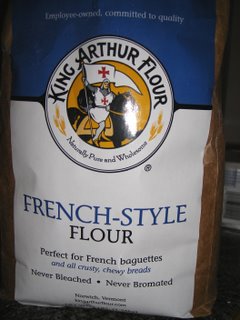
Last night, I used not only used my brotform for the first time but also the King Arthur French Style flour. This is some of the most lovely flour I have ever had the pleasure of working with while making bread. It was silky and formed a dough that had a velvet feel after kneading. I used the recipe for French Style Baguettes on the back but since I was making a boule, I added a step to the recipe by forming a sponge first. I like the flavour that develops in breads by doing this extra step. Making a sponge normally adds about two hours to the whole making and baking process but is really worth it for the flavour and in the case of artisan breads, the texture that develops.
I served the boule with Braised Beef Shortribs, a recipe from Spice: Flavors Eastern Mediterranean by Ana Sortun. The marinade was a bit heavy on the balsamic vinegar but the tamarind paste/dry white wine was flavourful (I'll cut back the balsamic vinegar from one cup to 3/4 cup next time).
As for the crusty boule? MBH declared it the best one yet...
Dinner Size Crusty Boule
(adapted from Baguette recipe on back of the King Arthur French Style Flour bag)
This recipe can be made in either a stand mixer or by hand.
Sponge:
5 oz of warm (75 - 85 degrees) water
1/2 teaspoon yeast
1 Cup KA French Style flour
Combine ingredients in a glass bowl, cover with plastic wrap and let raise for 2 hours
Dough:
1/2 teaspoon yeast
1 teaspoon salt
3/4 Cup KA French Style flour
Add yeast and salt to proofed sponge, mix well. Add flour 1/4 cup at time, mixing until a shaggy dough ball forms. (If you are making this by hand, you may need to combine the last 1/4 cup of flour by hand). Turn out dough ball onto a lightly floured surface. Knead until smooth (about 3-5 minutes), cover and let rest for 15 minutes. Knead relaxed dough for 5-7 minutes more or until very velvety smooth dough results or dough passes "windowpane" test. Place dough into lightly greased bowl, cover and let rise in draft free place for 2 hours or until triple in size. Punch risen dough down gently. Form boule and let rise again until double in size (use prepared brotform for 2nd raise, if using brotform).
Baking:
Adjust oven racks so one is on bottom and other in middle position (if using baking stone or unglazed quarry tiles, place on middle rack now as well). Pre-heat oven for one hour at 450 degrees. 45 minutes into pre-heat, place small baking pan (9 x 9 x 2) filled 3/4 way up side with hot water onto bottom rack. Very gently unmold boule if using brotform onto prepared baking sheet (lightly greased with dusting of cornmeal) or oven peel and slash if desired. Lightly spritz boule with water and quickly place into oven. Bake for 20 - 25 minutes or until crust is golden brown. For extra crunchy crust, spritz boule again at 10 minutes into baking time.
Let cool for 1 hour before serving
Friday, October 13, 2006
The Perfect Lemon Poppyseed Muffin
Muffins are an uniquely American food. They are like having cake for breakfast. Next to bagels, muffins are the most consumed breakfast bread in America. On any given morning, the bakeshops and coffee shops in every major city offer a staggering variety of muffins ranging the mundane but tasty corn and honey bran to the fruity-sweet cranberry-orange and blueberry. There are exotic flavours like kiwi-strawberry and pineapple-mango. And then, there is my favourite flavour, lemon poppyseed.
A really good lemon poppyseed muffin will not be neon yellow. It will not be sickly sweet like over-sugared lemonade or overly sour like children’s candy. It will not have sugar on top or twists of lemon peel for decoration. Poppyseeds will not be limited to the stump. It will not be heavy and greasy with oil nor will it be dry and crumbly so it falls apart as you eat it or pull off the top to eat it from the inside out (as I like to do).
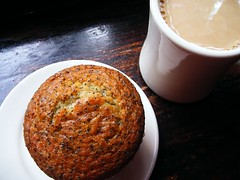
I have spent considerable time and effort these past few years investigating where in Boston to find the best lemon poppyseed muffin. And after sampling lemon poppyseed muffins in every bakeshop/coffee shop within a ten-mile radius of our home, I have decided that Panificio on Charles Street has the very best lemon poppyseed muffin in Boston.
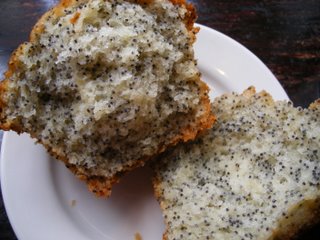
Their lemon poppyseed muffin is filled with scads of poppyseeds and little flecks of lemon zest evenly distributed throughout the muffin. It tastes subtly of fresh lemons and sunshine. The outside is golden with little cracks showing peeks of the pale white and moist insides. It has a high, wide, tapering crown and short squat stump. It does not fall to pieces when I tear off the stump but sticks together when pick up dropped morsels from my plate and scrunch them together. It has the texture of a fine cake and the lightness of a good Southern biscuit.
In other words, Panificio’s muffin is pure lemon poppyseed manna from heaven.
Sunday, October 08, 2006
Ask Breadchick: Your Questions Answered
Jill wanted to know why sometimes when she made a biga that it was perfect and other times there was what appeared to be a watery mess under a layer of frothy foam. First, for those of you who don't bake yeast breads a biga is what Italian breadmakers use as a 'pre-ferment' (starter like). The biga can be made two ways: with a bit of dough from a previous batch of bread mixed with water to form a batter-like mixture or by mixing some of the flour, water, and yeast from the recipe together and then letting the biga sit for anywhere from a few hours up to three days. The idea is that through "feeding" the biga for a bit, the flavour of the bread is developed and in the case of good hearty loaves like ciabatta and rustic Italian Rosemary, it helps develop those large holes in the bread. That "watery mess" Jill reports happening underneath her fluffy biga top is the same stuff that is on top of a sourdough starter after a feeding, hooch. When yeast starters like biga and sourdough feed and then digest the flour (remember, yeast is a living organism), they leave behind a mildly alcoholic watery liquid waste. The Goldrushers of '49 called the layer of liquid "hooch" and would drink it when they ran out of whiskey thus the now common name for bad whiskey of "hooch". It is a sign of what I call hyperactive yeast beasts. They fed fast and furious and then when the time to use them came they were exhausted. Using a starter or biga in this state will result in flat bread that doesn't rise or doesn't produce those big holes that are signatures of starter breads. How do you fix this or can you fix this? Yes, usually. When this happens to me, I stir it all back together again, do a power feed (basically two quick feeds, one right after the other within 2 hour of each other) and keep a close eye on the mixture, when it is at it foamiest, I make my bread. This method normally puts my starters and bigas back to rights. Another cause can be weather related. If it is humid when I feed my bigas/starters, I cut back on the liquid part of the feeding by about 2 Tablespoons as the humidity in the air will add that back. Vis-versa when it is really dry (like in the winter), I add 2 Tablespoons of liquid during a feed. Let us know if this helps, Jill.
Jo wrote to me after seeing my post about my recent purchases of older cookbooks and noticed that some of the purchases where volumes of Woman's Day "Encyclopedia of Cooking" from the 1960s. Jo is teaching a class on food fads and was trying to locate a recipe her mother used to make for Sweet and Sour Pork. Her mother was sure the recipe was from the wonderful series by Time-Life called "Foods of the World" (that came out around the same time as the WD "Encyclopedia of Cooking") and Jo now has in her possession. Jo looked in the volume about Chinese cooking and it wasn't there but between her mother and her, they came up with a pretty good facsimile of the recipe. Then Jo saw my posting about my new cookbooks (well new to me anyways) and it all came back to her and she was sure the recipe was really in WD "Encyclopedia of Cooking". Jo wanted to know if I would be so kind as to take a look and see if her memory was right. Well Jo, I'm happy to write that it is INDEED from The WD Encyclopedia of Cooking V. 3, under Chinese Cooking that your recipe for "Sweet and Sour Pork" (T'ang Ts'u Chu Jo) can be found. Here's the recipe for your class (and for your recipe box). Let us know how the Sweet and Sour Pork turns out and if the students enjoy the recipe. It does look pretty yummy and quaint in that late 50s/early 60s kind of Donna Reed way!
T'ang Ts'u Chu Jo
(Sweet and Sour Pork Honan School)
Oil for deep frying
1lb pork shoulder, cut into 3/4 inch cubes
Batter:
1 egg
1/2 cup all purpose flour
1/2 teaspoon salt
1/4 cup water
Sauce:
1 cup pineapple cubes
1 green pepper, cut into squares
1/2 cup vinegar
1/4 cup firmly packed brown sugar
3/4 cup water
1 tablespoon molasses
Thickening:
2 tablespoon cornstarch
1/4 cup water
Heat oil in a deep frying pan. Mix the batter. Dip pork cubes into batter and drop into the boiling oil. When cubes brown, remove them and drain on absorbent paper. Mix ingredients for the sauce in a pan and bring slowly to a boil, stirring constantly. Pour thickening into the sauce; when the sauce becomes thick and smooth, add meat and mix well. When very hot, serve at once. Makes 4 servings.
Friday, October 06, 2006
Bribing your colleagues
Every Thursday morning at 10AM, we have a meeting at work to discuss custom loudspeakers that are under development for projects. This meeting brings to light not only any technical obstacles that may have arisen in the prior week but sometimes personal bias against some of our customers; especially our customers that ALWAYS call us about two weeks before they need their speakers delivered knowing full well it is at least eight weeks to deliver a custom product. The meeting also brings out a certain amount of animosity between the members of our little cozy family of mad scientists. It often gets tense, especially when a few of our young turks like to start their sentences with "that won't work" in an attempt to strut their stuff and try to show us sly old foxes a thing or two about loudspeaker design (which they do sometimes, disproving the adage you can't teach an old dog a new trick).
It seems that my projects are overwhelmingly of the type where I need a custom speaker in a custom colour onsite in four to six weeks. Whenever I walk into the room with my black Moleskine and an armload of manila job folders there is a collective groan from the assembled group, because they KNOW I am going to present some project that has to have it's product yesterday. The only thing that saves me from being run out of the room tarred, feathered and on a rail along with my folders and my unreasonable requests? I always bring food.
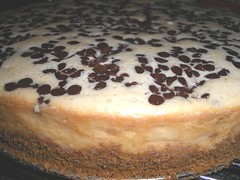
Normally this food consists of some type of baked goodie like home-made cinnamon rolls or scones. Sometimes, I stop at the Dunkin Donuts up the way from our offices and get a box of coffee and a dozen donuts, heavy on the chocolate covered with sprinkles type. But yesterday, I may have even topped the homemade cinnamon and pecan pull apart bread I brought a few weeks ago to bribe the guys into releasing a drawing in one day versus the normal one week time-frame. Because yesterday, I brought a homemade cheesecake; a mini-chocolate chip cheesecake to boot to the meeting.
I think when I sat the cheescake and 1/2 gallon of milk down on the table, everyone KNEW something huge was coming. A certain client just discovered that next month is November and they have a HUGE world famous to-do every year starting around the week before Thanksgiving and running into the New Year (wink-wink). They figured now is pretty good time to order that custom speaker we showed them in the Spring and, oh yea, they want to have it before opening night in four weeks. Sure I told our customer, knowing full well that it would be pushing the envelope of possibility but safe in the knowledge that it could happen because at home, in a cabinet, rested my secret weapon for success: a springform pan, a bag of mini chocolate chips, and box of graham crackers.
Mini Chocolate Chip Cheesecake(Note: my mom found this recipe on the back of Eagle Brand Condensed Milk many years ago. I've tried a few other recipes for cheesecake but this makes the best, dense but not too heavy cheesecake. I've made a few modifications to the recipe because I have 10" springform pan. See here for the original recipe for a 9" pan. One last thing, this is cheesecake, don't skimp and use anything but the real butter and cream cheese)
1 3/4 cups finely crushed graham crackers
1/2 cup (1 stick) butter, melted
3 (8 ounce) packages cream cheese, softened
1 (14 ounce) can sweetened condensed milk (NOT evaporated milk)
3 eggs
2 teaspoons vanilla extract
1 1/2 cup mini semi-sweet chocolate chips
1 teaspoon flour
Preheat oven to 300 degrees F. Combine graham cracker crumbs and butter; press firmly on bottom of springform pan. In a large mixing bowl, beat cream cheese until fluffy. Gradually beat in condensed milk until smooth. Add eggs, one at a time and vanilla; mix well. In small bowl, toss 3/4 cup chocolate chips with flour to coat; stir into cream cheese mixture.
Pour into prepared pan (spray sides of pan with light coating of cooking spray and flour). Sprinkle remaining chocolate chips evenly over top. Bake 60 minutes or until set. Let cool completely and refrigerate for 2 hours before serving.