Sunday, June 29, 2008

The Daring Bakers Do Danish...


You know, I realized as I typed this title for this post, that given the recent exploits of The Bakeanistas and some of my previous Daring Baker posts, you are going to be wondering if The Sour Dough is turning a bit risque! Not too much I promise you. But you have to admit when it comes to yeast breads, there is plenty of room to make the obvious jokes about stumps of dough and things rising...

This month's challenge, Sherry Yard's Danish Braid from her book, The Secrets of Baking: Simple Techniques for Sophisticated Desserts was presented to us by fellow Bakeanistas Kelly of Sass and Veracity and Ben of What's Cooking. This challenge made us make a laminated dough and in keeping with Ms. Yard's premise of the book, the concept of a laminated dough is to make a dough that incorporates quite a large amount of butter that is layered via a series of turns (folding over) of the dough and butter layers. The result is a flaky dough that is the basic dough used in croissants, puff pastry, palmiers, and the ilk.

I made this challenge three times. Once with my other twin sister from the north, Ivonne the night before the group that Kelly and Ben invited to bake together met on Skype resulting in a very delicious apricot preserve danish. Again the next day with Kelly, Ben, Sara, my yeast weedhopper John, Lis, Helen, and Chris (who just chatted with us) when the dough made a hugemungous raspberry cream cheese danish that was devoured in the record time of two minutes in my office the next day. Finally, last weekend on Sunday while I was doing the Garlic Knots with the gang because I was having so much fun with the challenge dough I wanted to use the Apple filling that recipe called for. I only made half the dough recipe and the formed danish is currently in my freezer waiting for the first touch of fall to be unthawed for its final rise.

The first time I made the dough I didn't particularly like the dough. I thought it was too soft and never really got solid even after the 30 minute rest in the fridge the recipe called for between turns and the overnight rest in the fridge and the softened butter technique yielded butter squishing out of the ends of the turned dough when I was rolling the dough out for the next turn. The second time I made the dough, I increased the rest time between turns to 45 minutes and the dough was more firm but still pretty soft. For the final time, I followed the method of building the butter block that Cook's Illustrated Baking Illustrated: A Best Recipe Classic details in it's recipe for croissant and danish dough. This small change in method resulted in dough that not only firmed the way other danish doughs I've made did but also resulted in a far flakier and crispy danish.

June 08 DB Danish Dough with CI Butter Block

Now, while time consuming, making this danish was pretty straight forward, after making the dough you roll out the dough into a large rectange and on two-thirds of the dough spread the butter block.

June 08 DB Danish Dough: Butter Block Time

Then you fold the unbuttered third over the center buttered part and then the last buttered top on top. This is the first turn.

June 08 DB Danish Dough Turn #1

For this recipe, three more turns will be needed. Each turn consists of rolling out the dough (this dough was really springy and required several rests between rolls) and folding the dough the same way. After each turn, the dough rests in the fridge (remember 45 minutes was better than the 30 minutes in the recipe).

After the overnight rest in the fridge, you roll out the dough into a very large rectangle in preparation for cutting the braid fringes and filling the danish with either the apple topping or with another topping of your choice.

June 08 DB Danish: The engineer in me

Of course, ever the engineer, I had to bring out some tools to make sure I was able to have a perfectly balanced braid. Then you cut strips into the rectangle to form the braid, the braid fringe if you will.

June 08 DB Danish Fringe

If you look close enough, you can see the markers for the place to quit cutting into the braid and leave enough dough to fold over the filling, the demarcation line of filling, and yes, the 1 1/4 inch width for the braid fringes. I'm such a dough nerd....

After spreading the filling in the center third and folding over one end, you just alternate the fringes so you have a nice, pretty even braid.

June 08 DB Danish Braided

You let the braid rise until it gets double and puffy

June 08 Daring Baker Danish Risen

I brushed the braid with an egg wash and then sprinkled baker's sparkle sugar on top. I think most danishes are sweet enough without adding a glaze or frosting. You bake the braid until it is golden brown. In my oven that was about 25 minutes. When it comes out, you have a gorgeous flaky danish.

June 08 DB Apricot Danish

The perfect coffee partner in the morning, or if you can get it to last that long later in the afternoon over a cup of tea with friends and gossip!

June 08 DB Apricot Danish Sliced

To see how the hundreds upon hundreds of Daring Bakers fared this month with their laminated doughs and danishes, go check out our Blogroll.

Thanks Kelly and Ben! I had a blast with this recipe and baking with the gang.

Saturday, June 28, 2008

Mmmm Canada....Beer, Brats and a Bit of Pork Pie

Mmm...Canada Badge

A few weeks ago, Jasmine of Confessions of a Cardamom Addict and Jennifer of The Domestic Goddess sent out invites to a bunch of food bloggers who either were from Canada or lived close enough to Canada to be considered almost Canadian citizens to blog about foods that mean Canada to us. Jennifer is hosting the sweet side of Canada and Jasmine is hosting the savory side of Canada. So, let's get right across the Northern border shall we?!

While I'm not from Canada, I'm from what is often referred to as the "lost province" of Canada, the Upper Peninsula of Michigan. We speak more Canadian than American, complete with ending our sentences with "eh" and besides bait shops and pasties, there is a good ole donut shop on every corner, including a few branches of Tim Hortons.

When ever I think of Canada, one of the first things that comes to my mind is beer. You remember the movie "Strange Brew" right?

Bob and Doug in the Great White North

The Canadians are proud of their breweries and rightly so! This the land of Molson and Labatt. Where I come from you are either a Molson drinker or a Labatt drinker. My family was a Labatt family. There wasn't a family gathering that didn't include Labatt Blue and this was especially true of summer. During the summer, one of my family's favourite things to do was to boil some brats in a few bottles of Blue and then toss them on the grill.

Labatt Blue Brats on Grill

We'd then put them on good potato rolls and slather course grained mustard. We'd then sit down with a bottle of cold Labatt Blue, a big spoonful of potato salad and enjoy the setting Northern Michigan sun.

Labatt Blue Brats

Everything about this meal screams summer to me.

The other dish that says Canada to me is Tourtiere. Tourtiere is a traditional pork pie from Quebec that is served during the Christmas holidays. But, in my family, tourtiere would make its appearance as the first sign of fall. My grandmother on my father's side had family roots in far eastern Ontario and she would fix tourtiere on cold and dreary days to bring a bit of the holidays into the house.

Tonight my awesome neighbor Chris, who is in the throes of discovering his inner cook, made a version of tourtiere that I'm calling Chris' Connecticut Tourtiere.

Chris and His Tourtiere

He made it to share with me and our other neighbor, Erica. It was delicious and spicy and despite the heat of the day, was refreshing with a glass of red wine. I'm hoping that Chris' version of tourtiere is on our house menu often.

Tourtiere Pie

Chris' Connecticut Tourtiere

1 frozen deep dish 9" pie crust
1lb spicy Italian sausage
1 Tbsp olive oil
1 lb mushrooms
1 cup shallots, sliced
1/2 cup red wine
3 Tbsp Worchester sauce
3/4 cup shredded Asiago cheese
salt and pepper to taste

Brown sausage, drain and set aside. Wipe excess grease from pan and add olive oil. Saute sliced mushrooms and shallots until golden brown and add back in sausage. Add wine and Worchester sauce and cook for 2 -4 minutes. Remove from heat and add salt and pepper to taste. Place in pie crust and top with cheese. Bake for 15 minutes until crust is golden brown. Serve hot.

Wednesday, June 25, 2008

Tying Myself Up in Knots of Dough and Laughter

This past Sunday most of my Bakeanista* posse, Lisa, Helen, Tanna, Kelly, John, Marce, Chris, and Sara all gathered on Skype to bake. (Stephanie, Ben, Ivonne and Laura had to miss the fun but we've caught them up on what they missed with over one hundred and twelve emails today!) We had gathered to bake one or both of two recipes: the Garlic Knots from the King Arthur Flour Blog, Baker's Banter (go over there and I dare you not to print at least four or five recipes!) or a recipe adapted from Bon Appetit. The goal of the gossip baking session was to try and mimic some garlic knots that Angelina...um I mean Lisa remembers from an Italian restaurant in her home town of Cleveland; where the food is crappy but the garlic knots are to die for.

Despite the title, this post isn't about anything kinky but considering some of the talk that happens when my little baking wrecking crew gets together you would never know we ever have time to bake! What we did have time for was eight plus hours of snorting coffee on computer screens (Did you know that Titanic Kate or rather Helen has a prophylactic wrapped keyboard because of us?!), explorations of stripper accessories for Diane's....I mean Kelly's wee-wee booby knots (we went with twirly versus jangley), and talking Dexter's Kate/John off the yeast is evil ledge (John, your knots are yar!).

OH yea, along with an education on electric tape versus body glue, I also got twelve of garlic infused, golden brown, squishy dough knots to scarf down in less than one hour! (I shared with my awesome neighbor Chris)

Sunday Knots Baked

They all had good wide girth and only one had a little appendage that rose to the occasion.

Nubby Middle Sundy Roll

Now, if you are long time reader of The Sour Dough, you know that I haven't met an yeast dough that I didn't like and this one was no exception. Our only complaint with the King Arthur recipe was despite how wonderful the garlic butter was, for those of us who have never heard the meaning of too little garlic, we wanted to taste the garlic all the way through the knots.

So, on Monday while I was working at home (hey, yeast dough rising is a great multi tasking kitchen duty!), I decided to play a little with the recipe. I crushed two cloves of garlic, mixed a dash of lemon juice into the crushed cloves to prevent them from turning Tanna Green, and added them to the dough before letting it rise. Then I formed the knots again, brushed them with an egg wash made from one egg and 1 Tbsp of garlic juice and sprinkled some Asiago cheese on top and left them to rise again.

Monday Knots Risen

After baking them, I brushed them with the garlic infused butter

Monday Garlic Knots

and ripped into one of them straight from the hot pan.

Inside Monday's Knots

They were everything a garlic fanatic like me could ever hope for with the added bonus that if Buffy needs me to help her out, I'm pretty sure I could wear one or two of these under my shirt, pasties optional, and keep the vampires away!

Now, a check list for you before you go see what the rest of this funny, fabulous and naughty bunch of bakers have put up on their blogs:

  1. Make sure you don't have any coffee, milk, cola, or adult beverage in your mouth

  2. If you do, make sure you have covered your keyboard and screen in a plastic drop cloth

  3. Keys should be at the ready to rush out and get the ingredients to bake the knots


* The Bakeanistas are not a baking group, we are just a small group of rowdy friends who get together every once in a while on Skype to bake, drink, chat and trade pictures of baked goods and other things (big things with lots of girth!) back and forth.

If you are interested in baking or cooking with a group of friends, I can heartily recommend using Skype, finding a recipe you all want to try, pick a date and let the good time roll! If you are interested in joining an online baking group and want to bake a monthly challenge with a bunch of really cool people, I can tell you from experience there isn't a better group of folks than The Daring Bakers. If you want to bake your way through Dorie Greenspan's fantastic book, "Baking From My Home to Yours", the guys and gals at Tuesday's With Dorie will be more than happy to have you join them (and they are a pretty fantastic group of folks too!)

Tuesday, June 24, 2008

A Bit of Tuscany at My House

Late June in Connecticut reminds me quite a bit of Tuscany in June. The temperatures are in the middle 80's during the day and drop to the upper 50's during the night and the skies are blue and breezes soft. The flowers are blooming in the window boxes

June 08 Flowers

and the tomatoes, basil, green beans and peppers are starting to thrive

Tomatoes, Peppers, Basil and Green Beans June 08

and take over the containers.

Tomatoes and Cukes June 08

The rosemary is bright green and growing like a tree

Rosemary June 08

and the lavender is about to bloom.

Lavender June 08

This past weekend, while baking something I'm blogging about tomorrow, I decided to sort through my latest stash of King Arthur Flour that arrived while I was on my recent trip. Good thing I did too, because the box had apparently been set someplace during the delivery process where it was exposed to the monsoons we had while I was gone and all the packages of flour were wet! So, while I chatted with Lisa on Skype, I sorted through the bags of flour to make sure none of it was too wet. At the very bottom of the box was a package of flour I had forgotten I really wanted to try, the King Arthur European Style Artisan Flour.

Unfortunately, this was the bag of flour that bore the brunt of the wet box. Even though the inside of the KA Flour bags are lined with waxed plastic, I didn't want to take the chance since this bag was entirely wet and opened the bag, sifted it and placed it in a container with a sticky label. As I was getting ready to throw out the bag, I noticed the recipe on the back of the bag for Tuscan Style Coffee Cake. Reading through the ingredients, I realized I could make this very easily and I would get to use some of the Eurpean Style Artisan Flour right away! After all who doesn't like to play with new toys?

The dough is a pretty straight forward sweet bread dough; soft and silky. It rose quickly and had a nice vanilla aroma. After gently deflating the dough and before shaping the loaf, you knead in a combination of chopped nuts and dried fruit. The recipe calls for dates and golden raisins but I wanted to add some other types of dried fruits along with the dates and golden raisins, so I added dried cranberries, apricots, and cherries along with some figs to the dates and raisins.

Dried Fruit and Chopped Walnuts for Tuscan Coffee Cake
It made for a lovely combination of colors and textures.

The recipe also calls for the bread to be shaped in a ball and left to rise in a 9" round pan. I decided to shape it like a horse shoe because I was feeling lazy and didn't want to pull out my round pans from the bottom shelf of my pantry.

Tuscan Coffee Cake Shaped

Once again, the dough rose fantastically. The loaf rose so much, it took over most of the sheet pan I was using!

Tuscan Coffee Cake Risen

Before the coffee cake is baked, the recipe calls for it to be drizzled with a sugar topping. I didn't see the sentence "before baking" and skipped this part.

You know what? The bread doesn't need a sugar topping at all! After letting it cool, I divided it up to share with my neighbors here in the house and my Indian neighbors next door (it was that huge!). I was going to drizzle some glaze on top before giving the portions away but it was so good without it, I decided it didn't need the extra sweetness. The fruit and nuts were nicely scattered in the bread complimenting the nice crumb and soft crust perfectly.

Tuscan Coffee Cake

It was delightful all by itself and the perfect accompaniment to a tall glass of cold iced tea while I sat in the sun in the backyard reading a book and enjoying the summer breezes.

Tuscan Coffeecake Bread
Adapted from the recipe on the back of the King Arthur European Style Artisan Flour bag

For the Dough:
1 cup + 3 Tbsp of water, room temperature
3 3/4 cups of KA European Style Artisan Flour (or any flour with about 11% gluten)
1/4 cup of butter, melted
1 large egg, room temperature
2 Tbsp sugar
2 tsp instant or bread-machine yeast
1 1/4 tsp salt
1/2 tsp vanilla (recipe calls for 1/4 but I am of the school of more vanilla is better!)

Whisk all the dry ingredients together and add water, butter, and vanilla. In a stand mixer with the dough hook, knead until a smooth and springy dough ball is formed (about 5 - 7 minutes). If making by hand, knead until dough is smooth and springy. The dough will be slightly tacky to touch but won't cling to your hand. If the dough clings, sprinkle some more flour on top of the dough ball and knead until the dough is just tacky, adding additional flour as necessary.

Place in slightly greased bowl and let rise until almost double, about 1 - 1 1/2 hours.

For the Filling:
1 cup walnuts, chopped
1/4 cup golden raisins
1/4 cup dates, chopped
1/4 cup dried figs, chopped
1/4 cup dried cranberries
1/4 cup dried cherries
1/4 cup dried apricots, chopped

Gently deflate dough and either by hand or using the dough hook on the stand mixer, knead in nuts and fruit on low until fruit and nuts are distributed through the dough. Turn dough onto slightly floured counter and give a few quick hand kneads. Let dough rest for 5 minutes.

Forming the loaf:

Push dough into long rectangle and roll into rough log, shape like horse-shoe and place on a large lightly greased parchment line paper jelly roll or cookie sheet with edges. With cooking spray, lightly dust top of dough and cover loosely with plastic wrap, let rise until double in a warm draft free place.

Baking the loaf:

Pre-heat oven to 350 degrees. Gently brush top of loaf with egg wash (1 egg and 1 Tbsp water, beaten until combined) and bake for 35 minutes or until internal temperature of bread is 190 degrees. Remove from pan and let cool completely before cutting. Top with glaze if desired.

Monday, June 23, 2008

Bread Baking Babes: Starters and Rye Up Neat

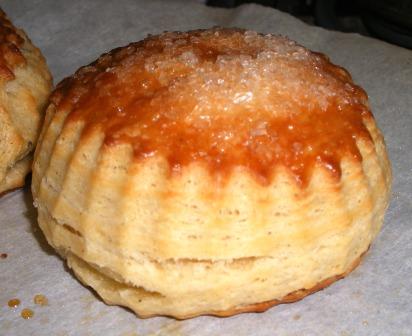
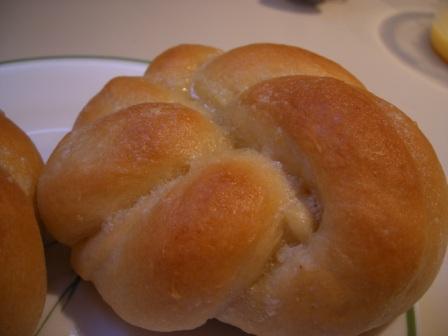
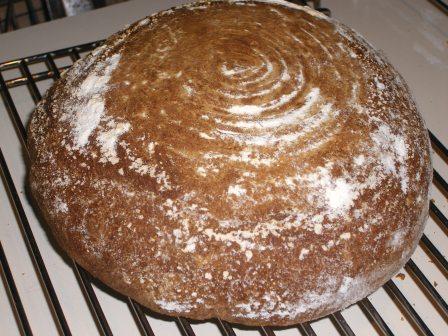
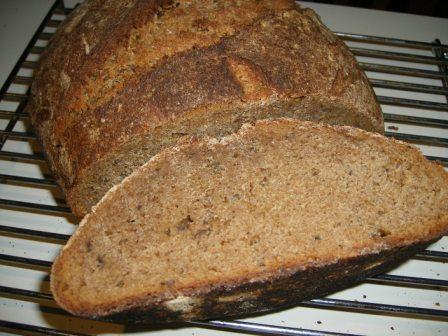
I'm hosting this month's edition of the Bread Baking Babes and I have us playing with starters and my favourite flour, rye because this month we are baking from a recipe I created and have been working on for about a year using my starter, a Dark Onion Rye boule

BBB Dark Onion Rye Logo

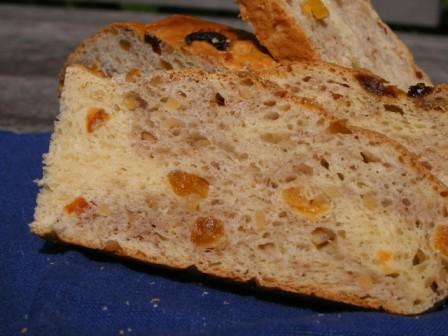
The bread I have been working towards should be a hearty bread with a chewy crust and a hint of onion and caraway. The bread would lend itself to cheese with a lot of character and cured meats.

Dark Onion Rye - First Recipe

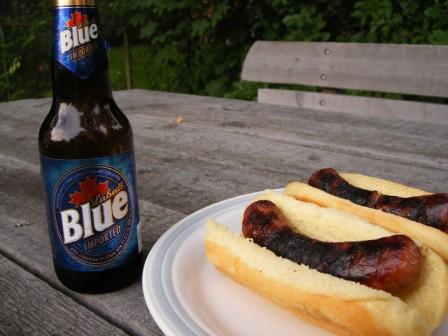
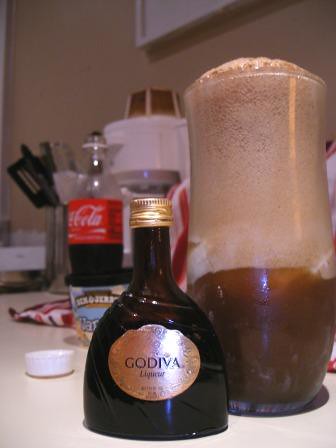
The perfect accompaniment to a ploughman's lunch washed down with a good stout.

I had reached a point in my recipe development that I needed a few test bakers and couldn't think of a better group to help me than my fellow Babes. After all, between them, there is a wealth of yeast and flour experience. I also wanted to see how the bread would work with the use of different types of rye flour.

First, let's get a definition out of the way in regards to pumpernickel. There are two types of pumpernickel: German style and United States style. German Pumpernickel is a lot like champagne, in it is a very specific style of bread baked and regulated by German rules. It is a very dense bread that is baked for a very long time in a low temperature oven. United States pumpernickel bread is dark rye bread made with combination of wheat and rye flour and then colored very dark with coffee or molasses. It normally contains caraway seeds. It has the same texture as a whole grain bread and is not as dense as the German style.

To add further confusion about pumpernickel here in the US there is a style of flour called "pumpernickel" which normally means 100% rye flour. It is a bit darker than medium rye flour which typically contains a portion of wheat flour. OK, now that you are thoroughly confused, on to this month's bread.

Like we have seen in other breads, flours that are called the same thing in one place of the world do not necessarily work the same way. Take rye flour for a really good example. My recipe calls for using 100% rye flour but several of our Babes, especially Karen and Lien who are in Holland, had disastrous results using their 100% rye flour. Their first loaves, there were many first loaves, were dense, non-rising, inedible bricks. It wasn't until I happened upon a true European bakery in NYC and spoke with one of the bakers that we discovered there was a huge difference in rye flours here versus there. She even gave me about 6 cups of the Eastern European rye flour they import to take home and try my recipe with to see the difference. The result? Brick...

Dark Onion Rye with European Flour

So, I had to make an allowance in the recipe if the baker is using European flour.

Next there was some concern about the use of onion powder. My original recipe called for onion powder instead of onions. I used it because it was a pretty easily available ingredient. Lien reported that her onion powder made the bread taste awful. In fact, her onion powder was nausea inducing! Well that is the last thing I would want to induce in a recipe of mine!! So, Tanna came up with a method of sweating the onions and then adding them. I and few other babes used freeze dried onions and had nice onion tasting results. So, I removed the onion powder and put either sweated onions or freeze dried onions in the recipe.

Finally, the last adjustment. My wonderful testers helped me refine the amount of liquid to flour and the crust. My original recipe did not add any oil and the result was a very hard, thick crust. Also, the amount of extra flour you had to add to the dough was much less than I suspected we needed to get structure (Rye flour absorbs liquid very quickly but also results in a very sticky dough). Some playing around with earlier versions of my recipe led me back to using some melted butter in dough. This gave us a much softer but still chewy crust.

BBB Dark Onion Rye Sliced


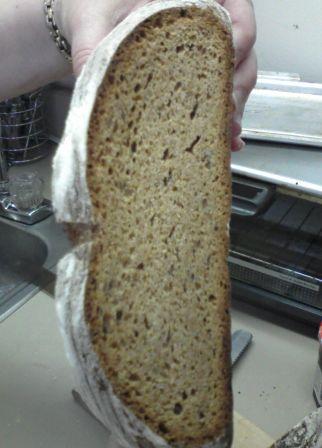
The results? With the exception of Karen and Lien, who report that rye breads just aren't their favourites, I'm quite happy to report that Tanna, Sher, Gorel, and Ilva all really liked the bread! The test loaves I took into the office were all devoured as well (even the ones I thought were failures). So, I'm happy with the recipe and think it is about right where I would want it for use in a class I am teaching on unusual grain sourdough breads in a few weeks at a local community college!

Thanks to my test bakers this month: A Fridge Full of Food (Glenna), Bake My Day (Karen), Cookie Baker Lynn (Lynn), I Like to Cook (Sara), Lucullian Delights (Ilva), My Kitchen in Half Cups (Tanna), Grain Doe (Gorel), Notitie van Lien (Lien), and What Did You Eat (Sher). Without you all, I could not have put this recipe to bed.

If you want to have a go at this bread and be Bread Baking Buddy this month, here is what you need to do:

  1. Make a starter using my recipe. For those of you who have your starters from my recipe already to go, you can move right to step 2!

  2. Make the bread, take some pictures and blog about it.

  3. Email me by July 6 with a link to your post. We are giving you two weeks this time because this bread involves getting a starter going from scratch. You will need one full week for this starter btw.

  4. I'll email you a Bread Baking Buddy badge to add to your post.

  5. You can still participate even if you don't have a blog, just bake the bread and drop me an email by July 6th with a picture of your bread.


I will do a round up of all the breads and your comments the week of July 7th.

Here is the recipe and even if you make this bread after the Bread Baking Buddy, please let me know your results. I will add them to my research and your experience will help me if the recipe needs further refining!

Dark Onion Rye - Final Recipe

Breadchick's Dark Onion Rye

Total Time for Recipe: 2 days (does not include the time needed to build a starter)

Results in one (1) boule

Day 1: You will feed your starter 2 times on the first day; once in the morning and once about 2 - 4 hour prior to making the sponge.

First Feeding: Stir in any hooch and DO NOT TOSS ANY OFF. Feed the starter 1/2 cup water and 1/2 cup AP flour.

Second Feeding: Stir in any hooch and divide the starter into two equal parts. Put one part away (This is your Mother Starter) and feed the other part 1/2 cup water and 1/2 cup AP flour. Wait 2 - 4 hours and then make the sponge. (Note: I make the sponge right before I go to bed as it needs about 8 hours of fermenting time)

Making the Sponge:

Dark Onion Rye Sponge

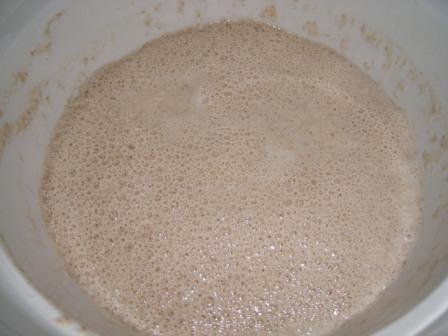
In large bowl combine
1 cup active starter
3/4 cup rye flour
3/4 cup Bread flour (12% + gluten)
1/2 cup water

Cover and let ferment 8 - 10 hours overnight
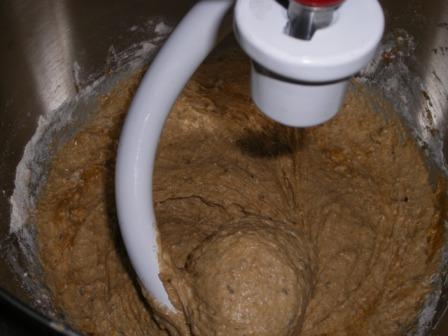
Making the Dough:

You can use a stand mixer or do this by hand.

Combine:
Sponge
1 1/2 Tbsp dark molasses (or if you can't find molasses, use Treacle or 1 Tbsp Lyle syrup and 1 Tbsp strong dark coffee) Note: don't use Blackstrap molasses as this will give the bread a bitter taste.
2 Tbsp honey
2 Tbsp melted unsalted butter

and mix until smooth.

Dark Onion Rye Sponge Mixture

To sponge mixture add:
1 3/4tsp salt
1 1/2 Tbsp freeze dried or sweated fresh onions
2 heaping tsp caraway seeds (optional)
1 cup Dark Rye or Pumpernickel flour (100% Rye flour)
1/2 cup bread flour

Note: Use 3/4 cup of rye flour and 3/4 cup of bread flour if using European rye flour

Mix on low speed until a shaggy wet dough is formed.

Dark Onion Rye Shaggy Dough

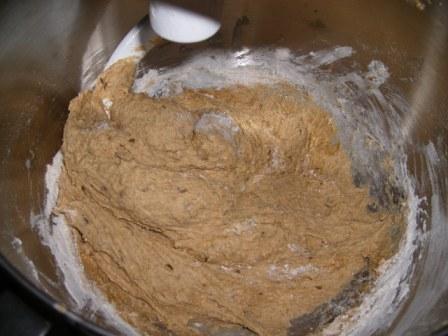
In a separate bowl, whisk together 1/2 cup dark rye, 1/2 cup medium rye, and 1/2 cup bread flour. Using the dough hook of your stand mixer, on low speed, add rye flour mixture to shaggy dough 1/2 cup at a time until dough forms ball that pulls away from the bowl and is firm but still slightly tacky to the touch.

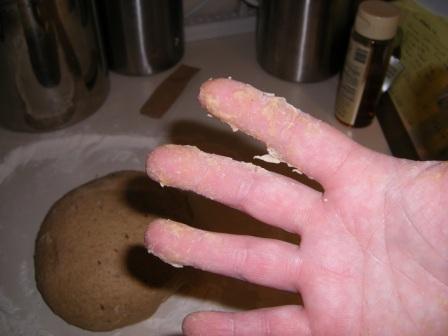
If you are doing this by hand, the dough ball will be firm and smooth but will stick your hand if you squeeze the dough.

Tacky Hand from Dark Onion Rye

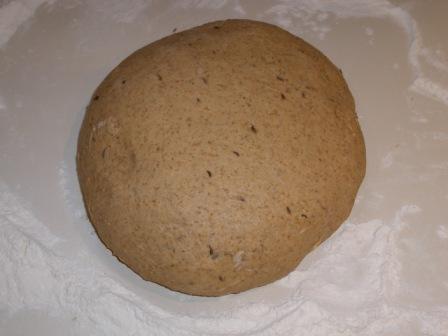
On a floured counter (I use medium rye flour to flour the counter), give the dough a few hand kneads (about 2 - 4 minutes) and let rest for 15 minutes. Give one last knead, dough should be elastic feeling and not stick to your hands but will feel tacky. If it sticks to your hands, knead in additional rye flour until dough is firm but ever so slightly tacky.

Dark Onion Rye Firm Dough Ball

In large, lightly greased covered bowl, let dough rise until almost double, about 4 hours.
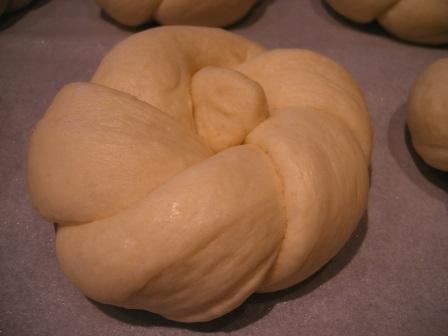
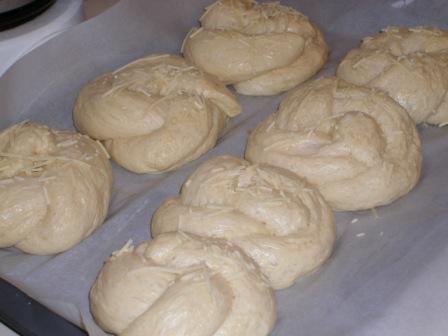
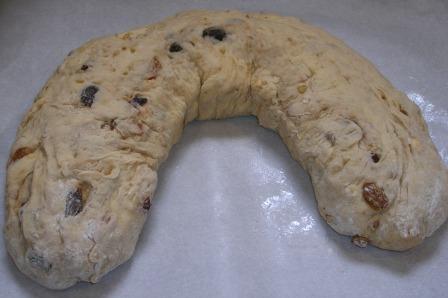
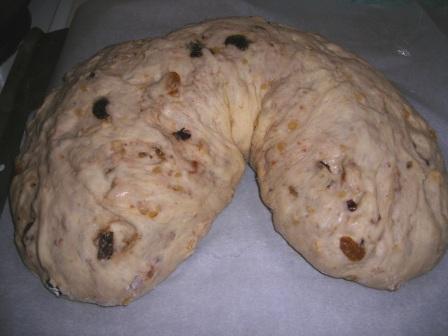
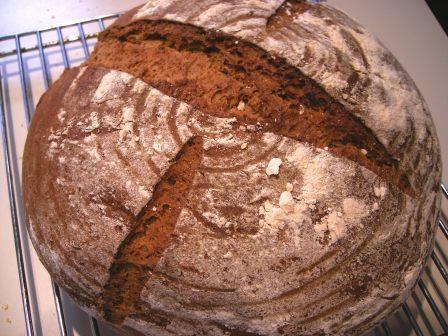
Forming the loaf:

This bread works best if formed into a large round loaf. Gently deflate risen dough and gather into a boule. Place, pucker side up, in a very well floured brotform or banneton and loosely cover. Let rise until dough fills form and rises slightly above.

Dark Onion Rye in Brotform Final Rise

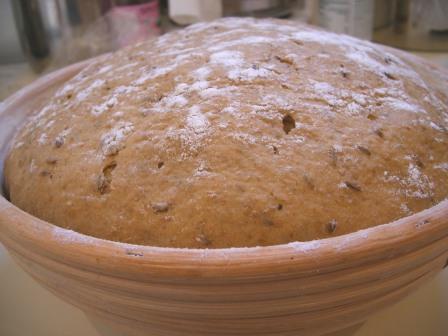
If you don't have brotform or banneton, you can improvise by placing a very well floured tea towel in a large colander or other large round dish.

Baking the Bread:

Preheat oven to 400 degrees. If using a stone or tiles, pre heat the oven with the stone/tiles in the oven. Gently unmold risen loaf onto a flat baking sheet prepared with cornmeal dusted parchment paper or onto a cornmeal prepared peel. You may slash the loaf is you wish. Mist top of loaf with water and gently slide bread into the oven and bake at 400 for 20 mintues. Turn oven down to 375 degrees and bake for another 25 minutes or until inside temperature of loaf reaches 200 degrees.

Let bread cool for 4 - 6 hours before slicing. This is very important as rye breads will turn to a gummy mess if they are sliced before completely cool.

Update: If you are baking using flours from Europe, go visit Ulrike at Kuchenlatein's wonderful post about her version of this bread! It quite a spectacular loaf of Dark Onion Rye. She sure earned her Bread Baking Buddy badge this month.

Thursday, June 12, 2008

Blog Party 35: Ch-Ch-Ch-Chocolate!!

When Stephanie of Dispensing Happiness announced the theme for this month's Blog Party was chocolate I thought to myself, "Now how in God's Green Acres am I going to top last month's creations for the Buffy themed Blog Party!" Worse, how was I going to limit myself when next to scallops, fresh homemade bread, bacon, good gin, fine scotch, and strawberry rhubarb pie, there is nothing I love more than chocolate.

I decided to think on it for a few days and turn my attention to the sourdough recipes I was playing with in preparation for a certain group of Bread Baking Babes upcoming event. You do remember, I gave you a hint in May that when I was host kitchen, we would be doing a sourdough recipe from a homemade starter don't you?! Well, even though my turn as host kitchen was delay until this month, I hope you've got your starter going...but I digress.

Anyways, I was prepping about three different starters to play with the recipe and catching up on my blog reading when I noticed that Judy over at the always full of good recipes blog, Judy Gross Eats had this fascinating recipe for chocolate cake made with sourdough starter! Now you know me. I'm never one to turn down the opportunity to bake the most unexpected things with my sourdough toss-off and hey, wouldn't a nice chocolatey bundt cake be just the perfect thing to take the Blog Party!

So, I prepped one more bowl of starter from the toss off of all the others and set about to make what frankly was one of the moistest and terrific tasting chocolate cakes I've ever had in my entire life. The sourdough starter took on the same role in the recipe that sour cream normally does in a cake recipe. It made for a tangy/sweet but not too sweet cake that was the perfect pick me up for an afternoon coffee break.

I topped the cake with the dark chocolate frosting from the Martha Stewart's Baking Handbook. I love this frosting. It is my "go to" chocolate frosting. It is easy to make and every bit as decadent as ganache or buttercream frosting. I then put some sliced almonds on top to decorate it.

So, to the party I'm going to bring a deep dark sourdough chocolate cake topped with dark chocolate frosting and sliced almonds.

Sourdough Chocolate Almond Bundt Cake

For my drink, it has been so hot and humid around these parts the past week I think we all could use a drink guaranteed to cool us down and bring back those great memories of the first week of Summer Vacation from school, an ice cream float made with almost frozen Coca-Cola and Ben and Jerry's Vanilla ice cream. But, since we are all adults here, let's give it a bit of a twist by using 2 shot glass fulls of Godiva Chocolate liqueur!

Godiva Float

Now aren't you glad you aren't a kid anymore!

Thanks Stephanie for inviting me to this month's edition of Blog Party. I can't wait to see what everyone else makes for us to eat and drink. I can pretty much guarantee we'll all be hopped up on chocolate by the end of the evening...

Tuesday, June 10, 2008

Places of the Heart

La Brasserie de l’Ile St. Louis, Paris

Today was my birthday and I turned forty-one. The funny thing is, one year ago my fortieth birthday, a birthday that is suppose to be monumental, was passed without much fanfare in a place where, despite having lived for over fifteen years, I found myself so utterly alone in so many ways.

This year was far cry from last year. This year, I not only was serenaded every where I went by strangers, who discovered it was my birthday, friends near and afar, and my business colleagues but I was treated to a special lunch and lovely dinner by two dear friends; both of whom last year I didn't even know. These two friends where just two of the many special people who made my forty-first birthday one the best birthdays I've ever had.

I think that I shall never sit in a more perfectly situated place in the world than Brasserie de I'lle St. Louis. It is the perfect place to ponder the finer points of the present, remember the days past and plan the days future. The broad expanse of the Seine as it is divided by I'lle de la Citie with Norte Dame stretched before you and I'lle St. Louis makes the end of Pont St. Louis feel like an oasis in the middle of Paris. Here, there is no rush and no pressure found on the Right Bank and no throng of tourists found on the Left.

So, as my birthday passes for one more year, I will take one more minute, if even only in my mind's eye, to sip some wine, listen to the conversations of lovers and friends and say thank you to those who made today special.

Sunday, June 08, 2008

Weekend Cat Blogging: Santa Comes Back and I Answer a MeMe

Mom spent a lot more time with me this week. I think she was feeling guilty about ignoring me last weekend when Mr. Fizzy Wine was hanging around. Thanks to everyone who said they would adopt me if I wanted to go with them. I'll keep your addresses on file if the tuna and chicken rations go down around here or that guy with the noisy wine bottle comes back any time soon.

Anyways, this week Mom spent a lot of time rambling around the house pulling stuff out of closets and drawers. She said she is "downsizing" her life. I don't know what that means but she tried on a lot of clothes and I noticed that a lot of them ended up in these big plastic bags that she mentioned she was driving to Goodwill. One of the the things she found while she was cleaning out closets was my favorite toy, Santa Claus!

Katley and his Santa

I'm not sure how that got into the closet but I'm sure glad she found it! I was so happy I kicked some stuffing out of Santa, stomped on him some and then laughed at my prowess

katley finds his Santa

After all that Santa Ass Kicking, I was pretty tired and it was starting to get really hot in the house. I'm so glad Mom turned the air conditioning on and left this pile of colorful t-shirts on the bed.

Katley Sleeps on My Workout TShirts

She wasn't that happy that I slept on them because she said she wears them when she goes to the gym or runs to the beach. I'm not sure why a little bit of cat hair on them is going to be a problem when she is going to sweat in them.

Besides ignoring me the past few weeks Mom has been neglecting a few of her blogging friends who have given her some pretty fantastic awards and a really good blogging friend who tagged her for a meme.

Gabi from The Feast Within awarded Mom the "E is for Excellent" blog award for all the good food Mom cooks and then tells you about here.

Excellent Blog Award

Then, Lynn at Cookie Baker Lynn gave Mom a "Blogging with Purpose" award for for all the good information that mom writes about bread and the encouragement she gives to people who are afraid of yeast.

Blogging with a Purpose

Now I don't really like the taste of bread and I think yeast and flour can't taste anywhere as good as crab or salmon but apparently there are a lot of people out there who think bread is pretty darn tasty.

I know Mom is thrilled and honored to be given these awards and I'm proud of her because she loves helping people who read her blog with their questions and wants to inspire people to get comfortable in their kitchens.

She is suppose to pass these on to folks she feels deserve them.

So she is passing the Excellence Award on to: Dharm, Mike, Sara, Lewis and Ruth who all do excellent work in the kitchen and inspire every one of their readers to do their best in their kitchens.

Blogging with a Purpose goes to: Andrea, Madam Chow, Ilva, Veronica, and Ham

Finally, one of Mom's oldest blogging friends Jenny of the really cool blog All Things Edible tagged Mom with a five questions meme. Even though Mom has sworn off meme's, I'll fill this one out for her!

1. What was I doing 10 years ago: I was wandering around the streets of Clinton, MA. My former owners had abandoned me and I was still one year from getting caught in a huge rainstorm on Mom's old porch at her condo in Clinton. I didn't have enough to eat and I got into lots of fights. The best thing that ever happened to me was I got caught on Mom's porch and she heard my crying in the rain and came out and got me, brought me into the house, dried me off and after no one came to claim me she decided she loved me too much to let me go. I've been very happy to run her house ever since.

2. Five non work things on my to do list for today: nap, chase the imaginary fly around the house, push the empty food bowl around the kitchen, meow at the squirrels in the front yard, hide under the bed and swat at Mom's ankles.

3. Five snacks I enjoy: bits of yellow fin tuna from Mom's sushi, Friskies Indoor Cat Treats - chicken flavour, scrambled eggs, king crab leg bits, small pieces of Round *what I call bologna, the only poison free food*

4. Things I would do if I was a Billionaire: find homes for and feed all the lost and stray kats in the world

5. Places I have Lived: Clinton and Cambridge, MA and East Norwalk, CT

6. Jobs I have Had: I've never had a job except to rule the house and keep the squirrels out of Mom's bird feeder by looking menacing in the window when they jump onto it and knock the bird seed out all over the porch.

I'm suppose to tag five people but I don't know too many kitties that blog so if you haven't sworn off memes and/or know a cat that can blog, consider yourself tagged.

Our good friend Sher and Laura and Pumpkin are hosting Weekend Cat Blogging this week, so head over to What Did You Eat to see what all the kitties in the blogosphere have been up to this hot week.