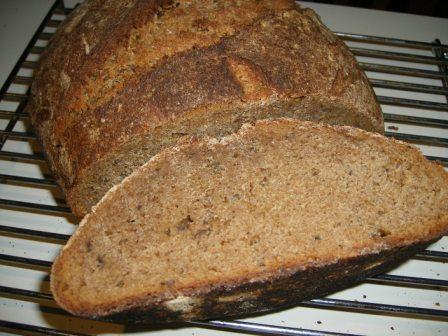
The bread I have been working towards should be a hearty bread with a chewy crust and a hint of onion and caraway. The bread would lend itself to cheese with a lot of character and cured meats.
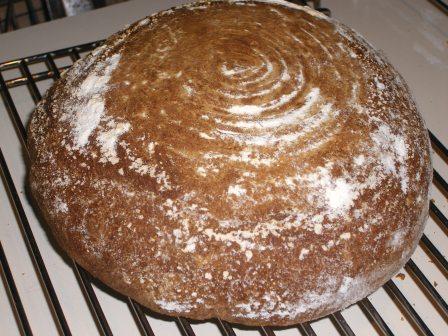
The perfect accompaniment to a ploughman's lunch washed down with a good stout.
I had reached a point in my recipe development that I needed a few test bakers and couldn't think of a better group to help me than my fellow Babes. After all, between them, there is a wealth of yeast and flour experience. I also wanted to see how the bread would work with the use of different types of rye flour.
First, let's get a definition out of the way in regards to pumpernickel. There are two types of pumpernickel: German style and United States style. German Pumpernickel is a lot like champagne, in it is a very specific style of bread baked and regulated by German rules. It is a very dense bread that is baked for a very long time in a low temperature oven. United States pumpernickel bread is dark rye bread made with combination of wheat and rye flour and then colored very dark with coffee or molasses. It normally contains caraway seeds. It has the same texture as a whole grain bread and is not as dense as the German style.
To add further confusion about pumpernickel here in the US there is a style of flour called "pumpernickel" which normally means 100% rye flour. It is a bit darker than medium rye flour which typically contains a portion of wheat flour. OK, now that you are thoroughly confused, on to this month's bread.
Like we have seen in other breads, flours that are called the same thing in one place of the world do not necessarily work the same way. Take rye flour for a really good example. My recipe calls for using 100% rye flour but several of our Babes, especially Karen and Lien who are in Holland, had disastrous results using their 100% rye flour. Their first loaves, there were many first loaves, were dense, non-rising, inedible bricks. It wasn't until I happened upon a true European bakery in NYC and spoke with one of the bakers that we discovered there was a huge difference in rye flours here versus there. She even gave me about 6 cups of the Eastern European rye flour they import to take home and try my recipe with to see the difference. The result? Brick...
So, I had to make an allowance in the recipe if the baker is using European flour.
Next there was some concern about the use of onion powder. My original recipe called for onion powder instead of onions. I used it because it was a pretty easily available ingredient. Lien reported that her onion powder made the bread taste awful. In fact, her onion powder was nausea inducing! Well that is the last thing I would want to induce in a recipe of mine!! So, Tanna came up with a method of sweating the onions and then adding them. I and few other babes used freeze dried onions and had nice onion tasting results. So, I removed the onion powder and put either sweated onions or freeze dried onions in the recipe.
Finally, the last adjustment. My wonderful testers helped me refine the amount of liquid to flour and the crust. My original recipe did not add any oil and the result was a very hard, thick crust. Also, the amount of extra flour you had to add to the dough was much less than I suspected we needed to get structure (Rye flour absorbs liquid very quickly but also results in a very sticky dough). Some playing around with earlier versions of my recipe led me back to using some melted butter in dough. This gave us a much softer but still chewy crust.
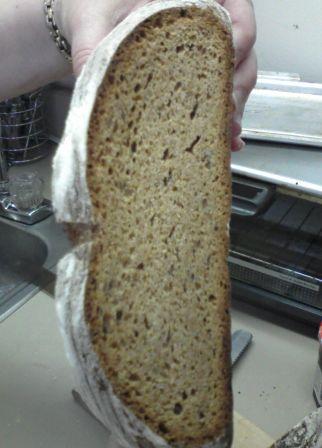
The results? With the exception of Karen and Lien, who report that rye breads just aren't their favourites, I'm quite happy to report that Tanna, Sher, Gorel, and Ilva all really liked the bread! The test loaves I took into the office were all devoured as well (even the ones I thought were failures). So, I'm happy with the recipe and think it is about right where I would want it for use in a class I am teaching on unusual grain sourdough breads in a few weeks at a local community college!
Thanks to my test bakers this month: A Fridge Full of Food (Glenna), Bake My Day (Karen), Cookie Baker Lynn (Lynn), I Like to Cook (Sara), Lucullian Delights (Ilva), My Kitchen in Half Cups (Tanna), Grain Doe (Gorel), Notitie van Lien (Lien), and What Did You Eat (Sher). Without you all, I could not have put this recipe to bed.
If you want to have a go at this bread and be Bread Baking Buddy this month, here is what you need to do:
- Make a starter using my recipe. For those of you who have your starters from my recipe already to go, you can move right to step 2!
- Make the bread, take some pictures and blog about it.
- Email me by July 6 with a link to your post. We are giving you two weeks this time because this bread involves getting a starter going from scratch. You will need one full week for this starter btw.
- I'll email you a Bread Baking Buddy badge to add to your post.
- You can still participate even if you don't have a blog, just bake the bread and drop me an email by July 6th with a picture of your bread.
I will do a round up of all the breads and your comments the week of July 7th.
Here is the recipe and even if you make this bread after the Bread Baking Buddy, please let me know your results. I will add them to my research and your experience will help me if the recipe needs further refining!
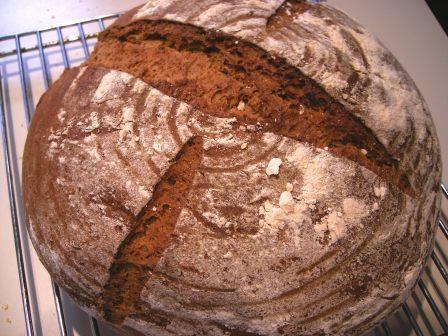
Breadchick's Dark Onion Rye
Total Time for Recipe: 2 days (does not include the time needed to build a starter)
Results in one (1) boule
Day 1: You will feed your starter 2 times on the first day; once in the morning and once about 2 - 4 hour prior to making the sponge.
First Feeding: Stir in any hooch and DO NOT TOSS ANY OFF. Feed the starter 1/2 cup water and 1/2 cup AP flour.
Second Feeding: Stir in any hooch and divide the starter into two equal parts. Put one part away (This is your Mother Starter) and feed the other part 1/2 cup water and 1/2 cup AP flour. Wait 2 - 4 hours and then make the sponge. (Note: I make the sponge right before I go to bed as it needs about 8 hours of fermenting time)
Making the Sponge:
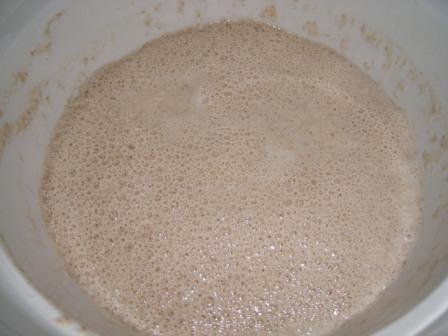
In large bowl combine
1 cup active starter
3/4 cup rye flour
3/4 cup Bread flour (12% + gluten)
1/2 cup water
Cover and let ferment 8 - 10 hours overnight
Making the Dough:
You can use a stand mixer or do this by hand.
Combine:
Sponge
1 1/2 Tbsp dark molasses (or if you can't find molasses, use Treacle or 1 Tbsp Lyle syrup and 1 Tbsp strong dark coffee) Note: don't use Blackstrap molasses as this will give the bread a bitter taste.
2 Tbsp honey
2 Tbsp melted unsalted butter
and mix until smooth.
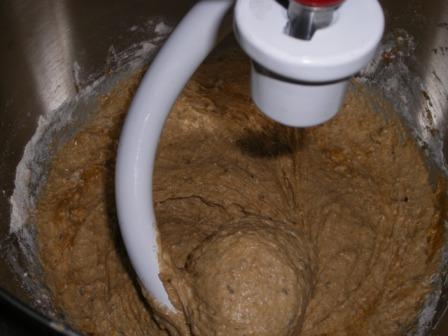
To sponge mixture add:
1 3/4tsp salt
1 1/2 Tbsp freeze dried or sweated fresh onions
2 heaping tsp caraway seeds (optional)
1 cup Dark Rye or Pumpernickel flour (100% Rye flour)
1/2 cup bread flour
Note: Use 3/4 cup of rye flour and 3/4 cup of bread flour if using European rye flour
Mix on low speed until a shaggy wet dough is formed.
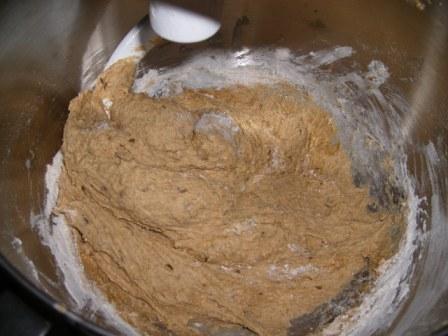
In a separate bowl, whisk together 1/2 cup dark rye, 1/2 cup medium rye, and 1/2 cup bread flour. Using the dough hook of your stand mixer, on low speed, add rye flour mixture to shaggy dough 1/2 cup at a time until dough forms ball that pulls away from the bowl and is firm but still slightly tacky to the touch.
If you are doing this by hand, the dough ball will be firm and smooth but will stick your hand if you squeeze the dough.
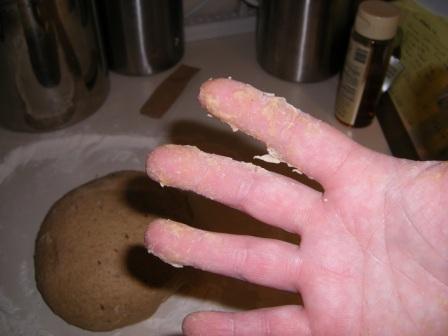
On a floured counter (I use medium rye flour to flour the counter), give the dough a few hand kneads (about 2 - 4 minutes) and let rest for 15 minutes. Give one last knead, dough should be elastic feeling and not stick to your hands but will feel tacky. If it sticks to your hands, knead in additional rye flour until dough is firm but ever so slightly tacky.
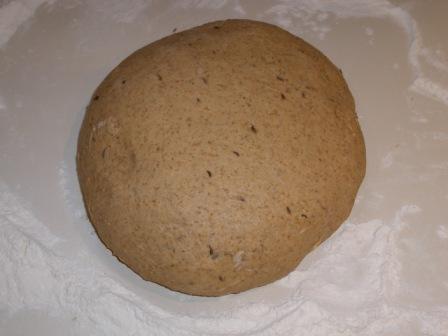
In large, lightly greased covered bowl, let dough rise until almost double, about 4 hours.
Forming the loaf:
This bread works best if formed into a large round loaf. Gently deflate risen dough and gather into a boule. Place, pucker side up, in a very well floured brotform or banneton and loosely cover. Let rise until dough fills form and rises slightly above.
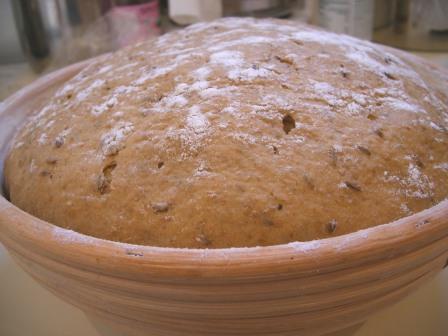
If you don't have brotform or banneton, you can improvise by placing a very well floured tea towel in a large colander or other large round dish.
Baking the Bread:
Preheat oven to 400 degrees. If using a stone or tiles, pre heat the oven with the stone/tiles in the oven. Gently unmold risen loaf onto a flat baking sheet prepared with cornmeal dusted parchment paper or onto a cornmeal prepared peel. You may slash the loaf is you wish. Mist top of loaf with water and gently slide bread into the oven and bake at 400 for 20 mintues. Turn oven down to 375 degrees and bake for another 25 minutes or until inside temperature of loaf reaches 200 degrees.
Let bread cool for 4 - 6 hours before slicing. This is very important as rye breads will turn to a gummy mess if they are sliced before completely cool.
Update: If you are baking using flours from Europe, go visit Ulrike at Kuchenlatein's wonderful post about her version of this bread! It quite a spectacular loaf of Dark Onion Rye. She sure earned her Bread Baking Buddy badge this month.


