Showing posts with label Bread Baking Babes. Show all posts

Wednesday, August 15, 2012

Bread Baking Babes: Celebrating Julia and Saying Good-Bye

The Babes are back! And this month we're celebrating the 100th birthday of one of the most famous personalities in all of food, Julia Child by baking bread from her the thirteen page epic tome she devoted to French Bread.

BBB logo August 2012 (babes and buddies)

Now if you've been a long time reader of mine, you know that many years ago Sara of I Like To Cook and I co-hosted this very recipe with the Daring Bakers. So, it was like returning an old friend when Susan of Wild Yeast suggested we celebrate Julia's birthday by baking the French bread and inviting all our buddies to post with us.

I love this recipe.  It is my go to recipe for making French bread and over the years, I like to think I've mastered it and the shapes that Julia describes in the recipe.

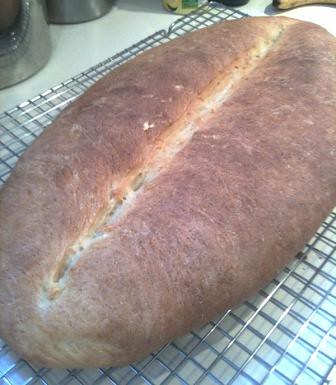
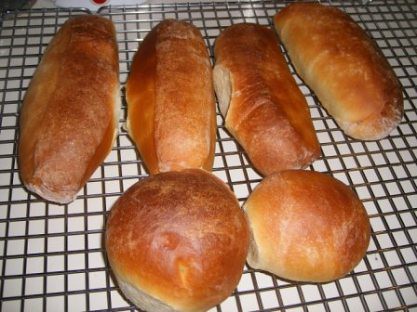
I made two different shapes for this month: baguette and small boule.  BBB Julia French Bread

 I had the boule for dinner the other night.
BBB Julia French Bread Dinner

It was fantastic smeared with pate and brie and downed with a good Bordeaux.

BBB Julia French Bread with Pate and Brie
I took the baguette to a friend's house tonight where we sat out on her back deck with a bottle of wine and a jar of Nutella.  It made for a great evening.

 If you would still like to join us, there is time!  Follow the long, LONG recipe at the bottom of this post, email our host kitchen, Susan of Wild Yeast fame with a picture and link to your bread on your blog, facebook page, social media, what ever before August 25th and she'll be happy to include you in her round up.

Now for the Good-Bye part of this post...

We all go through different phases and I like to think that we are constantly striving to grow and through that growth, we change.  Our passions ebb and flow and sometimes, the things we thought we'd love to do forever, come to an end.  Thus it is with The Sour Dough,

Almost eight years ago, I started The Sour Dough at the urging of my partner Wren.  He told me that I should use my talents as a baker and writer to share my tips about bread with the world through a blog.  So, on a cold snowy night in Boston in 2004 this blog was born.   Now, on a warm rainy night in Atlanta, the time has come to close this chapter of my life.   

I have loved the time I have shared with you, my readers.  I think I've learned more from you than you have from me.  You have made suggestions and asked me questions that I hadn't thought of and forced me to find answers to some really strange and bizarre bread issues. I have met some fantastic people who will be life long friends through the food blogging world.

I especially want to thank a few special people for all the love and support over the years: my Bread Baking Babe sisters (who, thankfully are going to allow me to keep my spot on the back bench guarding our secret stash of scotch, wine, bourbon and other adult beverages) Sara, Tanna, Ilva, Karen, Pat, Astrid, Gorel, Lien, Susan, Katie, Gretchen, Natashya, Elizabeth;  and my other foodie sisters Stephanie, Jasmine, and Kathy.

You know, there is symmetry in life.

One of the first posts on The Sour Dough was about me waiting for a baguette pan from King Arthur's Flour to arrive and the first food pictures on this blog were of the baguettes I made with that pan.   So it is kind of fitting that my last post is of baguettes...don't you think?

So, until we meet again, LB and I say adieu, farewell, and bon appetit.


LB in Window

Pain Francais (French Bread) 
From Mastering the Art of French Cooking: Volume Two by Julia Child and Simone Beck
(Note: for bonus notes and pictures you can go to this post )

Recipe Quantity:
3 - baguettes (24” x 2”) or batards (16” x 3”) or
6 – short loaves, ficelles, 12 – 16” x 2” or
3 – round loaves, boules, 7 – 8” in diameter or
12 – round or oval rolls, petits pains or
1 – large round or oval loaf, pain de menage or miche; pain boulot

Recipe Time: 7 – 9 hours

Additional Information About the Recipe  
Flour: French bakers make plain French bread out of unbleached flour that has gluten strength of 8 to 9 per cent. Most American all-purpose flour is bleached and has slightly higher gluten content as well as being slightly finer in texture. It is easier to make bread with French flour than with American flour.

Bakers’ Oven Versus Home Ovens: Bakers’ ovens are so constructed that one slides the formed bread dough from a wooden panel right onto the hot, fire-brick oven floor, a steam injection system humidifies the oven for the first few minutes of baking. Steam allows the yeast to work a little longer in the dough and this, combined with the hot baking surface, produced an extra push of volume. In addition, steam coagulating the starch on the surface of the dough gives the crust its characteristic brown color. Although you can produce a good loaf of French bread without steam or a hot baking surface, you will a larger and handsomer loaf when you simulate professional conditions.

Stand Mixer Mixing and Kneading of French Bread Dough: French bread dough is too soft to work in the electric food processor, but the heavy-duty mixer with dough hook works perfectly. The double-hook attachment that comes with some hand held mixers and the hand-cranking bread pails are slower and less efficient, to our mind, than hand kneading. In any case, when you are using electricity, follow the steps in the recipe as outlined, including the rests; do not over-knead and for the heavy duty mixer, do not go over a moderate speed of number 3 or 4, or you risk breaking down the gluten in the dough.

Equipment Needed: Unless you plan to go into the more elaborate simulation of a baker’s oven, you need no unusual equipment for the following recipe. Here are the requirements, some of which may sound odd but will explain themselves when you read the recipe.

(Note: you do not neet to buy all these items if you don't have them already. Just improvise with what you already have)

  • 4 to 5 quart mixing bowl with fairly vertical rather than outward slanting sides

  • a kneading surface of some sort, 1 1/2 to 2 square feet

  • a rubber spatula or either a metal scraper or a stiff wide metal spatula

  • 1 to 2 unwrinkled canvas pastry cloths or stiff linen towels upon which the dough may rise

  • a stiff piece of cardboard or plywood 18 – 20 inches long and 6 – 8 inches wide, for unmolding dough from canvas to baking sheet

  • finely ground cornmeal or pasta pulverized in an electric blender to sprinkle on unmolding board so as to prevent dough from sticking

  • the largest baking sheet that will fit in your oven

  • a razor blade or extremely sharp knife for slashing the top of the dough

  • a soft pastry brush or fine spray atomizer for moistening dough before and during baking

  • a room thermometer to verify rising temperature

Making French Bread:
Step 1: The Dough Mixture – le fraisage (or frasage)


1 cake (0.6 ounce) (20grams) fresh yeast or 1 package dry active yeast
1/3 cup (75ml) warm water, not over 100 degrees F/38C in a glass measure
3 1/2 cup (about 1 lb) (490 gr) all purpose flour, measured by scooping
dry measure cups into flour and sweeping off excess
2 1/4 tsp (12 gr) salt
1 1/4 cups (280 - 300ml) tepid water @ 70 – 74 degrees/21 - 23C


Both Methods: Stir the yeast in the 1/3 cup warm water and let liquefy completely while measuring flour into mixing bowl. When yeast has liquefied, pour it into the flour along with the salt and the rest of the water.


Hand Method: Stir and cut the liquids into the flour with a rubber spatula, pressing firmly to form a dough and making sure that all the bits of flour and unmassed pieces are gathered in. Turn dough out onto kneading surface, scraping bowl clean. Dough will be soft and sticky.

Stand Mixer:
Using the dough hook attachment on the speed the mixer manufacturer recommends for dough hook use or the lowest setting if there is no recommendation, slowly work all the ingredients together until a dough ball is formed, stopping the mixer and scrapping the bits of flour and chunks of dough off the bottom of the bowl and pressing them into the dough ball. Continue to mix the dough on a low speed until all the bits of flour and loose chunks of dough have formed a solid dough ball.

Both Methods: Turn dough out onto kneading surface, scraping bowl clean. Dough will be soft and sticky. Let the dough rest for 2 – 3 minutes while you wash and dry the bowl (and the dough hook if using a stand mixer).

Step 2: Kneading – petrissage
The flour will have absorbed the liquid during this short rest, and the dough will have a little more cohesion for the kneading that is about to begin. Use one hand only for kneading and keep the other clean to hold a pastry scrapper, to dip out extra flour, to answer the telephone, and so forth. Your object in kneading is to render the dough perfectly smooth and to work it sufficiently so that all the gluten molecules are moistened and joined together into an interlocking web. You cannot see this happen, of course, but you can feel it because the dough will become elastic and will retract into shape when you push it out.

Hand Method: Start kneading by lifting the near edge of the dough, using a pastry scraper or stiff wide spatula to help you if necessary, and flipping the dough over onto itself. Scrape dough off the surface and slap it down; lift edge and flip it over again, repeating the movement rapidly.

In 2 -3 minutes the dough should have enough body so that you can give it a quick forward push with the heel of your hand as you flip it over.

Continue to knead rapidly and vigorously in this way. If the dough remains too sticky, knead in a sprinkling of flour. The whole kneading process will take 5 – 10 minutes, depending on how expert you become.

Shortly after this point, the dough should have developed enough elasticity so it draws back into shape when pushed, indicating the gluten molecules have united and are under tension like a thin web of rubber; the dough should also begin to clean itself off the kneading surface, although it will stick to your fingers if you hold a pinch of dough for more than a second or two.

Stand Mixer:  Place dough back into the bowl and using the dough hook attachment at the recommended speed (low), knead the dough for about 5 – 7 minutes. At about the 5 minute mark, stop the mixer and push at the dough with your fingertips. If it springs back quickly, you have kneaded the dough enough. If it doesn’t spring back continue to knead, stopping the mixer and retesting every 2 minutes. If the dough sticks to your fingers, toss a sprinkling of flour onto the dough and continue to knead. The dough should be light and springy when it is ready. Breadchick also recommends always finishing with about 1 – 2 minutes of hand kneading just to get a good feel for how the gluten is formed.

Both Methods: Let dough rest for 3 – 4 minutes. Knead by hand for a minute. The surface should now look smooth; the dough will be less sticky but will still remain soft. It is now ready for its first rise.

Step 3: First Rising – pointage premier temps (3-5 hours at around 70 degrees)
You now have approximately 3 cups of dough that is to rise to 3 1/2 times its original volume, or to about 10 1/2 cups. Wash and fill the mixing bowl with 10 1/2 cups of tepid water (70 – 80 degrees) and make a mark to indicate that level on the outside of the bowl. Note, that the bowl should have fairly upright sides; if they are too outward slanting, the dough will have difficulty in rising. Pour out the water, dry the bowl, and place the dough in it (Mary and Sara Note: Very lightly grease the bowl with butter or kitchen spray as well to prevent the risen dough from sticking to the bowl).

Slip the bowl into a large plastic bag or cover with plastic, and top with a folded bath towel. Set on a wooden surface, marble or stone are too cold. Or on a folded towel or pillow, and let rise free from drafts anyplace where the temperature is around 70 degrees. If the room is too hot, set bowl in water and keep renewing water to maintain around 70 degrees. Dough should take at least 3 – 4 hours to rise to 10 1/2 cups. If temperature is lower than 70 degrees, it will simply take longer

When fully risen, the dough will be humped into a slight dome,

showing that the yeast is still active; it will be light and spongy when pressed. There will usually be some big bubbly blisters on the surface, and if you are using a glass bowl you will see bubbles through the glass.

Step 4: Deflating and Second Rising – rupture; pointage deuxieme temps (1 1/2 to 2 hours at around 70 degrees)
The dough is now ready to be deflated, which will release the yeast engendered gases and redistribute the yeast cells so that the dough will rise again and continue the fermentation process.

With a rubber spatula, dislodge dough from inside of bowl and turn out onto a lightly floured surface, scraping bowl clean. If dough seems damp and sweaty, sprinkle with a tablespoon of flour.

Lightly flour the palms of your hands and flatten the dough firmly but not too roughly into a circle, deflating any gas bubbles by pinching them.

Lift a corner of the near side and flip it down on the far side.

Do the same with the left side, then the right side. Finally, lift the near side and tuck it just under the edge of the far side. The mass of dough will look like a rounded cushion.

Slip the sides of your hands under the dough and return it to the bowl. Cover and let rise again, this time to not quite triple, but again until it is dome shaped and light and spongy when touched.

Step 5: Cutting and resting dough before forming loaves
Loosen dough all around inside of bowl and turn out onto a lightly floured surface. Because of its two long rises, the dough will have much more body. If it seems damp and sweaty, sprinkle lightly with flour.

Making clean, sure cuts with a large knife or a bench scraper, divide the dough into:

  • 3 equal pieces for long loaves (baguettes or batards) or small round loaves (boules only)

  • 5 – 6 equal pieces for long thin loaves (ficelles)

  • 10 – 12 equal pieces for small oval rolls (petits pains, tire-bouchons) or small round rolls (petits pains, champignons)

  • 2 equal pieces for medium round loaves (pain de menage or miche only)

  • If you making one large round loaf (pain de menage, miche, or pain boulot), you will not cut the dough at all and just need to follow the directions below.
After you have cut each piece, lift one end and flip it over onto the opposite end to fold the dough into two.

place dough at far side of kneading surface. Cover loosely with a sheet of plastic and let rest for 5 minutes before forming. This relaxes the gluten enough for shaping but not long enough for dough to begin rising again.

While the dough is resting, prepare the rising surface; smooth the canvas or linen towelling on a large tray or baking sheet, and rub flour thoroughly into the entire surface of the cloth to prevent the dough from sticking

Step 6: Forming the loaves – la tourne; la mise en forme des patons
Because French bread stands free in the oven and is not baked in a pan, it has to be formed in such a way that the tension of the coagulated gluten cloak on the surface will hold the dough in shape.

For Long Loaves - The Batard: (Baguettes are typically much too long for home ovens but the shaping method is the same)

After the 3 pieces of dough have rested 5 minutes, form one piece at a time, keeping the remaining ones covered.

Working rapidly, turn the dough upside down on a lightly floured kneading surface and pat it firmly but not too roughly into an 8 to 10 inch oval with the lightly floured palms of your hands. Deflate any gas bubbles in the dough by pinching them.

Fold the dough in half lengthwise by bringing the far edge down over the near edge.

Being sure that the working surface is always lightly floured so the dough will not stick and tear, which would break the lightly coagulated gluten cloak that is being formed, seal the edges of the dough together, your hands extended, thumbs out at right angles and touching.

Roll the dough a quarter turn forward so the seal is on top.

Flatten the dough again into an oval with the palms of your hands.

Press a trench along the central length of the oval with the side of one hand.

Fold in half again lengthwise.

This time seal the edges together with the heel of one hand, and roll the dough a quarter of a turn toward you so the seal is on the bottom.

Now, by rolling the dough back and forth with the palms of your hands, you will lengthen it into a sausage shape. Start in the middle, placing your right palm on the dough, and your left palm on top of your right hand.

Roll the dough forward and backward rapidly, gradually sliding your hands towards the two ends as the dough lengthens.

Deflate any gas blisters on the surface by pinching them. Repeat the rolling movement rapidly several times until the dough is 16 inches long, or whatever length will fit on your baking sheet. During the extension rolls, keep circumference of dough as even as possible and try to start each roll with the sealed side of the dough down, twisting the rope of dough to straighten the line of seal as necessary. If seal disappears, as it sometimes does with all purpose flour, do not worry.

Place the shaped piece of dough, sealed side up, at one end of the flour rubbed canvas, leaving a free end of canvas 3 to 4 inches wide.

The top will crust slightly as the dough rises; it is turned over for baking so the soft, smooth underside will be uppermost.

Pinch a ridge 2 1/2 to 3 inches high in the canvas to make a trough, and a place for the next piece. Cover dough with plastic while you are forming the rest of the loaves.

After all the pieces of dough are in place, brace the two sides of the canvas with long rolling pins, baking sheets or books, if the dough seems very soft and wants to spread out. Cover the dough loosely with flour rubbed dish towel or canvas, and a sheet of plastic. Proceed immediately to the final rising, next step.

For Long Thin Loaves – Fincelles: Follow the steps above but making thinner sausage shapes about 1/2 inch in diameter. When they have risen, slash as with the Batard.

For Oval Rolls – Petits Pains, Tire-Bouchons: Form like batards, but you will probably not have to lengthen them at all after the two foldings and sealings. Place rolls on a floured canvas about 2 – 4” apart and cover with plastic to rise. When they have risen, make either 2 parallel slashes or a single slash going from one end to the other.

For Small, Medium, or Large Round Loaves – Pain de Menage, Miches, Boules: The object here is to force the cloak of coagulated gluten to hold the ball of dough in shape: the first movement will make cushion; the second will seal and round the ball, establishing surface tension.

Place the dough on a lightly floured surface.

Lift the left side of the dough with the side of your left hand and bring it down almost to the right side.

Scoop up the right side and push it back almost to the left side. Turn the dough a quarter turn clockwise and repeat the movement 8 – 10 times. The movement gradually smooths the bottom of the dough and establishes the necessary surface tension; think of the surface of the dough as if it were a fine sheet of rubber you were stretching in every direction.

Turn the dough smooth side up and begin rotating it between the palms of your hands, tucking a bit of the dough under the ball as you rotate it. In a dozen turns you should have a neatly shaped ball with a little pucker of dough, le cle, underneath where all the edges have joined together.

Place the dough pucker side up in a flour-rubbed canvas; seal the pucker by pinching with your fingers. Flour lightly, cover loosely and let rise to almost triple its size. After unmolding upside down on the baking sheet, slash with either a long central slash, two long central slashes that cross at right angles, or a semi-circular slash around half the circumference.

For Small Round Rolls – Petits Pains, Champignons: The principles are the same here as for the preceding round loaves, but make the cushion shape with your fingers rather than the palms of your hands.

For the second stage, during which the ball of dough is rotated smooth side up, roll it under the palm of one hand, using your thumb and little finger to push the edges of the dough underneath and to form the pucker, where the edges join together

Place the formed ball of dough pucker side up on the flour rubbed canvas and cover loosely while forming the rest. Space the balls 2 inches apart. When risen to almost triple its size, lift gently with lightly floured fingers and place pucker side down on baking sheet. Rolls are usually too small for a cross so make either one central slash or the semi-circular cut.

For Large Oval Loaf – Pain Boulot: Follow the directions for the round loaves except instead of rotating between the balms of your hands and tucking to form a round loaf, continue to turn the dough from the right to the left, tucking a bit of each end under the oblong loaf. In a dozen turns you should have a neatly shaped oval with tow little puckers of dough, le cles, underneath where all the edges of have joined together.

Place the dough pucker sides up in a flour-rubbed canvas; seal the puckers by pinching with your fingers. Flour lightly, cover loosely and let rise to almost triple its size. After unmolding upside down on the baking sheet, slash with parallel slashes going diagonally across the top starting from the upper left and going to the lower right.

Step 7: Final Rise – l’appret - 1 1/2 to 2 1/2 hours at around 70 degrees
The covered dough is now to rise until almost triple in volume; look carefully at its pre-risen size so that you will be able to judge correctly. It will be light and swollen when risen, but will still feel a little springy when pressed.

It is important that the final rise take place where it is dry; if your kitchen is damp, hot, and steamy, let the bread rise in another room or dough will stick to the canvas and you will have difficulty getting it off and onto another baking sheet. It will turn into bread in the oven whatever happens, but you will have an easier time and a better loaf if you aim for ideal conditions.

Preheat oven to 450 degrees about 30 minutes before estimated baking time.

Step 8: Unmolding risen dough onto baking sheet – le demoulage.
The 3 pieces of risen dough are now to be unmolded from the canvas and arranged upside down on the baking sheet. The reason for this reversal is that the present top of the dough has crusted over during its rise; the smooth, soft underside should be uppermost in the oven so that the dough can expand and allow the loaf its final puff of volume. For the unmolding you will need a non-sticking intermediate surface such as a stiff piece of cardboard or plywood sprinkled with cornmeal or pulverized pasta.

Remove rolling pins or braces. Place the long side of the board at one side of the dough; pull the edge of the canvas to flatten it; then raise and flip the dough softly upside down onto the board.

Dough is now lying along one edge of the unmolding board: rest this edge on the right side of a lightly buttered baking sheet. Gently dislodge dough onto baking sheet, keeping same side of the dough uppermost: this is the soft smooth side, which was underneath while dough rose on canvas. If necessary run sides of hands lightly down the length of the dough to straighten it. Unmold the next piece of dough the same way, placing it to the left of the first, leaving a 3 inch space. Unmold the final piece near the left side of the sheet.

Step 9: Slashing top of the dough – la coupe.
The top of each piece of dough is now to be slashed in several places. This opens the covering cloak of gluten and allows a bulge of dough underneath to swell up through the cuts during the first 10 minutes of baking, making decorative patterns in the crust. These are done with a blade that cuts almost horizontally into the dough to a depth of less than half an inch. Start the cut at the middle of the blade, drawing toward you in a swift clean sweep. This is not quite as easy as it sounds, and you will probably make ragged cuts at first; never mind, you will improve with practice. Use an ordinary razor blade and slide one side of it into a cork for safety; or buy a barbers straight razor at a cutlery store.

For a 16 to 18 inch loaf make 3 slashes. Note that those at the two ends go straight down the loaf but are slightly off centre, while the middle slash is at a slight angle between the two. Make the first cut at the far end, then the middle cut, and finally the third. Remember that the blade should lie almost parallel to the surface of the dough.

Step 10: Baking – about 25 minutes; oven preheated to 450 degrees (230 degrees C).
As soon as the dough has been slashed, moisten the surface either by painting with a soft brush dipped in cold water, or with a fine spray atomizer, and slide the baking sheet onto rack in upper third of preheated oven. Rapidly paint or spray dough with cold water after 3 minutes, again in 3 minutes, and a final time 3 minutes later. Moistening the dough at this point helps the crust to brown and allows the yeast action to continue in the dough a little longer. The bread should be done in about 25 minutes; the crust will be crisp, and the bread will make a hollow sound when thumped.

If you want the crust to shine, paint lightly with a brush dipped in cold water as soon as you slide the baking sheet out of oven.

Step 11: Cooling – 2 to 3 hours.
Cool the bread on a rack or set it upright in a basket or large bowl so that air can circulate freely around each piece. Although bread is always exciting to eat fresh from the oven, it will have a much better taste when the inside is thoroughly cool and has composed itself.

Step 12: Storing French bread
Because it contains no fats or preservatives of any kind, French bread is at its best when eaten the day it is baked. It will keep for a day or two longer, wrapped airtight and refrigerated, but it will keep best if you freeze it – let the loaves cool first, then wrap airtight. To thaw, unwrap and place on a baking sheet in a cold oven; heat the oven to 400 degrees. In about 20 minutes the crust will be hot and crisp, and the bread thawed. The French, of course, never heat French bread except possibly on Monday, the baker’s holiday, when the bread is a day old.

Step 13: Canvas housekeeping
After each bread session, if you have used canvas, brush it thoroughly to remove all traces of flour and hang it out to dry before putting away. Otherwise the canvas could become mouldy and ruin your next batch of dough.

The Simulated Bakers’ Oven

Baking in the ordinary way, as described in the preceding recipe, produces an acceptable loaf of bread but does not nearly approach the glory you can achieve when you turn your home oven into a baker’s oven. Merely providing yourself with the proper amount of steam, if you can do nothing else, will vastly improve the crust, the color, the slash patterns, and the volume of your bread; steam is only a matter of plopping a heated brick or stone into a pan of water in the bottom of the oven. The second provision is a hot surface upon which the naked dough can bake; this gives that added push of volume that improves both the appearance and the slash patterns. When you have the hot baking surface, you will then also need a paddle or board upon which you can transfer dough from canvas to hot baking surface. For the complete set up here is you should have, and any building-supply store stocks these items.

For the hot baking surface: Metal will not do as a hot baking surface because it burns the bottom of the dough. The most practical and easily obtainable substance is ordinary red floor tiles 1/4” thick. They come in various sizes such as 6 x 6, 6 x 3, and you only need enough to line the surface of an oven rack. Look them up under Tiles in your Directory, and ask for “quarry tiles” their official name.

For unmolding the risen dough from its canvas: A piece of 3/16 inch plywood about 20 inches wide.

For sliding the dough onto the hot tiles: When you are doing 3 long loaves, you must slide them together onto the hot tiles; to do so you unmold them one at a time with one board and arrange them side by side on the second board, which takes place on the baker’s paddle, la pelle. Buy a piece of plywood slightly longer but 2 inches narrower than your oven rack.

To prevent dough from sticking to unmolding and sliding boards: White cornmeal or small dried pasta pulverized in the electric blender until it is the consistency of table salt. This is called fleurage.

The steam contraption: Something that you can heat to sizzling hot on top of the stove and then slide into a pan of water in the oven to make a great burst of steam: a brick, a solid 10lb rock, piece of cast iron or other metal. A 9 x 12 inch roasting pan 2 inches deep to hold an inch of water and the hot brick.

Monday, April 16, 2012

Bread Baking Babes are a Bit Beery- Eyed

The Babes are back and we're all hopped up about this month's bread because Natashya of Living In the Kitchen with Puppies, the host kitchen this month, picked a favorite type of bread of mine, a beer bread!


I used a Michigan micro-brew beer from Bell's, their Two Hearted Ale

two hearted ale

named after the Two Hearted River in the UP and being a Yooper and since the Two Hearted River is about 15 miles from where I grew up and while not Canadian beer, the UP is sorta a lost province of Canada (we say "eh" quite a bit too!)I'm hoping Natashya gives me bonus points for using an almost Canadian beer...

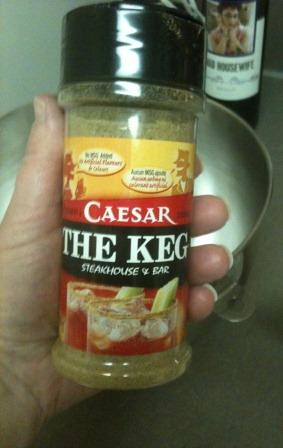
I also deviated a bit from the original recipe, which calls for sausage and cheese, by using some hearty herbs and another ingredient from Canada, Ceasar rimming salt!

ceasar salt

This was a gift from my sister Babe, Sara of I Like to Cook

The finished product:

April Beer Bread

The bread was super tasty and excellent with a beef stew I made to go with it.


If you want to be a buddy with the Babes this month, bake the bread, post about it at your blog or favorite social media site, and email Natashya with a link to your post by April 29th. She'll include you in the round up and send along a nice little badge for your post.


Granville Island Beer Bread
From from CookingBread.com

Thanks Chuck for letting us post your recipe on our blogs.

Ingredients

Night before:

    1¼ cups bread flour
    ¾ cup tepid water
    ¼ teaspoon instant yeast

Day of:

    1 - 12 oz bottle beer (room temperature)
    ¼ cup olive oil
    3 tablespoons dried onion flakes
    4 teaspoon instant yeast
    1½ tsp salt
    ½ teaspoon ground pepper
    ¼ cup sugar
    4 - 4½ cups bread flour
    1½ cups farmers sausage
    2 - 3 cups grated Monterey Jack cheese

Method

The night before combine 1¼ cup of bread flour, ¾ cup tepid water and ¼ teaspoon instant yeast, cover with plastic wrap and set aside till next day.

The next morning pour the night before mixture into a large bowl. Add in the room temp. bottle of beer, olive oil, dried onion flakes, 1 cup of bread flour, instant yeast, salt, pepper and sugar, with a wooden spoon mix all these ingredients together till well blended.
Mix in another 1½ cups of flour. Sprinkle some more flour onto a flat surface. Pour out the wet dough onto the floured surface, place a little more flour on top. Start to knead the dough and continue to add a little flour till the dough becomes smooth (a little on the tacky side). Knead the dough for about 8 minutes, then place into a lightly oiled bowl, turn the dough over so all the sides are lightly coated. Cover with plastic and let rise for1 hour or till it has doubled in size.

Sprinkle a little flour onto a flat surface and pour out the dough. Add the farmers sausage or any other cooked sausage you like. Add 1 cup of cheese and knead till all incorporated. Cover dough with plastic wrap and allow to rest for another 15 minutes. Afterwards cut dough in half, shape into loaves and place onto a cornmeal parchment lined cookie sheet. Cover with plastic wrap and allow to rest for 1 hour. Using a sharp knife score the dough about a inch deep. Sprinkle the rest of the grated cheese on top of the loaves. Bake in a preheated 350F oven for 30-35 minutes or till a thermometer places into middle of loaf reads 180F-190F. Remove from oven and allow to cool on a wire rack.


This bread is sourced from CookingBread.com and we have been given full permission from Chuck to feature the recipe and publish it to our blogs. He is in the middle of switching over his website to a new one, so links may be updated before the publishing date.
http://www.cookingbread.com/recipes/savory_bread/beer_bread_recipe.html

Friday, March 16, 2012

Bread Baking Babes: Swedish Rye

It's that time of the month again. The Bread Baking Babes have been in the kitchen again and this month, our host kitchen Astrid at Paulchen's FoodBlog gave us a fabulous hearty bread for the cold month of February, Swedish Rye.


I'm a sucker for all rye breads. If you had to ask me what is your favorite bread, I wouldn't hesitate to say OH rye. I love the little pumpernickel loaves we see around the holidays here in the US with a bit of a ham and mustard. There is nothing in this world like a big pile of pastrami piled high on a thick slice of Jewish rye bread from a deli in NYC. I love rye bread toasted and spread with marmalade and a cup of tea.

Swedish Rye w orange marm

In keeping with the new me and because when I made this bread, I was a little "ingredient challenged", I made a few changes to the recipe to suit my needs.

I halved the recipe. I didn't use the anise seeds as I had used all mine for some other bread. But, the biggest was I didn't have enough honey to make the bread AND have honey on my peanut butter sandwiches for my golf bag for the week that was ahead, so I used a mix of molasses and honey.

Things I noticed about the recipe: It took a very long time to get the dough to come together, almost 20 minutes of mixing/rest/mixing in a bit more flour/rest. I expected this because of the amount of rye flour in this recipe. Rye flour tends to absorb liquid slowly.

But if you haven't baked with rye a lot (I love rye and used to bake rye bread all the time before the "new me") don't think because it looks like it will need a bunch more flour after a few minutes of mixing and/or kneading, you do. If it looks like it still needs flour after 4 or so minutes of continuous mixing. Let it rest for a few minutes and if it is still really wet, loose, shaggy, or tacky, add a little more of the whole wheat flour the recipe calls for.

The dough was very tacky after I kneaded it but again, after resting for about 5 minutes I had the nice dough ball the recipe describes.

Swedish Rye Dough

It took 80 minutes to bake to an internal temperature 200 degrees. The recipe doesn't call out a temp but my experience with rye breads is that if you don't get the internal to 200 degrees, the bread will be just barely baked inside or even still doughy. So, check your bread temps along with the time.

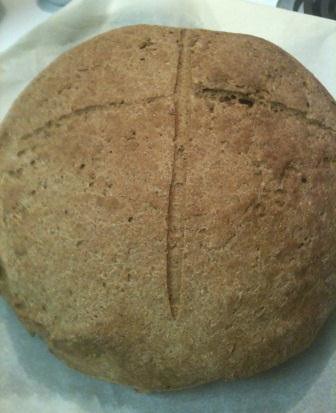
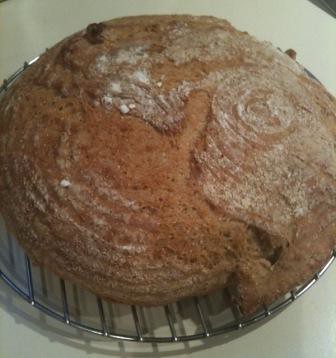
This is what my boule looked like when it came out of the oven

Swedish Rye Boule

I LOVE this bread. It was fantastic tasting, the right combo of caraway with the citrus of the orange. I loved it so much after having a slice with marmalade the morning after I baked it, that I ventured out in 21 degree temps (Brrrrrr) to get a corned beef brisket to make for dinner that night just so I could make Rueben sandwiches all the next week.

In the land of rye breads, this one is a keeper...

To bake along with the Babes this month and be a Buddy, bake the Swedish rye, blog about it or post it to your facebook page, or any other place you want to post it to and contact Astrid via her email with a link to your post. She'll send you nice badge to put on your post.


Swedish Rye Bread
adapted from Tassajara Bread Book by Edward Espe Brownhttp://www.blogger.com/img/blank.gif

1.
3 cups lukewarm water
1 1/2 tablespoons dry yeast (2 packets)
1/3 cups honey
1 cup dry milk
grated peel of 2 oranges
2 teaspoons anise seeds
2 teaspoons caraway seeds
4 cups unbleached white flour

2.
4 teaspoons salt
1/4 cup oil
4 cups rye flour
1 cup whole wheat flour (for kneading)

Method:


  1. Dissolve the yeast in water. Add the honey and dry milk plus the oranges and seeds
  2. Add the flour to get a thick batter.
    Add one cup of flour at a time, stirring good after each addition. The more flour you add the more you knead to go into a beating mode with your spoon. Best way is to stir up and down in a circular mode from the bottom of the bowl to the surface of the dough. Don't forget to scrape the sides of the bowl from time to time. After the 4 cups of flour you should have a thick mud-like dough.
  3. Beat well with a spoon (100 strokes).
    Continue to beat until you have a smooth dough. Again pull your spoon under the dough and bring it up to the surface again in a circular mode. The batter will be more elastic while you are doing this as more and more air gets incorporated.
  4. Let rise for 45 minutes.
    Cover the bowl with a damp towel and let rise in a warm place.
  5. Folding in the remaining ingredients. Do not stir! Do not cut through the dough, this will improve the elasticity and strength of the dough.
  6. Sprinkle on the salt and pour on the oil. Stir around the side of the bowl working carefully your way towards the center. Rotate your bowl a little with every stroke you do. Repeat until all of the salt and oil is incorporated.
  7. Sprinkle the flour 1/2 a cup at a time onto the dough. Again fold it in while rotating your bowl.
  8. Continue until the dough comes away from the sides of your bowl. Now the dough is ready to give it a good knead!
  9. Plop your dough on your kneading board and scrap all remainings from the bowl onto the dough. Keep in mind that your surface should be floured enough to prevent the dough from sticking to much on the board.
  10. Flour your hands and the top of the dough. From the middle of your down stretch it away from you and then fold it back onto the remaining part of the dough. Continue to push down and forward.
  11. Turn the dough a quarter turn. Again continue with the pushing and folding.
  12. Turn, fold, push. Rock forward. Twist and fold as you rock back. Be careful not to stretch the dough too much and tear it. Add flour to the boards as needed.
  13. While you continue with the kneading the dough will become more and more elastic, smooth and shiny.
  14. When you are finished, place the dough in your lightly oiled bowl smooth side down, then turn it over so the dough ball is covered lightly with oil. This will prevent the dough from forming a crust on the top while rising.
  15. Cover the bowl with a damp towel again and set aside to rise in a warm place. (50.60 minutes until doubled in size)
  16. Punch down your dough with your fists steadily and firmly about 15-20 times.
  17. Let rise again 40-50 minutes until doubled in size again.
  18. Preheat your oven at 350°F.
  19. Turn your dough onto the board again.
  20. Form the dough into a ball. Cut the dough into two even pieces and form smaller balls again. Let rest for 5 minutes.
  21. Knead the dough and fold it about 5 times, this gives the dough added spring. After the final push turn the dough a quarter turn.
  22. Roll up the dough into a log shape. Seam at the bottom, flatten the top of the dough. Square the sides and ends. Turn the dough over and pinch the seams all the way.
  23. Put the dough seam side down into your pan. Press it down into the pan with your fingers.
  24. Cover and let rise again. This will take 20-25 minutes.
  25. Cut the top with 1/2 inch deep slits to allow the steam to escape.
  26. You and brush with eggwash and sprinkle with poppy seeds or sesame if you want!
  27. Bake for about 50-60 minutes.
  28. Remove from pan to cool down completely.

Thursday, February 16, 2012

Bread Baking Babes: Biscotti Picanti

The Babes are back!

And not only are we back but this month we are celebrating four fabulous years of sharing a kitchen and yeasty classroom together. I can't believe I've been with this incredible group of women baking breads. Even more so, I can't believe that they've kept me around for four years.

To celebrate this milestone, we are making a really unique bread, courtesy of host kitchen, Lien of Notitie van Lien, Biscotti Picanti


I was fascinated by this bread. I had never heard of rusks and after the Babes that share the back bench of our little haven educated me, I was excited to give these try.

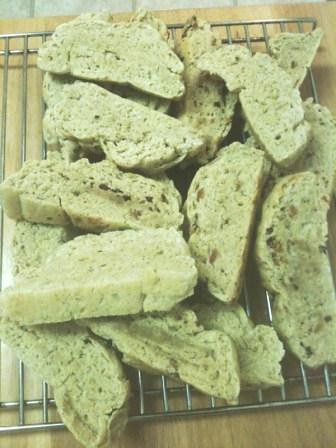
The dough was really easy to make and it makes so much, I divided it into two and made two different versions: Roasted Garlic with Sea Salt and Bacon Cheese.

Biscotti Picanti

I really like both but if I was to make these again, I'd just make a big batch of the roasted garlic and sea salt. They were perfect as the backdrop for cheese and cured meats but really good on their own.

To bake along with the Babes this month and be a Buddy, bake the Biscotti Picanti, blog about it or post it to your facebook page, or any other place you want to post it to and contact Lien via her email with a link to your post. She'll send you nice badge to put on your post.

Also, if you do blog or post somewhere else about this fantastic bread please place a link to incredibly gracious Anissa Halou's Blog. She was so sweet to let us blog about her recipe and re-post it verbatim (A refreshing attitude in the land of food blogs). While your at it, go visit her blog because it is full of fabulous photos and food.


Biscotti Picanti (Sicilian Spicy Rusks)
(makes about 36 rusks)

2 ¼ tsp active dry yeast (1 package = 7 grams)
60 ml warm water
1 ⅔ (± 225 g) cups AP-flour (+ extra for kneading and shaping)
1 ⅔ (240 g) cups semolina flour
¼ cups (25 g) aniseed
3 TBsp (28 g) white sesame seeds
1 tsp salt
1 tsp freshly ground black pepper
½ cup + 2 TBsp (150 ml/130 g) extra-virgin olive oil (+ extra for greasing the bowl)
¼ cup (60 ml) dry white wine
115 ml water

1. Dissolve the yeast in ¼ cup/60 ml warm water and stir until creamy.

2. Combine flours, aniseed, sesame seeds, salt and pepper in a large mixing bowl and make a well in the center. Add the olive oil in the well and rub into the flour with your fingertips until well incorporated.

3. Add yeast, wine and ½ cup (115 ml) warm water en knead briefly to make a rough ball of dough. Knead this for another 3-5 minutes or so. Cover and let rest for 15 minutes.
Knead for another 3 minutes until the dough is smooth and elastic. Shape into a ball and let rise in a lightly greased bowl, covered with greased plastic, for 1 hour in a warm place (or until doubled).

4. Divide the dough in 3 equal pieces and shape each piece into a loaf about 12”( 30 cm) long.
Transfer the logs to a baking sheet lined with parchment paper and leaving at least 2 inches/5 cm between them so they can expand. Take a dough cutter (or sharp knife) and cut the loaves into 1 inch/2,5 cm thick slices (or if you prefer them thinner in 1"/1 cm slices). Cover with greased plastic and let the rise for about 45 minutes.

Meanwhile preheat the oven to 500ºF/260ºC.

5. Bake the sliced loaves for 15 minutes, until golden. Remove from the oven and reduce the temperature to 175ºF/80ºC.
Separate the slices and turn so that they lie flat on the baking sheet. Return to the oven and bake for about 1 hour more, or until golden brown and completely hardened (if not totally hardened, return to the turned off oven to let them dry more).Transfer to a wire rack to cool.
Serve at room temperature, or store in an airtight container for up to 3 weeks.Link

(source: “Savory baking from the Mediterranean” - Anissa Helou)

Wednesday, January 18, 2012

Bread Baking Babes: Bring on the Cuban and Pork

This month, the Bread Baking Babes got a little revolutionary with the choice of bread when we made a soft sandwich bread from Cuba.


Ilva from Lucullian Delights is our host kitchen and the recipe can be found here. It is from Bernard Clayton's "New Complete Book of Breads".

It is wicked easy to make and the really cool thing is the bread is baked from a cold start oven.

I paired this fantastic bread with pulled pork and coleslaw.

The pulled pork recipe is a family recipe and is made in the crockpot. The coleslaw recipe is one I found several years ago and I've modified it to make it "healthy" (no mayo or sugar).

If you want to be Bread Baking Babe Buddy,send Ilva the link to your blog post about it before midnight Saturday 28th of January to luculliandelights AT gmail DOT com, please write Bread Baking Buddy a the subject so Ilva doesn't miss it for her round up.

Sunday, July 24, 2011

Bread Baking Babe-orama

What's this?

Typing??

Here??!!

Why, yes it is typing here!

And not only is there typing here but this is the beginning of me blogging with some regularity again. I'll go into my whereabouts, my reasons behind my taking such long blogging break, what is new in my life and how those new things are going to effect what happens here at The Sour Dough in a future post.

But for now, I have some long outstanding posts about the past two breads my lovely and understanding Bread Baking Babes (Karen, Elizabeth, Elle [Pat], Gorel, Sara, Natasha, Ilva, Tanna, Lien, Astrid, and Susan) have already posted about. I guess this makes me the Bad Babe in the Corner sent to the back bench of our classroom without her supper or her bottle of scotch.

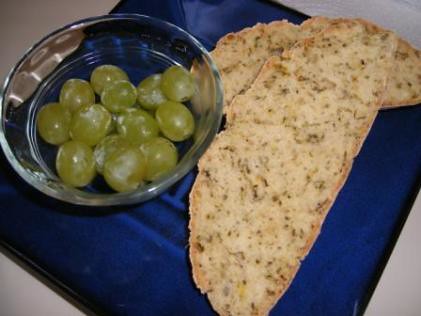
In June, Ilva presented us with the recipe for the most fantastic soda bread I've ever made! Ballymaloe White Soda Bread with Herbs

BBB logo June 2011


I hate to say it but saying this was the best soda bread I've ever had includes my long kept family recipe of my great grandmother Sarah Kate Burgess of County Wexford in Ireland AND Michigan.

I made this bread when my mother was visiting.

Bread Baking Babe Ballymaloe White Soda Bread with Herbs

It was so easy and quick to make that I made it for an afternoon snack on the day she arrived. We took the leftovers with us when we visited the Vanderbilt mansion in Hyde Park, NY

Vanderbilt Mansion

to have as a picnic dinner in the garden.

Mom in garden

The deep purple iris

iris

and white waterlilies

waterlily

made a lovely backdrop to our light dinner

Bread Baking Babe Ballymaloe White Soda Bread with Herbs sliced (YUM!)

of soda bread, fruit, cheese and of course wine!


This past month, July, Sara gave us the freedom to make hamburger buns any way or shape we wanted to using a recipe from Williams Sonoma.

BBB logo July 2011

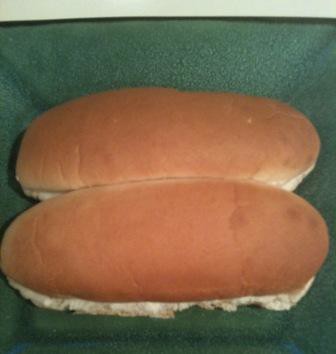
For my birthday in June, my brother and sister in law sent me a gift card to King Arthur Flour and I used it buy a pan to make homemade hot dog buns. I hadn't had a chance to use it yet but Sara's recipe was too much to resist.

BBB Buns from the pan

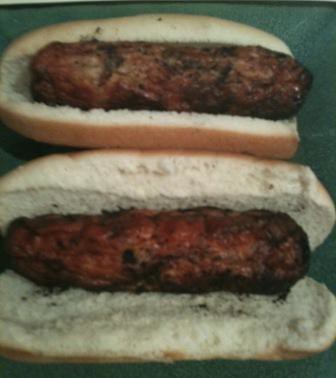
After making my own hot dog buns, I don't think I'll ever buy them again. I've become addicted to turkey Italian sausage. I've been grilling it on my new grill at least two times a week. These buns are the perfect compliment to them.

Bread Baking Babes Williams Sonoma Hamburger Buns

I've made them at least three times this month and even made the buns using whole wheat flour last week. This recipe is a keeper.

I'm afraid it's too late to be buddy for either of these breads but I really suggest you give them a try. You won't be sorry.

Thanks Babes! I promise to try and be a better Babe for the rest of the year...


White Soda Bread with Herbs
from The Ballymaloe Bread Book by Tim Allen

1 loaf

450 g/1lb plain white four
1 level teaspoon salt
1 level teaspoon bread soda, finely sieved
1 dessert spoon each of rosemary, sage and chives, all freshly chopped
400 ml/ 14 fl oz buttermilk

Heat up the oven to 230 degrees C/450 degrees F

Sieve the flour, salt and bread soda into a large, wide mixing bowl. Add the freshly chopped herbs to the dry ingredients.

Make a well in the centre. Pour most of the milk into the flour. Using one hand with the fingers open and stiff, mix in a full circle drawing in the flour from the sides of the bowl, adding more milk if necessary. The dough should be softish, not too wet and sticky.

The trick with all soda breads is not to over-mix the dough. Mix the dough as quickly and as gently as possible, keeping it really light and airy. When the dough comes together, turn it out onto a well-floured work surface. Wash and dry your hands.

Gently roll the ball of dough around with floury hands for a few seconds, just enough to tidy up. Then pat it gently into a round, about 5 cm/2 in high.

Place the dough on a lightly floured baking sheet. With a sharp knife cut a deep cross in the middle of it, letting the cuts go over the sides of the bread. Then prick the four triangles with your knife: according to Irish folklore this will let the fairies out!

Put this into your preheated oven for 10 minutes, then turn the heat down to 200 degrees C/400 degrees F for a further 25 minutes, or until cooked. When the bread is cooked it will sound hollow when tapped.


Homemade Hamburger Buns
from Williams-Sonoma

1 1/2 cups (375 ml) milk
8 Tbs (1stick/125 g) unsalted butter, cut into 8 pieces
4 1/2 tsp active dry yeast
4 cups (625 g) all purpose flour, plus more for dusting
5 Tbs sugar
1 Tbs kosher salt
1 egg beaten with 1 tsp water
sesame seeds for sprinkling (optional)
In a small saucepan over medium heat, combine the milk and butter and heat until the butter is melted, about 7 minutes. Remove from the heat and let cool to 105-155'F (40 to 46'C). Add the yeast and stir until the yeast is dissolved. Let stand for 10 minutes.

In the bowl of a stand mixer fitted with the dough hook, combine the 4 cups of flour, the sugar and salt and beat on low speed until combined, about 30 seconds. Add the milk mixture and knead until the dough forms a ball, about 1 minute. Increase the speed to medium low and knead until the dough is smooth and elastic, 4 to 5 minutes. Remove the dough from the bowl, oil the inside of the bowl and return the dough to the bowl. Cover tightly with plastic wrap and let the dough rise in a warm place until doubled in volume, about 1 hour.


Line a baking sheet with parchment paper. On a lightly floured work surface, roll out the dough into a 10 by 7 1/2 inch (25 by 19 cm) rectangle. Using a ruler as a guide, cut the dough into 2 1/2 inch (6cm) squares. Transfer to the prepared baking sheet, spacing the buns evenly apart, and cover tightly with plastic wrap. Let rise in a warm place for 30 minutes.


Preheat oven to 400'F (200'C)


Remove the plastic wrap from the baking sheet. Brush the tops of the buns with the egg mixture (I brushed the tops with milk) and sprinkle with sesame seeds if using. Bake until the buns and golder and an instant read thermometer inserted into the center of a bun registers 190'F (88'C), 14 to 16 minutes. Transfer the buns to a wire rack and let cool completely. Cut in half and use as hamburger buns. Makes 12 hamburger buns.


For slider buns: Follow the instructions above but roll out the dough into a 9 inch (23 cm) square. Cut into 1 1/2 inch (4cm) squares and place on 2 parchment lined baking sheets. Cover tightly with plastic wrap and let rise in a warm place for 30 minutes. Position one rack in the upper third of an over and one rack in the lower third and preheat to 400'F (200'C). Brush the tops with the egg mixture and sprinkle with sesame seeds if using. Bake for about 14 minutes, rotating the baking sheets from top to bottom and 180 degrees halfway through baking. Makes 36 slider buns.

Wednesday, February 16, 2011

A Babeiversary: Three Years of Breads, Bitchin' and Buddies

Well, well, well...

How time flies when you're having fun with twelve plus crazy women all wearing embroidered panties and aprons, up to your elbows in wet dough, wine, scotch, brandy, and the King Arthur flour catalog; not to mention changing jobs/careers (Karen, Gretchen, Sara, me), having a baby (Sara), getting married (Gretchen), becoming a grandmother (Tanna x 2, Lynn), losing a spouse (me), losing a beloved pet (Natashya, Katie), losing a sister (All of us when we lost Sher), losing our minds (all of us from time to time), moving homes (Gorel, Gretchen, Sara, and me), building a house in the Northern Michigan woods (Tanna), building a house in France (Katie), remodeling a house (Karen), building a brick oven in the backyard (Susan). Well, you get the picture...

In the past three years this little band of sisters has done a lot both in the kitchen and out of the kitchen but the one constant has been every month since February 2008, a bread has been baked in most of our ovens.

We've had some fantastic successes with the Royal Crown Tortano, Poilane style Miche, Challah, Asparagus Bread, Potato Bread with Chives, and Sweet Portuguese Bread. We've had some challenges with the Crocodrillo, Russian Black Bread, Gluten Free No Knead Hearty Seeded Sandwich Bread, and the Yeasted Sprouted Wheat Bread. We've experienced international breads many of us had never tried or heard of with Ethiopian Injera, Sukerbolle, Sukkar bi Tahin, and Broa (Portuguese Corn Bread). We've had fun shaping with the Yule Wreath, Tanta Wawa, Viennese Striesel, and the Cornucopia.

To celebrate the Babes three year anniversary, I took advantage of a few down weeks at home in my Connecticut kitchen to pick one bread from each of the three years to make again or in the case of the last one, for the first time.

3 yr badge

During our first year, the one bread that struck fear in the hearts of all us and still sends shivers down the spines of my sisters was the uber-wet dough Crocodrillo.

Croc

This bread not only was the wettest dough we've tackled to date (and tackling is the operative word when you are chasing dough off the end of the counter) but it also ended up one of the most satisfying when you got it right and out of the oven. The taste and the texture with the crispy, chewy crust and the large holes in the dough made all the cursing, crying, and pleading worth it.

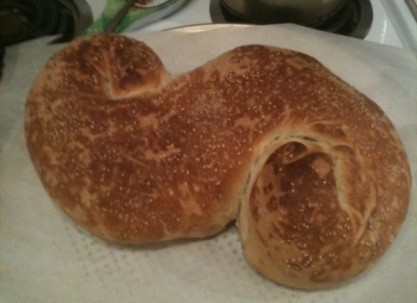
In the second year, we made a bread sold on the streets of Beirut, the Sukkar bi Tahin. It surprised me when I sat down to pick the three breads that I was going to make for this post that this one kept popping up to the top of my mind. I wasn't a huge fan of the bread when I made it in July 2009, mainly because I'm not a big fan of tahini except in hummus. But when I made it this time I was blown away by how wonderful the bread was. I did stray from the recipe by shaping the dough into one large serpent shaped loaf but the result was stunning.

tahini

My office mates were also impressed because exactly ten minutes after I announced at the Monday morning project meeting the bread was on the cutting board in the kitchen, the last piece was consumed.

In the third year of Babe breads, I have to admit there are several breads I missed baking owing to job schedules and some other life changes (i.e. golf), I left our collective kitchen to go on hiatus. So, I decided to bake one of the breads I missed for this anniversary post. Having been itching to use my brotform for several months, I decided the dough and bread from 2010 that best suited the wicker shape was the Broa: Portuguese Corn Bread.

corni

Like my revisit to the Sukkar bi Tahan, this bread surprised me with how much I loved it. It reminded me in taste and texture to my beloved Anadama bread. I admit, I ate about half the loaf at various meals before I finally took the remaining loaf into the office. It too was devoured by my fellow workers and already, I'm hearing rumbling to make it again. It won't be hard to twist my arm in that regards.

Of all the things the past three years that we Babes have enjoyed it has been inviting you, our readers (if I have any left) into our collective kitchen every month as Bread Baking Buddies.

So, this month there isn't a single bread that we are baking and inviting you to bake with us but rather there are thirty-seven! That's right, if you would like to help us celebrate three years of Babe Bread Baking, we would like you to select one of the breads in the below to bake, blog about and then email our host kitchen, our founder and den mother, Tanna (My Kitchen in Half Cups) with a link to your post by Feb. 29. She'll email you a little something-something for your blog!

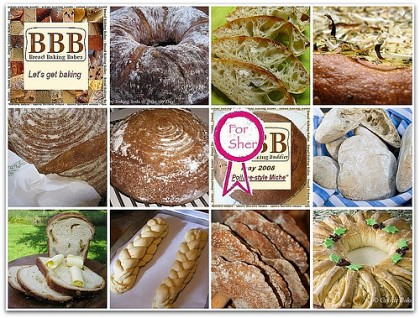
BBB Breads 2008 Collage
2008 (from left to right) February: Karen Royal Crown Tortano (in Dutch) and in English:
March: Lien Coccodrillo
April: Tanna Sullivan Street Pizza
May: Sher - Poilane-Style Miche
June: Mary Breadchick's Dark Onion Rye
July: - in memory of Sher who passed away July 20 2008; this month we made something from her blog, something that reminded us of the warm and witty personality Sher was. The news of her passing shocked us. She is our Angel Babe.
August: Ilva Whole Wheat Pita
September : Monique Sûkerbôlle
October : Sara Challah
November: Görel The Rosendal Crisp Bread
December: Lynn Yule Wreath

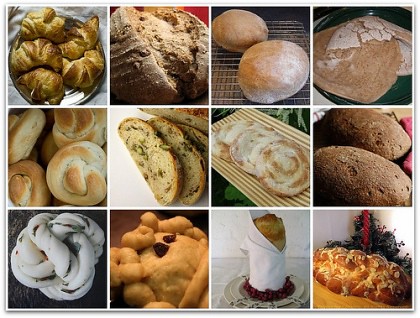
In our second year, the loaves of 2009;
BBB Breads 2009 Collage
2009 (from left to right): January Katie Croissants
February Tanna Pane ai Cinque Cereali con Nod (Five-Grain Bread with Walnuts)
March Sara Pane Francese
April Mary Ethiopian Injera
May Ilva Pane di Pasta Tenera Condita (Italian Knot Bread)
June Lien Asparagus Bread (in English and Dutch)
July Natashya Sukkar bi Tahin (Beirut Tahini Swirls)
August Görel Russian Black Bread
September Karen Chinese Flower Steam Buns
October Gretchen Tanta Wawa (Peruvian Bread Babies)
November Monique Brioche Mousseline
December Katie Viennese Striesel

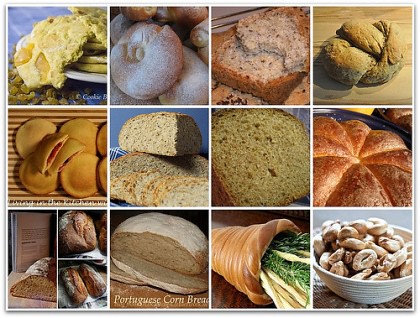
And our third year 2010;
BBB Breads 2010 Collage
2010 (from left to right) January Lynn Curried Naan
February Karen Ensaimada
March Mary Gluten Free No Knead Hearty Seeded Sandwich Bread
April Sara Potato Bread with Chives
May Natashya Tunisian Spicy Breads
June Lien Korni (in English and Dutch)
July Lynn Yeasted Sprouted Wheat Bread
August Tanna Sweet Portuguese Bread
September Görel Brunkans Långa
October Elizabeth Broa: Portuguese Corn Bread
November Susan Cornucopia
December Ilva Taralli Pugliesi

And finally, just this past month


2011
January: Astrid Hildegard's Spelt Bread


Now, I'm going to get a little sappy here so you might want to go grab a box of tissue. I want to take a few words to thank my Babe sisters for all the love and support of the past three years while I've made some major life changes including leaving the kitchen to pursue a dream of mine, to work on my golf game and get good enough to play serious competitive golf. You each have been so supportive of me and kept my spot on the back bench warm, a bottle of my Macallan 25 taped under the bench, sent me well wishes when I've been competing and helped pick me up when I've failed. I know I won't be joining you every month in the upcoming year but I also know that when I drop into the kitchen and the classroom from time to time, you will welcome me back with open arms. Ladies, may your yeast always bloom, your flour always stay dry, and your loaves always rise.

To go see what my Sisters, The Bread Baking Babes did this month to celebrate three years, go visit their blogs. You can find them over there on the side bar of this blog.

Tuesday, February 01, 2011

Three Years of Babe Bliss

Three years ago a little email arrived in my mailbox from my dear friend Tanna asking if I would be interested in joining her in an endeavor: find a very small and intimate group of ladies to bake bread, share laughs, tears, drinks and bottles taped to the underside of back benches, and most importantly create life long friendships.

How could I refuse not to join such a group? Especially when Tanna told me we would have custom embroidered panties and aprons...

Just for kicks and giggles and because as I get older, I feel the need to wander down memory lane more and more, let"s revisit the breads the Babes have baked the past three years:

BBB Breads 2008 Collage
2008 (from left to right) February: Karen Royal Crown Tortano (in Dutch) and in English:
March: Lien Coccodrillo
April: Tanna Sullivan Street Pizza
May: Sher - Poilane-Style Miche
June: Mary Breadchick's Dark Onion Rye
July: - in memory of Sher who passed away July 20 2008; this month we made something from her blog, something that reminded us of the warm and witty personality Sher was. The news of her passing shocked us. She is our Angel Babe.
August: Ilva Whole Wheat Pita
September : Monique Sûkerbôlle
October : Sara Challah
November: Görel The Rosendal Crisp Bread
December: Lynn Yule Wreath

In our second year, the loaves of 2009;
BBB Breads 2009 Collage
2009 (from left to right): January Katie Croissants
February Tanna Pane ai Cinque Cereali con Nod (Five-Grain Bread with Walnuts)
March Sara Pane Francese
April Mary Ethiopian Injera
May Ilva Pane di Pasta Tenera Condita (Italian Knot Bread)
June Lien Asparagus Bread (in English and Dutch)
July Natashya Sukkar bi Tahin (Beirut Tahini Swirls)
August Görel Russian Black Bread
September Karen Chinese Flower Steam Buns
October Gretchen Tanta Wawa (Peruvian Bread Babies)
November Monique Brioche Mousseline
December Katie Viennese Striesel

And our third year 2010;
BBB Breads 2010 Collage
2010 (from left to right) January Lynn Curried Naan
February Karen Ensaimada
March Mary Gluten Free No Knead Hearty Seeded Sandwich Bread
April Sara Potato Bread with Chives
May Natashya Tunisian Spicy Breads
June Lien Korni (in English and Dutch)
July Lynn Yeasted Sprouted Wheat Bread
August Tanna Sweet Portuguese Bread
September Görel Brunkans Långa
October Elizabeth Broa: Portuguese Corn Bread
November Susan Cornucopia
December Ilva Taralli Pugliesi

And finally, just this past month


2011
January: Astrid Hildegard's Spelt Bread

Visit back on the 16th of February to see the beginning of the next year....

Monday, August 16, 2010

Bread Baking Babes: Exploring the Portuguese Sweet Side

When Tanna first emailed me with a question about her bread for this month, Sweet Portuguese Bread

BBB logo august 2010

I almost peed my pants with excitement! You see, next to dark rye bread, Anadama bread and the perfect French baguette, there is no other bread in this world I love more than Sweet Portuguese Bread.

You see, I have had an almost 45 year love affair with Sweet Portuguese Bread ever since the first time my Auntie Nora took me to one of the many Portuguese bakeries Fall River, MA to help pick up the rolls for weekends at the summer house on Long Lake.

I remember walking into the bakery with the windows all steamed up from the summer heat, standing in line with all the other ladies from New Bedford, Fall River, Tiverton, and the surrounding communities waiting for our turn, the sweet lady behind the counter who would always give me a roll or cookie to "munch on" while I waited for my Aunt to have her rolls and desserts wrapped. I would then sit in the front seat all the way back to the summer house with a big box of still warm buns in my lap. Those buns were so yellow from the eggs and soft, shiny and melt in your mouth good.

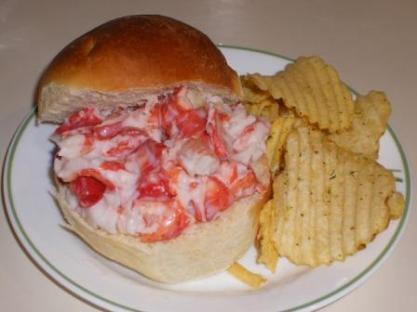
We would have those rolls with fresh chunks of lobster in a light mixture of mayonnaise and lemon juice while sitting out on the back deck watching the sun go down over the lake and further out the distance the Atlantic Ocean.

The recipe that Tanna had us follow was an almost perfect match for those sweet rolls I remember from my childhood summers. The rolls I made from the dough (sorry Tanna, I wanted to be 10 again) were sweet without being over sweet like so many recipes for Sweet Portuguese Bread I've tried in the past. They were soft inside with a firm, slightly chewy crust that was dark brown, leading to a nice contrast to the yellowish insides.

I also strayed from the recipe by not marking the tops of my buns or long rolls like Tanna's recipe, again wanting to recreate the rolls of my childhood. Because you see, I had a special plan for my rolls of Sweet Portuguese Bread. I wanted lobster rolls.

There is a lobster pound down the street from my apartment where the lobster boats from Long Island Sound come in and off load their catch for the area restaurants.

lobster boats

This morning, on my way to my coffee shop, I stopped by and spoke with one of the guys on the boat about buying a lobster from them. He said to come back at 3pm when they were back and the restaurants had picked up their catch and if there was an orphan or "damaged" lobster, it was mine.

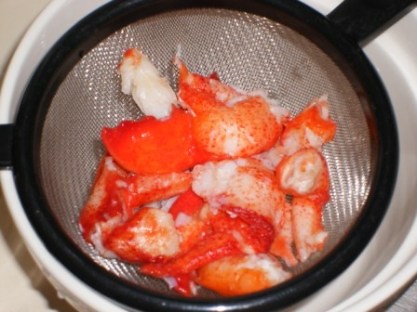
At 3:35pm this after a 1 1/2lb lobster found its way into my kitchen and into my steaming pot and about 12 minutes later I had a lovely pile of lobster meat.

lobster

While the lobster was cooling, I formed four round rolls and four long rolls from the dough that had been rising all afternoon and put them in my oven/proofing chamber for their final rise. After the rolls had baked and cooled,

portugese sweet bread

I pulled the lobster meat from the fridge, dressed it with a tablespoon of mayonnaise and squeeze of lemon.

I piled the lobster meat onto a sliced round roll, put a handful of Herr's Creamy Dill potato chips on the plate

lobster roll on sweet portuguese bun

and sat down to watch the final few holes of the 2010 PGA Championship. I could almost see the back deck of my Auntie Nora's when I bit into the lobster roll...

If you want to see what my fellow Babes did with their Sweet Portuguese Bread go visit the blogs over there on my side bar. You'll notice a few new names there too! Last month we welcomed four new Babes, Astrid, Elizabeth, Elle, and Susan to our ranks to help keep our group lively. You'll also notice that a few of us are on hiatus: Gretchen, Katie, and Monique. They will still join us from time to time to bake when their hectic lives allow. I'm trying to be a better Babe and bake more often as my crazy schedule allows as well.

If you want to be a Bread Baking Buddy, you can bake this fantastic tasting bread, post about it by August 29, and email Tanna, our Kitchen of the Month with a link to your post. She'll email you a nifty badge for your blog and include you in her round up.

Sweet Portuguese Bread
Note: Requires an overnight sponge


Ingredients
Over night SPONGE
72 grams bread flour
2 1/4 teaspoons osmotolerant yeast (instant worked just as well too)
114 milliliters potato water, or whey or water (potato water or whey really make it extra tender & soft)

DOUGH
6 tablespoons butter, room temp.
30 to100 grams brown sugar
lemon zest
1 teaspoon salt
3 large eggs, room temp.
120 milliliters milk, room temp.
460 grams bread flour, I make approximately1 cup of the 460g whole wheat, you can use all bread flour if you like
2 tablespoons flax seeds, ground

Method
Mix together the sponge the night before baking the bread. Leave sitting at room temp 8 to 12 hours.

Beat sugar and butter until creamy.
Add zest and salt and beat.
Beat in each egg separately and completely; mix will appear curdled.
Stir in milk and sponge.
Stir in 2 1/2 cups flour and beat vigorously (in a stand mixer it would clear the sides of the bowl, by hand lifting the spoon up should stretch the dough about a foot.)
Add remaining flour to make stiff dough. Knead 5 minutes or more to incorporate all the flour:
Dough should be smooth, soft and very supple with a slight stickiness. Looks a little like very thick cake batter or a brioche dough.
Shape into ball, oil bowl and dough ball.
Cover and allow to rise about 2 hours, should almost or triple in size.
Divide into loaves, shaped into balls.
Allow to rest 20 to 30 minutes before final shaping with rolling pin.
See photos for shaping.

For best demarcation of indents be careful to dust dough ball well with flour.


Shape and place into well oiled cake pans seam side down.
Allow to rise an hour to 2 hours; more than double in size.

Brush with egg wash if you want that beautiful glossy finish.

Bake 350°
50 minutes as two loaves
35 minutes as four loaves
mine took less

Brush with melted butter when hot from the oven.


Recipe a combination of recipes found in Tanna's books:
Advanced Bread & Pastry: A Professional Approach by Michel Suas pg 237
The Bread Bible by Beth Hensperger pg 368
A Baker's Odyssey by Gregg Patent pg 221
The Bread Book by Linda Collister & Anthony Blake pg 136
The Bread Baker's Apprentice by Peter Reinhart pg 215