
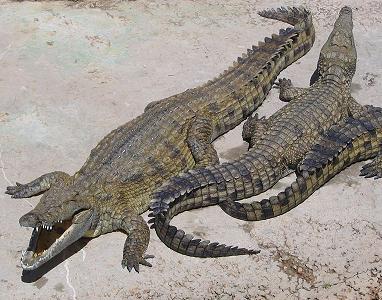
When our Host Kitchen for March, Lien of Notitie Van Lien suggested that we take the skills we learned about handling wet doughs from the Royal Crown Tortano and apply them to a beast named a Coccodrillo, it sounded like it would be challenging but fun. Little did we know we were unleashing a beast that would require more than our skills handling wet dough but would turn some of us into this:

because this bread's 107% hydration dough quickly earned a reputation in our midst of behaving like an angry crocodile
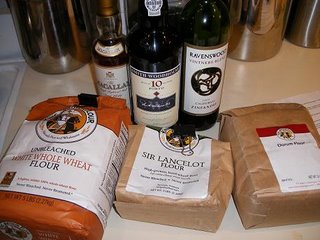
This recipe also brought out loud and clear the differences in flours; not only from country to country but from parts of the same country as well. For example, I couldn't find stone ground flour anywhere while Tanna had no problem. It took two different tries for me to find the right durum flour (started with pasta flour but ended up ordering durum bread flour from King Arthur).
Trying to find the right combination of flours to get this dough to behave brought out the mad flour scientist in us all; along with requiring an adult beverage or two or three to figure it all out.
And trying to tame the "Croc", as we began to lovingly call this bread, also led to some of us making this recipe multiple times. I know I made it four times and I think Tanna made it at least six times! Even Sara and Ilva made it at least twice and don't let them fool you into thinking they aren't bread mavens because they are, even if they blame Tanna and I for corrupting them...
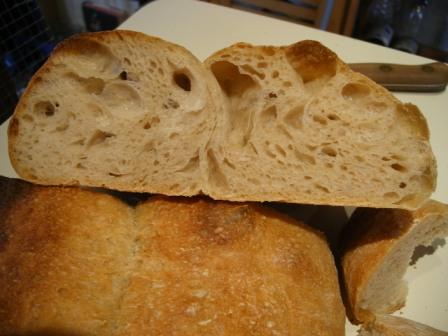
This bread takes two or three full days to make and is comprised of two starters and then a dough. I made it once in 28 hours starting with a first starter when I left for work, the second starter when I got home and the dough/rising/baking the next day. This loaf was the last loaf I made and it was a combination of AP, durum, bread, whole wheat and buckwheat flours. It was tasty but it's crumb was too tight and fine to be a true coccodrillo except in shape.
Other flour combinations I tried included just AP and durum flour, to mimic the flours called out in the recipe. This combination resulted in a soup dough that would not come together. This was my first try at the bread and when I baked it, I got a big blobby pancake that I didn't even take a picture of before feeding it to the squirrels in the backyard. The second try was a combo of AP, white whole wheat with 2 tsp of vital wheat gluten, and the durum flour. This was a better loaf but still didn't have the big holes or the crumb the recipe described. It was like a good focaccia bread versus a full fledged loaf of croc bread.
The winning flour combination for me was the third croc loaves. Here I used a combination of the durum flour, all purpose, white whole wheat, and a bit of high gluten flour (20% durum, 60% AP, 15% white whole wheat, 5% high gluten flour with 14.2% protein). This bread resulted in not only the wet dough that behaved exactly as described in the recipe but also developed the structure and holes we were looking for in a coccodrillo.
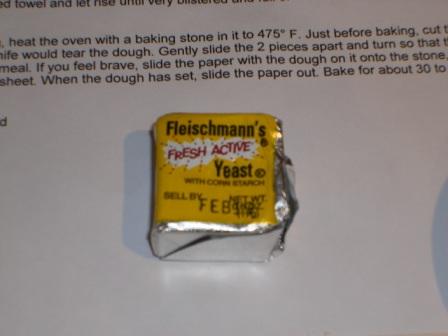
There was something about this bread that encouraged experimenting because I also played with yeast varieties to see if that would result in better bread. For the 28 hour bread, I used instant yeast. I used the called for active yeast for the two tries I liked the least and for the bread I liked the most I used a cake of fresh yeast.
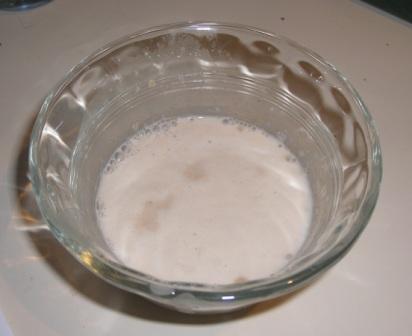
During the http://breadchick.blogspot.com/2008/02/ze-daring-bakers-conquer-french-bread.htmlDaring Baker French Bread challenge, a lot of people seemed to have a hard time telling when yeast has proofed all the way so I thought I'd show how foamy fresh yeast gets when it is proofed.
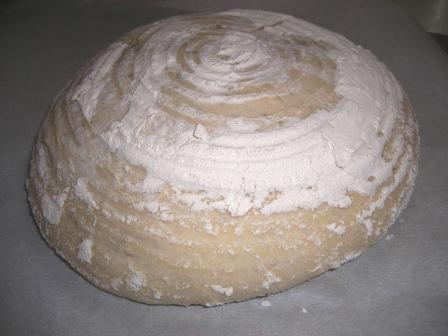
After I had mastered the basic croc or rather gotten comfortable with the dough, I then played with shapes and seasoning too. Like yesterday when I made a herb infused croc shaped in one of my brotforms.
So how exactly does one go about wrangling a crocodile bread?
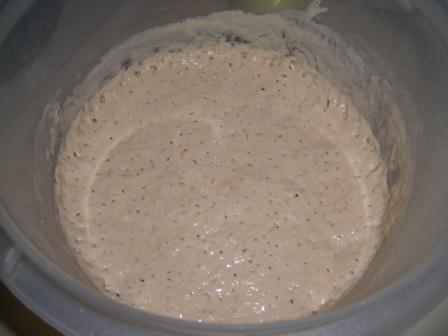
Well you make the first starter with warm water, some yeast, and a bit of durum flour and AP flour. You let this sit from 12 - 24 hours until it is all frothy and bubble filled. Mine also separated a bit with a more glutenous mass on top and liquid under layer.
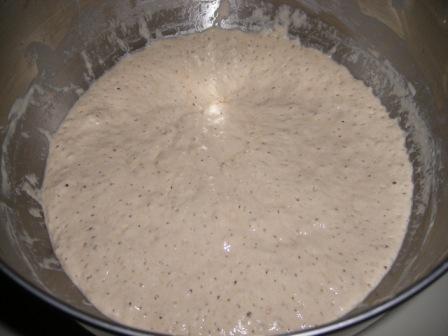
The next day or in the evening of the first day, you make a second starter with more warm water, more yeast, more durum and AP flour, and the first starter. This too sits overnight or up to 24 hours until nice and thick and bubbly.
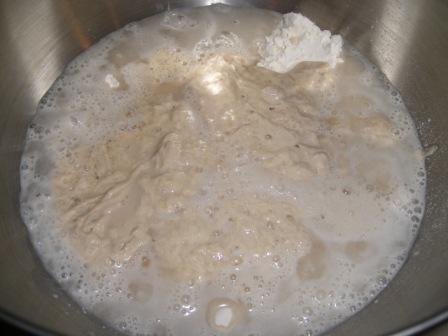
Then you add the rest of the flours (here is where I added the whole white wheat and high gluten flour)
and mix/knead for 17 minutes until you get a mass of dough that comes together while the mixer is running
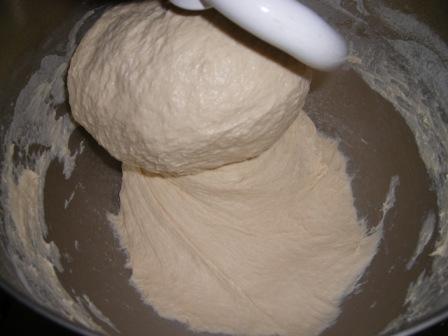
but falls back into a liquid mass when it is turned off
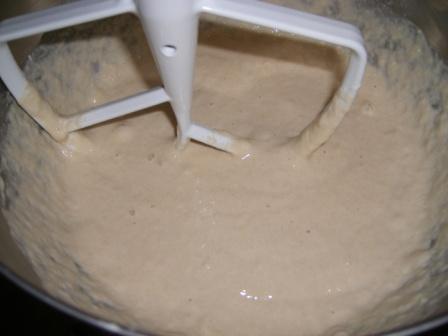
You add the salt and let the bread mix for a few more minutes and then pour the wet mess out onto a very, very well floured counter.

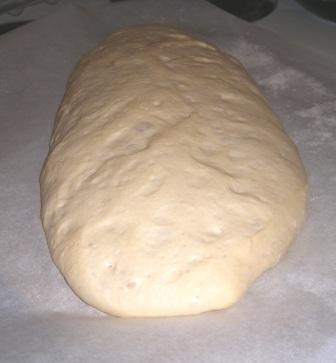
You mash it around a bit and then set it in a large bowl (and you want a large bowl of at least 5 quarts), cover and allow air to circulate around the bowl. After rising until it is triple, you try and corral your dough into the shape of a wide log and place it on a very well floured parchment paper lined baking sheet and then you let it rise until lots of bubbles begin to appear on the surface of the dough.
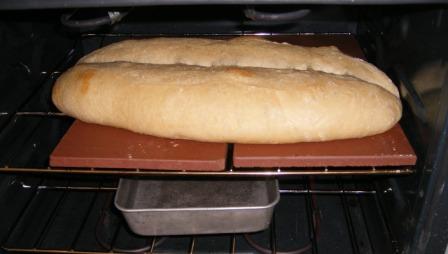
While the croc is in its final rise you will want to put a baking stone or unglazed tiles into the oven and pre-heat the oven to 475 degrees. When the croc is risen, divide it into two long loaves, roll them apart so the slashed insides are not the top, and slide it into the oven on the heated stone or tiles parchment paper and all. When the loaf sets, you can remove the parchment paper and finish baking the croc on the stone or tiles directly.
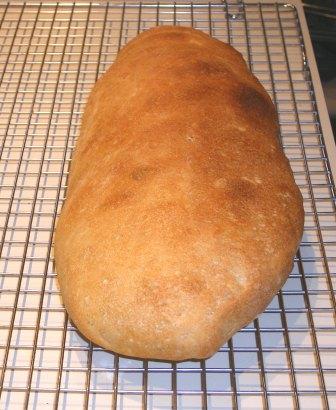
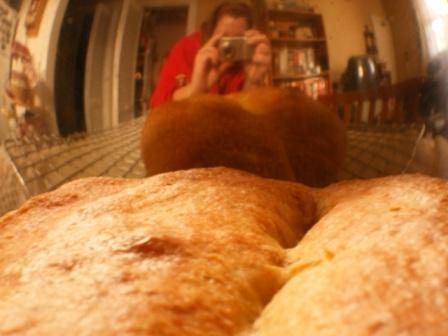
When it comes out of the oven, you will have a golden brown loaf with the dimpled skin of a crocodile. If you look really closely you can see I didn't need a big knife after all but just a trusty digital camera to tame this croc!
Now go visit the rest of my sheila mates, A Fridge Full of Food (Glenna), Bake My Day (Karen), Cookie Baker Lynn (Lynn), I Like to Cook (Sara), Living on Bread and Water (Monique), Lucullian Delights (Ilva), My Kitchen in Half Cups (Tanna), Grain Doe (Gorel), Notitie van Lien (Lien), Thyme of Cooking (Katie), and What Did You Eat (Sher), and check out there crocodile hunting skills.
Also, if you want to join us as a Bread Baking Buddy for this wildlife adventure, go visit our Host Kitchen Lien for the recipe.
Coccodrillo or Crocodile Bread aka The Croc
From: The Italian Baker by Carol Field
Makes 2 large loaves
Breadchick Recommended Flours: Durum Bread flour (from King Arthur), All Purpose, White Wheat, high gluten flour 14% (Sir Lancelot from King Arthur)
This bread, named for its shape, was dreamed up about thirty years ago by Gianfranco Anelli, a baker in Rome. It is his favorite bread and, judging from the numbers of people who come from all over the city to buy it, it may be his most popular as well. At the bakery it takes two days to make; you start it in the morning, work at it again for ten minutes in the evening, and finish the next day. You can also stretch the process over three days because the flavor is even better. Three days may seem formidable, but the working time of the first two days is only 5 to 10 minutes.
This is one dough that you will find difficult to make without an electric mixer, for it requires thirty minutes of continuous stirring for the final dough-of course you could enlist help. The result is an extremely light bread with a crunchy dark-speckled crust and a very chewy interior. The bread stays fresh for an amazing number of days.
FIRST STARTER
1/2 teaspoon active dry yeast or 1/6 small cake (3 grams) fresh yeast 1 cup warm water
1/4 cup (35 grams) durum flour
3/4 cup (90 grams) unbleached stone-ground flour
The morning of the first day, stir the yeast into the water; let stand until creamy, about 10 minutes. Add the flours and stir with a wooden spoon about 50 strokes or with the paddle of an electric mixer about 30 seconds. Cover with plastic wrap and let rise 12 to 24 hours. The starter should be bubbly.
SECOND STARTER
1 1/4 teaspoons active dry yeast or 1/2 small cake (9 grams) fresh yeast
1/4 cup warm water
1 1/4 cups water, room temperature
1/2 cup (70 grams) durum flour
1 1/2 cups (180 grams) unbleached stone-ground flour
The evening of the same day or the next morning, stir the yeast into the warm water; let stand until creamy, about 10 minutes. Add the water, flours and dissolved yeast to the first starter and stir, using a spatula or wooden spoon or the paddle of the electric mixer until smooth. Cover with plastic wrap and let rise 12 to 24 hours.
DOUGH
1/4 cup (35 grams) durum flour
1 to 1 1/4 cups (120 to 140 grams) unbleached stone-ground flour (Or mounded 1/8 cup high gluten, 1/4 cup white wheat, and 1 cup AP for Breadchick combo)
1 1/2 tablespoons (25 grams) salt
BY MIXER
The next day, add the durum flour and 1 cup unbleached flour to the starter in a mixer bowl; mix with the paddle on the lowest speed for 17 minutes. Add the salt and mix 3 minutes longer, adding the remaining flour if needed for the dough to come together. You may need to turn the mixer off once or twice to keep it from overheating.
BY HAND
If you decide to make this dough by hand, place the starter, durum flour, and 1 cup unbleached flour in a wide mouthed bowl. Stir with a rubber spatula or wooden spoon for 25 to 30 minutes; then add the salt and remaining flour if needed and stir 5 minutes longer. The dough is very wet and will not be kneaded.
First Rise. Pour the dough into a Hammarplast bowl or a wide mouthed large bowl placed on an open trivet on legs or on a wok ring so that air can circulate all around it. Loosely drape a towel over the top and let rise at about 70° F, turning the dough over in the bowl every hour, until just about tripled, 4 or 5 hours.
Shaping and Second Rise. Pour the wet dough onto a generously floured surface. Have a mound of flour nearby to flour your hands, the top of the oozy dough, and the work surface itself. This will all work fine-appearances to the contrary-but be prepared for an unusually wet dough. Make a big round shape of it by just folding and tucking the edges under a bit. Please don't try to shape it precisely; it's a hopeless task and quite unnecessary. Place the dough on well, floured parchment or brown paper placed on a baking sheet or peel. Cover with a dampened towel and let rise until very blistered and full of
air bubbles, about 45 minutes.
Baking. Thirty minutes before baking, heat the oven with a baking stone in it to 475° F. Just before baking, cut the dough in half down the center with a dough scraper; a knife would tear the dough. Gently slide the 2 pieces apart and turn so that the cut surfaces face upward. Sprinkle the stone with cornmeal. If you feel brave, slide the paper with the dough on it onto the stone, but the dough can also be baked directly on the baking sheet. When the dough has set, slide the paper out. Bake for about 30 to 35 minutes. Cool on a rack.


