
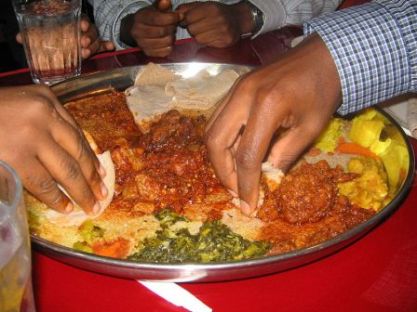
This month the gang gathered around my tiny breakfast bar to find out if we really could make bread without using an oven and remember how much fun it is to eat with our hands!
Because, I picked Ethiopian Injera as our bread
and not only did I make all my fellow Babes find teff flour, make another starter, burn their fingertips before eating with them, but I also made them make a full fledged Ethiopian meal.
How and why did I pick Injera?
I love Ethiopian food, especially the eating method of ripping off a piece of the traditional spongy flat bread, Injera, and then using it to scoop up a some spicy and tasty curries and stews.
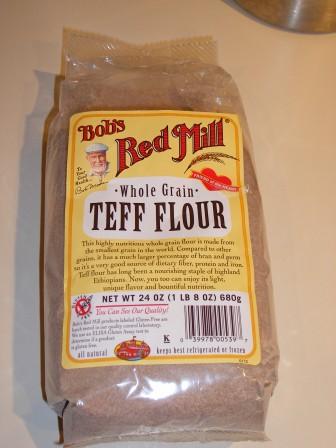
I've always wanted to try to make this at home but everything I had read about it said that it was hard to make because you needed Teff flour to do it right.
So, a few months ago when I saw Teff flour in the Wholepaycheck...um...I mean the Whole Foods I knew I had to try to make it, some day.
And who better to share the fun with than my fellow Babes!!!
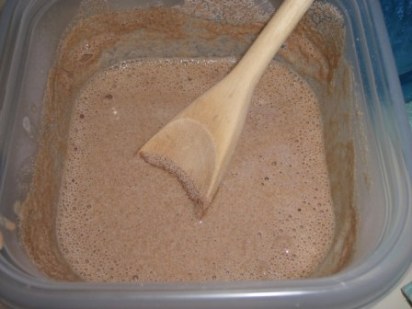
Basically, making injera is a three step process: starter (surprise, surprise), dough, and cooking. Yes I said cooking because you cook Injera on your stovetop. But, before you can get to the cooking you need to first make the starter.
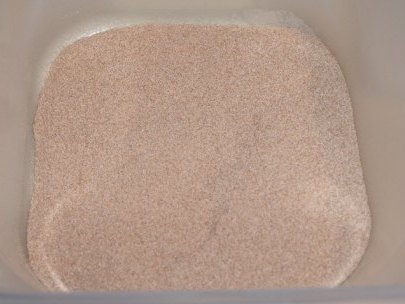
The starter is absolutely vital to the taste and tang that Injera is known for and is made from teff flour, some yeast, and water. The good news here is that you will be using all the starter you make and there is no "tossing off" any of the starter when you feed it. You also only need to feed the starter three times before you can use it and you don't feed it every day. The starter will take five (5) days to be at the right stage to use in Injera.
Warning about this starter, it really has a very unpleasant smell. It is very grassy and earthy while it goes sour. So, if you are super sensitive to smells, get your clothespin out. Luckily, there are only 3 feedings over the 5 days (1st day, 3rd day, morning you want to make the dough).
Making the dough is a half day process. The dough has two ingredients: the teff starter and self rising flour.
If you can't find self rising flour, I'll be giving directions on how to make it from the AP flour you use and some baking powder/soda and salt. You will want to make the dough about 5 - 6 hours before you want to use it. So you will need to do a little pre-planning on the day you want to make this and the meal. This resting of the dough is important to let the "grassy taste" of the Teff blend with the flour and get milder.
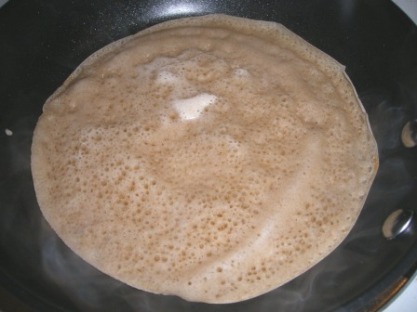
Cooking is super easy. We are making a thick pancake/crepe batter. You cook it just like you would a crepe.
There is a really cool thing that happens after you cook the flat bread too, it doesn't immediately come out spongy. As it cools, it takes on the true characteristic of injera, it gets soft and spongy.

The flavor also gets milder.
To really enjoy Injera, you need to try it with some Ethiopian food.
I'm going to be giving you some recipes in another post tomorrow for a few different dishes to serve with the Injera. Ethiopian food is spicy but there are some dishes that aren't too spicy or can be adapted to not be spicy at all.
Finally, I know there will be questions about if Teff is really necessary. Over the past two months I've made about ten different batches Injera, some using teff but quite a few not using teff. I wanted to see if, by chance, someone could not find teff flour if there was a way to make it without using teff.
Unfortunately, not one of the non-teff flour recipes really turned out with the same texture as the teff injura. While the non-teff flour recipes looked like injera in many ways, they never became the spongy texture that is the true signature of injera. The closest was a rye/spelt/barley combo of flour that behaved like injera in many ways but had a very bready texture and grainy taste.
If you don't have a source for Teff, please reach out to one of us. I know Gorel and Karen found online sources in Europe. Also, Teff is gluten free so if you have a health store in your town or near you, you probably can find it.
One last thing, I wasn't able to find a cookbook dedicated to Ethiopian food so I found some really good online sources and adapted the recipes on them to match the Injera served at Lalibela (New Haven, CT) and Addis Red Sea (Boston) the two Ethiopian restaurants I eat at most often.
To check out all the various injera and to see what my fellow Babes made to go with their injera, go to the links over there on my sidebar under "Bread Baking Babes". I know from the photos and emails of the past month there were some fantastic meals out in Babeland.
I hope all you potential Buddies have as much fun as we Babes have had figuring out how to make this interesting and very unique bread. If you want to be Bread Baking Buddy with us this month, you have until May 9th to make the Injera and serve it with an Ethiopian meal.
When you are finished, email me with a link to your post. I'll email you a badge for your blog showing you were a Bread Baking Buddy for this month. I'll be doing a round up on May 11th. If you don't have a blog, you can still participate and be included in the round up.
Also, check out Yeastspotting at the end of the week! The Babes are always there on our posting week but we often have other yeastie goodness there too hiding amongst Susan's other fantastic participants breads.
Authentic Ethiopian Injera
Adapted from Burakeyae "Blessings" (a blog by a missionary in Ethiopia) and Ethiopian Restaurant.Com
Starter:
This takes five days. If you want to have some starter left over to keep to make injera again, wait seven days.
3/4 cup water, room temp. (70 degrees)
1/2 cup teff flour
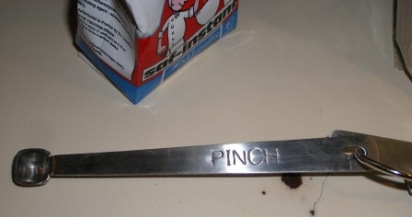
A pinch active yeast (about 1/8 tsp)
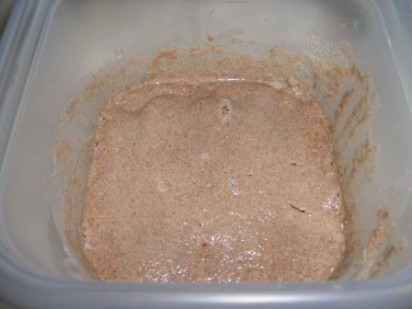
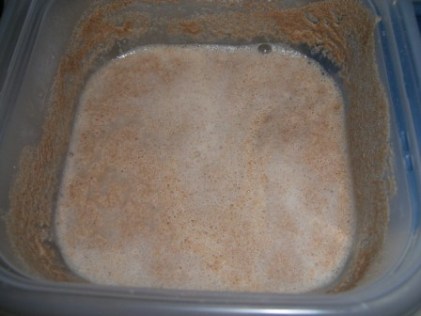
Day 1: Combine ingredients in a 4 cup container with a lid. Loosely cover the starter with the lid and let ferment for two days on the counter or someplace that is about 70 degrees. You should see some rising in about four hours.
Let alone for 2 days.
Day 3: Stir starter, you should notice a grassy yeasty smell and small bubbles should rise to the top.
Feed the starter 1/3 cup teff flour and 1/2 cup water and loosely cover with the lid. Let alone for 2 days.
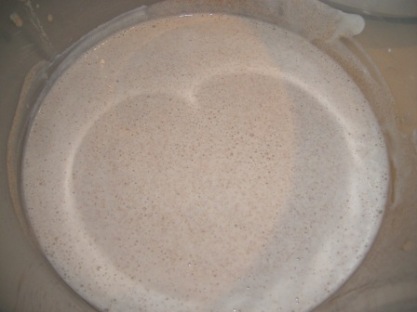
Day 5: Starter should have separated into distinct layers.
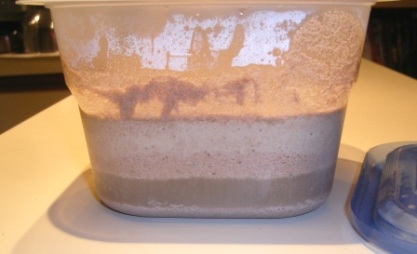
Stir starter, it should be slightly fizzy and have a very strong grassy aroma.
Feed with 1/3 cup teff flour and 1/2 cup water. Loosely cover and allow to sit alone for at least 4 hours before using to make Injera. You should have about 2 cups of starter by now.
Note: If you go to Day 7, follow Day 3 instructions for Day 5. You will have left over starter to make Injera again in the future this way.
Dough:
You will need a blender or food processor for this step. This is to get rid of the gritty feel of the teff flour in the starter. I used both my food processor (pulse with the mixing blade) and my blender. My blender did a better job on getting the grit gone in the starter but I didn't have a failure using the food processor.
2 cups Teff starter
2 cups Self Rising Flour
Room Temp Water (70 degrees F), as needed to make batter right consistancy
Stir the starter to combine in all the liquid and any "starter sludge" at the bottom. Rub a bit between three fingers. It will be very gritty. Place the Teff starter, one cup at at time in a blender or food processor and whiz starter until it doesn't feel gritty when you rub it between your fingers. Place whizzed starter in a large bowl and repeat with the other cup of starter.
Stir in self rising flour and add any water as necessary to get a medium thick batter.
Loosely cover with plastic wrap or a lid and set in a warm, draft free place to rise for about 4 - 6 hours.

Batter/Cooking:
You will need a 8" pan and two large plates: one to cool the cooked Injera and the other to place the cooled Injera on. You will also need wax paper to place between each piece of cooled Injera.
Stir dough mixture. If it is too thick, add more water until the right consistency. You should have about 4 cups of batter
Right consistency for batter Movie: The music playing is Dave Matthews. I forgot to turn down my stereo
Heat on stove on medium heat, a 8" pan. Non-stick works best but if you don't have non-stick, have some peanut or neutral tasting oil in a small bowl and basting brush to brush oil on the hot pan when you cook the Injera.
Using between 1/8 - 1/4 cup of batter, pour into heated pan and swirl around as if making a crepe. Allow Injera to cook until entire top of bread is full of pockmarks.

Do not turn over. Remove when batter is fixed and all the bubbles have popped.
Using your fingers remove Injera from pan, set aside on a plate and allow to cool.
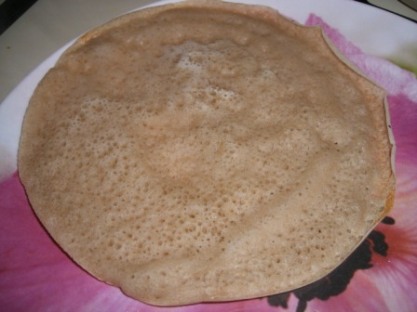
Injera will be stiff when removed from the pan but will get spongy as it cools. Like most crepes, etc the first few may or may not be the greatest.

Place cooled Injera on other plate and place a piece of wax paper between each Injera or they will stick to each other.
Repeat until all the batter is gone. You should get about 20 Injera from the batch. This is enough for 4 Injera to go on the serving platter and under the curries/stews

and to serve 4 people during the meal.
Self Rising Flour Recipe
2 cups AP flour
1 tsp salt
1 Tbsp Baking Powder
Whisk ingredients together. Store in an airtight container until ready to use


