Showing posts with label Sourdough. Show all posts

Saturday, November 20, 2010

Look Who's Back!

After a two month hiatus to work on a few things out of the kitchen, I'm back for a little food blogging while I make some decisions about what the next stage of my life is going to be and where I'm going to be living for that stage.

A few things I've decided like where I want to be living: the Carolinas or southern Virginia. A few things I haven't but I'm working on those and hope to have that figured out by late winter or early spring. So, next year at this time, I'm hoping to be out of New England and happily living someplace where it doesn't snow that often and I can play golf year round.

For the past eight weeks I've been dedicating almost all my free time to improving my golf game. It has been break from blogging I needed and good way to re-center my life around an active and healthier lifestyle.

During my time away from blogging, I hired a fitness coach, swing coach and a nutritionist. I began a regime with a workout in the morning and evening while watching what I ate (cutting out white flour, sugar, etc. which made baking bread a very hard thing to do). I would go to work, go to the driving range and the golf course, and then come home and fall into bed exhausted. The work has paid off, not only am I almost thirty pounds lighter than I was at the beginning of September but I've got a pretty mean golf game these days.

So, now that the cold weather is setting in and besides doing drills on the golf simulator and working with my coaches inside, my time on the course is going to be very limited, I've decided it is time to see if I can find a way to slowly bring back into my life my love of bread making and not lose the good work I've done. The office and my neighbors is going to love me because nothing I'm baking is staying in the house. I'm giving it all away.

Now this doesn't mean that I'm going to be updating every week but what it does mean that I am back in a place in my life where finding a balance and being in the kitchen amongst the baking pans and flour is as much of a place of peace and comfort as standing on the tee box and smacking a 3 wood 180 yards down the center of a fairway.

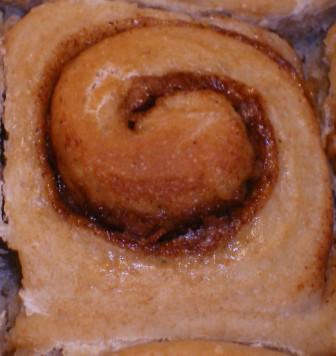
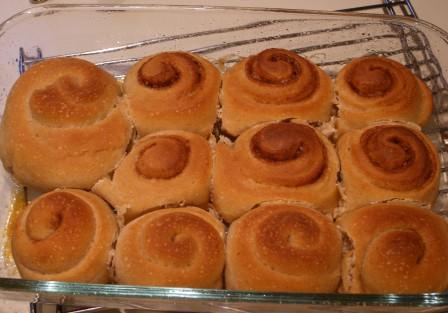
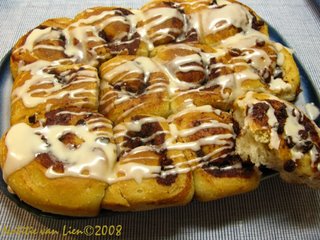
It also means that I'm going to try and find a way to participate a bit more with my sisters, The Bread Baking Babes who this month made the most stunning bread I think we've made, cornucopias.

One of the bread baking items I did purchase while I was away was a Pullman Loaf Pan.

Pullman Loaf Pan

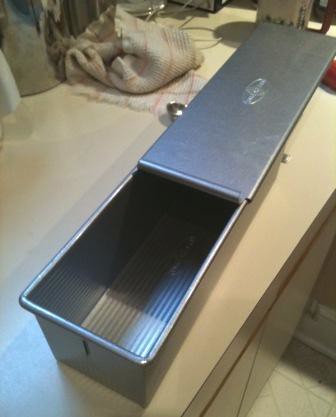
I have been wanting one of these forever because who can resist the perfectly square loaf of soft sandwich bread you bake in these.

Perfect Sandwich Bread

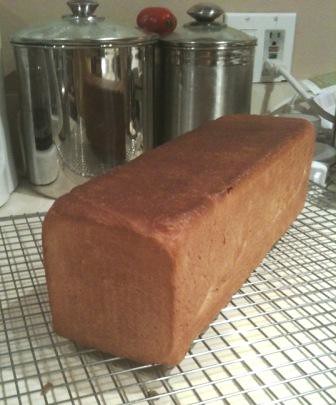
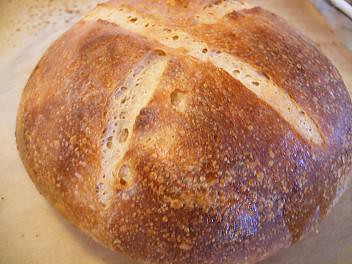
This bread went right into the office with the exception of two slices I used to make a turkey sandwich for lunch.

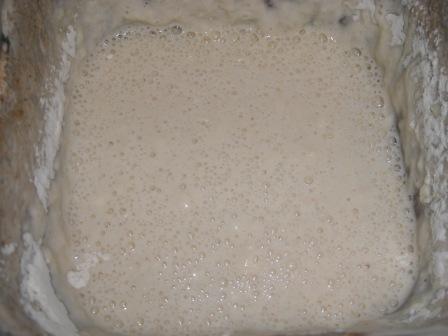
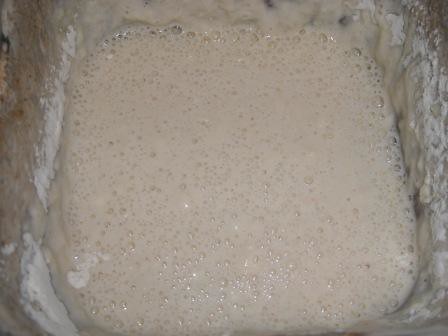
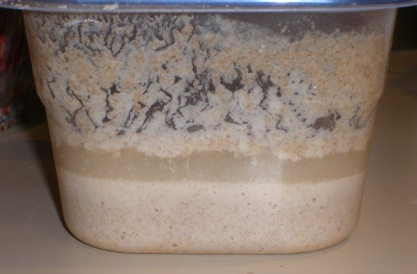
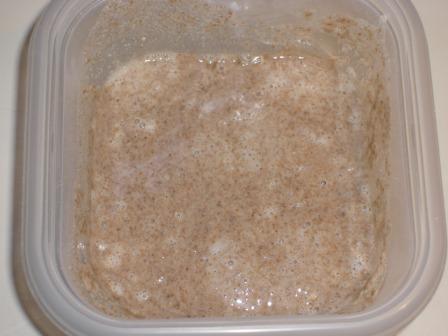
Right now, I'm working on some very zingy sourdough bread from my favorite starter, Groucho. Since I haven't been baking much Groucho was pretty dormant.

Groucho, My Best Sourdough Starter  Before Revive

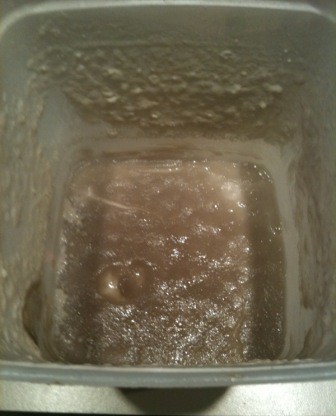
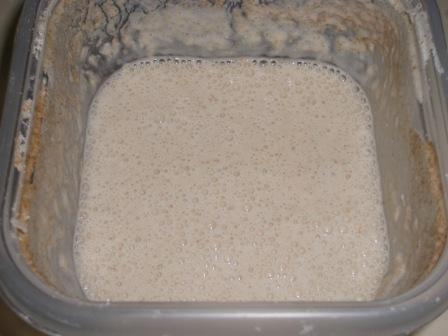
To revive him, I started a few days ago by taking half of the dormant starter

Groucho Revive Step 1

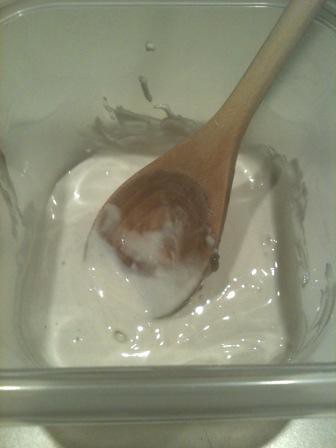
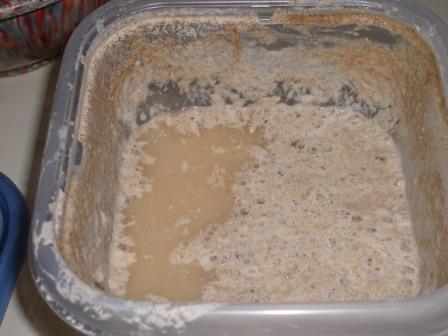
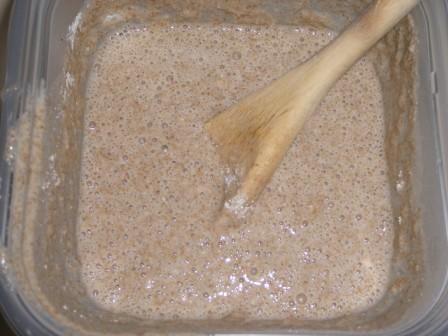
Adding one half cup of luke warm (about 75 degrees)

Groucho Revive Step 2

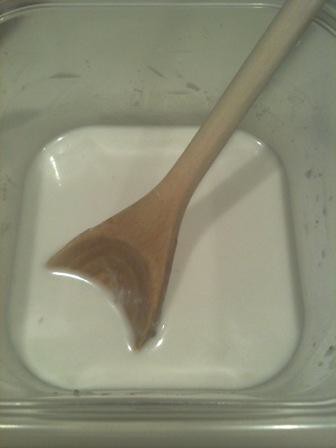
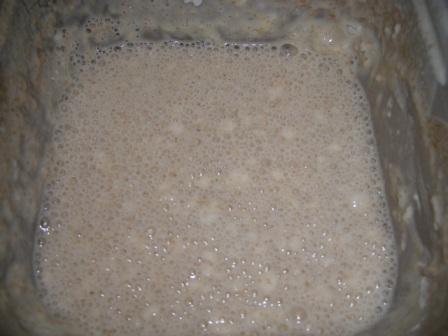
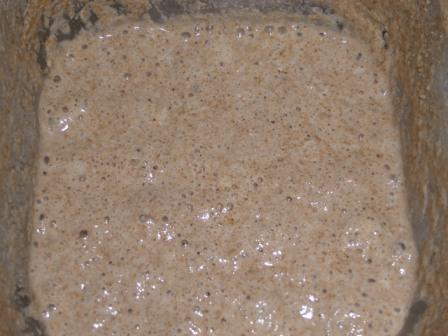
and stirring in one half cup of flour

Groucho Revive Step 3

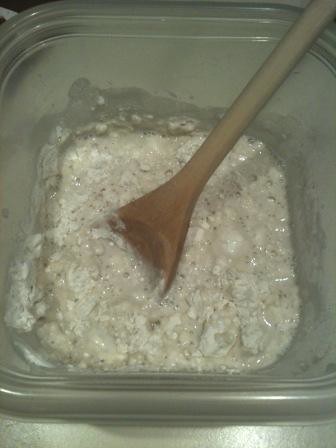
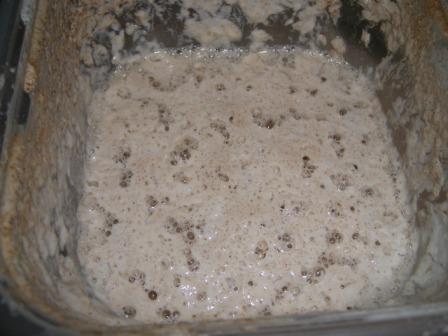
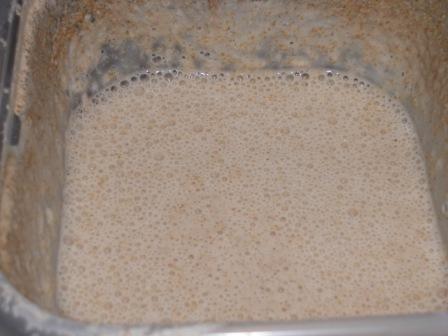
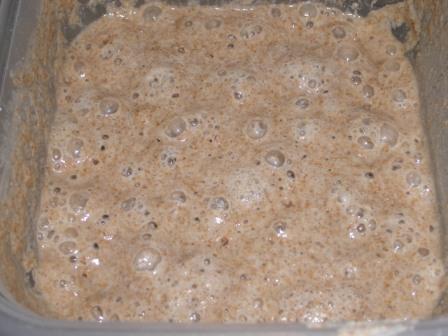
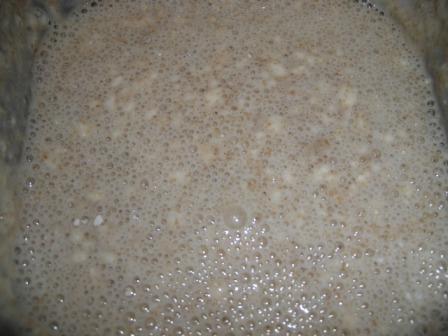
About forty minutes later, I had some bubbles.

Groucho Revive Step 4

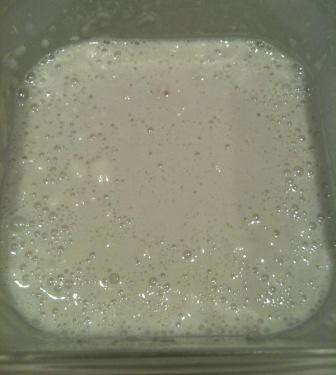
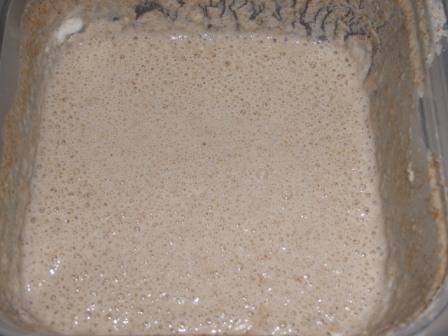
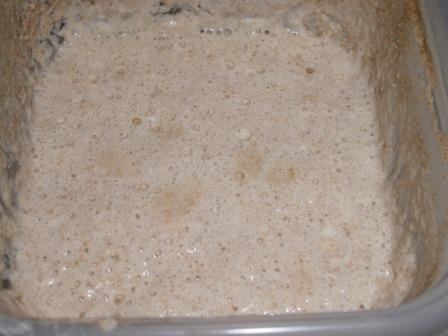
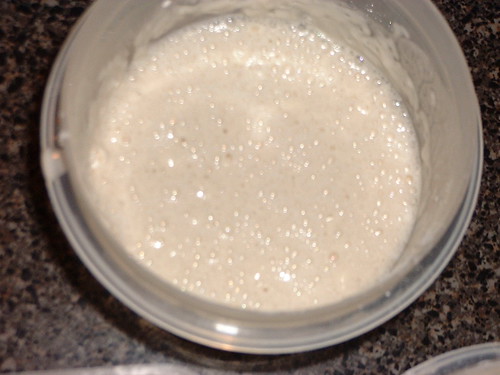
I repeated this for three days and this morning, Groucho was bubbly and happy. Tomorrow, I'll be baking a boule for the office.

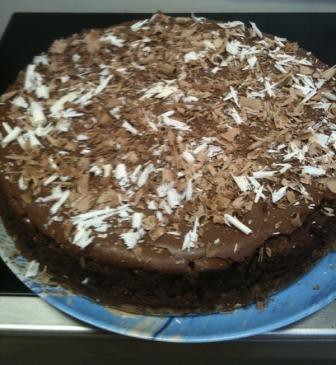
The office is really glad I'm back in the kitchen because they have been missing things like this Triple Chocolate Truffle Cheesecake on Gingersnap Crust I took in to work at the end of the week.

Triple Chocolate Truffle Cheesecake

LB is pretty happy I'm spending more time at home too. So much so, when I'm sitting on the couch working on my laptop or watching some golf on TV, he immediately hops up and assumes his favorite napping position.

LBs Big Fat Feet

Have you ever seen such big feet on a cat?!


Triple Chocolate Truffle Cheesecake on Gingersnap Crust

Crust:
1 2/3 C Gingersnaps, crushed
1/3 C Vanilla Wafer Cookies, crushed
1/2 C Confectioners Sugar
1/3 + 2 Tbsp Butter, melted

Cheesecake
3 8oz packages Cream Cheese, softened
1 14oz can Sweetened Condensed Milk
2/3 C Dark Chocolate (66% or darker), broken into small pieces (or in chips)
2/3 C Milk Chocolate, broken into small pieces (or in chips)
2/3 C White Chocolate, broken into small pieces (or in chips)
4 Eggs
2 tsp Vanilla
1 C Semi Sweet Chocolate, broken into tiny pieces (or in mini chips)

To Make Crust:
Combine dry ingredients in medium bowl and moisten with melted butter. Press crust into prepared 9" spring form pan. Make bottom crust about 1/4" thick and press any excess crust evenly up the sides of the pan. Set aside.

To Make Cheesecake Batter:

Using 1/8 cup of cocoa powder coat semi sweet chips and set aside.

In large bowl using a hand mixer or in a stand mixer, beat cream cheese until fluffy. Add in sweetened condensed milk and continue beating until smooth.

Melt dark, milk, and white chocolate in a double boiler until completely smooth. Stir into cream cheese mixture. Add eggs in, one at time and combine until smooth. Stir in vanilla and semi sweet chocolate until combined.

Pour into spring form pan over the crust and gently shake pan to remove any bubbles.

Place spring form pan on a baking sheet with edges to prevent butter from the crust leaking out in the oven and bake cheesecake for 60 minutes at 300 degrees until firm in the center.

Allow to cool for 20 minutes before gently loosening the outer ring of the spring form pan. If necessary, run a knife under hot water and run along side of outer ring to loosen cheesecake from outer ring.

Let cheesecake cool completely or overnight in the refrigerator.

To serve, shave dark, milk, and white chocolate over top.

Saturday, November 08, 2008

Whole Wheat Sourdough Cinnamon Rolls for Elle

A few weeks ago I noticed one of my first blogging friends, Elle over at Feeding My Enthusiasms had started to bake bread with her brand new sourdough starter. I can't tell you how thrilled I am when I notice my blogging friends getting excited about baking with sourdough. There is nothing more satisfying, in my very humble opinion, than growing a starter and then making bread and other goodies with it.

One of the type of baking that doesn't seem to be obvious to most sourdough bakers is that tangy starter is just as much fun to bake sweet goodies with as it is to bake savory breads. That tang of the starter gives a nice contrast to the sweet in most bar cookies, quick breakfast breads, and sweet rolls.

When I got back into the kitchen last week, I was tasked with pulling out all my starters from my fridge and giving everyone a good feeding. Some of my starters, like Herman, hadn't been fed in three months and poor Gertrude, my sweet sourdough starter, hadn't seen any baking action in over six months!

After I checked on my family of starters to make sure everyone was bubbling away happy (they all were fine), I divided Gertrude into half with the intention of not only baking with her but baking whole wheat with her. This meant that I had to first take the starter to a whole wheat starter. I did this by changing the flour type from all purpose to wheat over three days of two times a day feedings. The first two feedings were half all purpose and half wheat flour and then the last two days were all whole wheat flour.

Then I was ready to bake with my new whole wheat sweet sourdough starter and what better recipe to start with than making my sourdough cinnamon roll recipe whole wheat? It was pretty easy actually, I substituted all but 1 1/2 cups of the bread flour with whole wheat flour.

I loved how these came out.

Sour Dough Cinnamon Roll: Whole Wheat for Blog

They had the same sweet and tang of the original but had a nice chewy texture and the combination of the whole wheat and cinnamon made a for a hearty goodness. I'm looking forward to making these again very soon. Maybe I'll do a nut roll this time!

Whole Wheat Sourdough Cinnamon Rolls

Breadchick's Whole Wheat Sourdough Sweet Rolls

Prep Time: 2 Days

This recipe results in 15 - 20 good sized rolls or 30 - 40 small rolls with a tangy sweet taste. You can top them with any type of frosting.

For Dough:
1 Cup whole wheat sourdough starter
3/4 Cup sugar
1/2 Cup vegetable oil
2 1/2 Tsp. salt
1 1/2 Cup warm water (80 - 85 Degrees)
1 1/2 Cup bread flour
5 to 6 1/2 Cup whole wheat flour (depending on stiffness of batter, hold back 1/4 cup)

For Filling:

1 Cup Sugar
4 tbsp. Cinnamon (or to taste)
2 tsp Cardamom (0ptional)
1/4 Cup water (to brush on rolled out dough)


Making The Sponge: Combine the starter, the water and one half the flour (without 1/2 Cup held back in reserve) in a large glass or plastic bowl. Cover loosely with plastic wrap and let rise at room temperature for at least 3 hours or until almost tripled.

Making The Sweet Dough: Mix the sugar and salt together in small bowl. Stir down the sponge and add the oil and 1/2 the sugar/salt mixture to the sponge. Stir well until all the oil is almost absorbed by the dough. Add 2 cups of the flour and mix well until the dough is smooth. Add the rest of the sugar/salt mixture and all the bread flour and one cup of the whole wheat flour and mix well until combined fully. You may need to switch to hand mixing here if your dough is starting stiffen or if your standing mixer is starting to strain, switch to the dough attachment.

Add remaining flour (without 1/4 Cup held back in reserve). At this point you may find you have to use your hands to combine this flour. Dough should feel sticky but stiff. If the dough feels too loose or wet, add the 1/2 Cup of flour you held back held back slowly until dough feels right. (Depending on the dough, you may need to add more flour). Mix well by hand until dough is smooth and elastic. Dough will still be slightly sticky. Resist the temptation to add more flour as this will result in tough rolls.

Place dough in a very large buttered glass or plastic bowl. Cover loosely with plastic wrap and let rise for 8 - 12 hours or until at least doubled or almost tripled.

Form The Rolls: Divide the dough into 2 halves and cover the half not being worked with plastic wrap and return to bowl. Turn the half of dough you are working with onto a floured surface for rolling and form into rough rectangle. Begin rolling dough out to form 15" x 6" rectangle that is about 1/2" thick. If dough springs back as your rolling use your hand to press into rectangle and roll out slowly. You will depress air pockets out of dough and the dough will be slightly resistant to rolling.

You may also have to let dough "rest" and relax between some rolls for a minute or two. Be patient, dough will relax. Also, be careful to not overwork the dough or add too much flour as you are rolling.

When you have dough rolled out, brush dough with water; not too much or the sweet roll will "fall apart" during last rise. Just enough for filling to cling to dough. Generously sprinkle the filling from one long edge to the other, leaving about 1/4" of one long edge free of filling. Roll the dough slowly to form a long "roll". Pay attention to keeping "ends" of the roll as even as possible, working the ends to be even is necessary until all that is left to roll is the 1/4" long edge border without filling. Brush water or an egg white wash on this 1/4" and seal the roll; gently pinching the roll to seal if necessary.

Using dental floss, cut the long roll into 1 1/2" - 2" sections and place in well buttered 13" x 9" glass baking dish.

Repeat method with remaining dough. (You may need to also use a second baking dish)

Cover baking dish with plastic wrap and let rise 8 - 12 hours or until rolls are almost doubled.

Baking: Bake Rolls at 350 Degrees for 45 minutes or until internal temperature of roll is 190 degrees. Let completely cool (1 to 2 hours) and frost.

Don't try and halve this recipe. If it makes too many rolls for you, just bake them and freeze them without frosting them. When you want a roll, take a few out of the freezer, let them come to room temperature, pop them in the microwave for a 20 seconds and then frost them.

Tuesday, April 01, 2008

The Starter That Wouldn't Die!

Oh drat, that work thing again. No, I'm not dead, yet. But if I keep having to work thirteen plus hour days the way I have the past three weeks, including all the weekends, I may be soon!

And Bob isn't dead either. With the the crazy work schedule, something happened that hasn't happened ever...I forgot to feed Bob! Bob hasn't had food since Sunday.

No, please don't call the Starter Abuse Hotline!!! Bob is perfectly fine. In fact, this is a good example of how forgiving this starter is.

If you forget to feed your starter don't sweat it! Just stir all the hooch back in. You should have big layer of hooch if you miss a feeding.


After you stir your starter up and get that hooch incorporated, you should notice it gets foamy. That is good.


And then give your starter its normal feeding.

Notice how bubbly Bob got after his feeding tonight?


I'll probably give him two feedings tomorrow just get him back to strength and then I'm going to prep him for some baking.

A couple days ago, I also promised you a little tip to bring your starter out of the moodies if by Day 10, he/she was still feeling sluggish and not getting perky after the switch to an all AP diet.

First, how do you know your starter isn't fully adjusted? Basically you will only have little bubbles and a sour smell and taste but not the happy bubbly and foamy starter like below.


If this happens, it is time to entice your starter to come out and see the sunshine!

Here is how you do this:

Give it a feeding using 1/8 cup rye flour, 3/8 cup AP flour and a pinch of sugar and just a little less than 1/2 cup of water. The reason for a little more flour vs water is to give it lots of food to get all excited over. Give it this feeding 2X in a 24 hour period. You should see life come back into your starter. Then go back to the normal AP flour feeding.

If you don't see life come back into the starter, give it another day of the 2X "booster shot" above and see what happens.

If after all that all you have is still sludge well... time to give your starter a goldfish funeral and start afresh. But before you do that, email me and we'll do a starter diagnosis.

My mom flies into NYC tomorrow night to spend a long weekend with me. I'm probably not going to be blogging much while she is here and I'm definitely NOT working while she is here. But, I can guarantee I'm baking while she's here because we love to be in the kitchen together.

It's going to be a good time!

Saturday, March 29, 2008

Starter Watch Day Eight: I Can Name That Starter...

And, I Can Bake With That Starter!!

Day Seven probably passed uneventfully for our starters on the counter and today, Day Eight is the big graduation day!!

Today after your first feeding you should have noticed the beginnings of a more active starter. In fact, you may now have the type of action you saw on Days 3 and 4!

starter_day8fizzy

This is a sign your starter has adjusted to the all AP flour feedings. If you don't have a super active starter after today, don't panic. Your starter didn't die, it is just a late bloomer on the all AP flour diet. Sometimes it takes through Day 10 for a starter to adjust to the AP flour. However, if after Day 10 you don't have activity, there are a few things you can do to jump start your starter. I'll post about those on Monday, Day 10 when I'll also post about getting ready for the first bread try.

Another thing that happens today is, unless you are going to be baking with your starter every day, this will be the last day of two times a day feedings. Which is a good thing because with the cost of flour these days you are probably getting worried this starter child of yours is going to eat you out of 5lb bags of flour every week! Starting with tomorrow's feeding you will go to 1/2 cup of water and 1/2 cup of AP flour and wait twenty-four hours between feedings.

So, what are you waiting for??!!

Get out there, name your starter and try one of the two recipes I gave on Thursday (Klondike Pancakes or Quick Bread/Muffins)! If you are feeling really brave and what to see the rising power of your starter you can try my recipe for Sourdough Cinnamon Rolls.

And leave a comment telling us all what you named your starter. We're dying to know...

lienscinbuns


Lien's Sweet Rolls from the recipe below made with Gollum, her starter, who is now sleeping until May's BBB recipe.

Breadchick's Sourdough Sweet Rolls With Butter Cream Frosting

Prep Time: 2 Days

This recipe uses the sponge method for a first rise followed by a second standard rise before you roll out dough for the rolls. Your sourdough starter should be well established as well to give the best results. Also, the temperature of the room you are baking in should be between 75 and 80 degrees. If room is colder, double the rising times. If kitchen is warmer, use a retarded rise method by placing dough in refrigerator (this method will take some watching of dough. expect 2 to 2.5 times longer on rises). This recipe is suited for either hand mixing or standing mixers.

This recipe results in 15 - 20 good sized rolls with a tangy sweet taste.

This recipe may be used to make cinnamon, gooey caramel or pecan caramel rolls (recipes for fillings are below).

INGREDIENTS FOR SWEET DOUGH:

1 C. sourdough starter
3/4 C. sugar
1/2 C. canola or vegetable/canola blend oil
1 Tbsp. salt
1 1/2 C. warm water (80 - 85 Degrees)
6 1/4 to 6 1/2 C. bread flour (depending on stiffness of batter, hold back 1/4 cup)

INGREDIENTS FOR FILLINGS:

Cinnamon Rolls:

1 C. Sugar
4 tbsp. Cinnamon (or to taste)
1 C. Raisins (Optional)
Orange Zest (Optional/to taste if you want Orange/Cinnamon rolls)
1/4 C. Melted Butter (to brush on rolled out dough)

Gooey Caramel Rolls:

1/2 C. Light Brown Sugar (packed)
1/2 C. Sugar
4 tbsp Cinnamon (or to taste)
1/4 tsp Salt (optional or to taste)
1/4 C. Melted Butter(to brush on rolled out dough)

Caramel Pecan Rolls:

1 - 1 1/2 C Pecans (lightly toasted and chopped coarsely)
1/2 C. Light Brown Sugar (packed)
1/2 C. Sugar
4 tbsp Cinnamon (or to taste)
1/4 tsp Salt (optional or to taste)
1/4 C. Melted Butter(to brush on rolled out dough)

INGREDIENTS FOR BUTTER CREME FROSTING

1/2 stick butter very soft but not melted
1/8 Cup Milk
2 Cups of Confectioner Sugar
1/2 tsp Vanilla Extract (or other flavoring of your choice. Almond or Orange is very nice on the Cinnamon Rolls!!)

Blend well adding more sugar if necessary until frosting is creamy and very spreadable

STEP 1: MAKING THE SPONGE

Combine the starter, the water and one half the flour (without 1/4 Cup held back in reserve) in a large glass or plastic bowl(Don't use a metal bowl as the starter will "react" to the metal). Cover loosely with plastic wrap and let rise at room temperature for at least 3 hours or until almost tripled.

STEP 2: MAKING THE SWEET DOUGH

Mix the sugar and salt together in small bowl. Stir down the sponge and add the oil and 1/2 the sugar/salt mixture to the sponge. Stir well until all the oil is almost absorbed by the dough. Add 2 cups of the flour and mix well until the dough is smooth. Add the rest of the sugar/salt mixture and 1/2 cup of the flour and mix well until combined fully. You may need to switch to hand mixing here if your dough is starting stiffen or if your standing mixer is starting
to strain, switch to the dough attachment. Add remaining flour (without 1/4 Cup held back in reserve). At this point you may find you have to use your hands to combine this flour. Dough should feel sticky but stiff. If the dough feels too loose or wet, add the 1/4 Cup of flour you held back held back slowly until dough feels right. Mix well by hand until dough is smooth and elastic. Dough will still be slightly sticky. Resist the temptation to add more flour as this will result
in tough rolls.

Place dough in a very large buttered glass or plastic bowl. Cover loosely with plastic wrap and let rise for 8 - 12 hours or until at least doubled or almost tripled.

Step 3: FORM THE ROLLS

Divide the dough into 2 halves and cover the half not being worked with plastic wrap and return to bowl. Turn the half of dough you are working with onto a floured surface for rolling and form into rough rectangle. Begin rolling dough out to form 15" x 6" rectangle that is about 1/2" thick. If dough springs back as your rolling use your hand to press into rectangle and roll out slowly. You will depress air pockets out of dough and the dough will be slightly resistant to rolling.
You may also have to let dough "rest" and relax between some rolls for a minute or two. Be patient, dough will relax. Also, be careful to not overwork the dough or add too much flour as you are rolling.

When you have dough rolled out, brush dough with melted butter; not too much or the sweet roll will "fall apart" during last rise. Just enough for filling to cling to dough. Generously sprinkle the filling of your choice from one long edge to the other, leaving about 1/4" of one long edge free of filling. Roll the dough slowly to form a long "roll". Pay attention to keeping "ends" of the roll as even as possible, working the ends to be even is necessary until all that is left to roll is
the 1/4" long edge border without filling. Brush water or an egg white wash on this 1/4" and seal the roll; gently pinching the roll to seal if necessary.

Using dental floss, cut the long roll into 1 1/2" - 2" sections and place in well buttered 13" x 9" glass baking dish.

Repeat method with remaining dough. (You may need to also use a second baking dish)

Cover baking dish with plastic wrap and let rise 8 - 12 hours or until rolls are almost doubled.

Step 4: BAKING/FROSTING

Bake Rolls at 350 Degrees for 45 minutes or until internal temperature of roll is 190 degrees.

Let completely cool (1 to 2 hours) and frost.

Note: If you make the gooey caramel or caramel pecan rolls, the caramel will set. To loosen from dish, set baking dish in pan of hot water for a few minutes before serving. These two rolls are also best served a bit warm. About 20 seconds in the microwave is about right to make them warm but the fillings not too hot.

Also, don't try and halve this recipe. If it makes too many rolls for you, just bake them and freeze them without frosting them. When you want a gooey roll, take a few out of the freezer, let them come to room temperature and frost them.

Thursday, March 27, 2008

Starter Watch Day Six: A Sullen Starter and Coaxing It Out of Its Shell

Welcome to Day Six and the Tween Years, complete with the disappearing into the bedroom and not coming out for anything but dinner act. Seems just like yesterday our starter was a babe in swaddling flour and now look at him/her!


Should bring a tear to your eye because if your starter is healthy you definitely have a sour smell wafting from the container. My fellow BBB sister Lien called the smell at this stage, "strong glue smell"!

Two things you probably have going on in that container is little if any evidence of a rise or big bubbles. You also have hooch between every feeding and at the bottom, you may even have a thick gloopy flour mixture.


Don't worry about any of this. It is all part of our starter growing up. Just stir it all back in and together and go about your normal first


and second feedings.


Another part of any pre-teen is wanting to stretch their wings and try to fly. So, let's talk about what you can do with some of that toss off starting Saturday!

How to get a starter ready to bake with also called a power feed.

We need to give a starter a bit of a jump start to get it all bubbly and at peak rising capacity before we can bake with it. This is going to be especially important with our young starters. But we also need to test our starter to make sure we will have a viable starter for when we want to make a tasty boule


or baguette with it. This is called power feeding the starter. Just think of it as "carb loading" before a marathon. Depending on the recipe and when you want to bake, you will either do this 2 -4 hours before baking or right before going to bed.

Here is what you do:

Stir in any hooch back into the starter, DO NOT toss any off, you want the full Monty. Feed the 1/2 cup water and 1/2 cup AP flour. This will give you enough to starter to make something and still have starter left over to grow for the next time to bake. If you want to bake a double batch of something feed the starter 1 cup of water and 1 cup of flour. You will need to use this power fed starter within 12 hours of feed.

Now, what to bake? I like to have people make one or both of two really simple recipes that should result in fantastic food and definitely won't fail with a young starter: quick bread and Klondike Pancakes! Why something like this versus a boule or a loaf of bread? Because your young starter may or may not have enough Ompf to force a full rise and remember my motto about baking with yeast? Success breeds success. I would rather have you get comfy working with the starter AND have something yummy to eat than to end up with a flat, pale piece of baked dough.

sarasmuffins

Sara of I Like to Cook's Blueberry Muffins from her young starter, "Crater Face". Crater Face is about two weeks old and was born from this starter recipe.


Quick Bread/Muffin Master Recipe.

You can add anything you want to this recipe and you will have muffins or a loaf of quick bread

Step 1: Power Feed for Starter about 2 - 4 hours before baking (or night before). See directions above for the Power Feed.

Step 2: Master Recipe

1 egg
1 tsp vanilla
1/4 cup vegetable oil
1 cup starter
1 cup AP flour
1 tsp baking soda
1/2 cup sugar (if making a savory muffin/bread, reduce sugar to 3 TBS but don't eliminate. You need this to give the starter a little boost!)
1/2 cup fruit, nuts or anything else you want to add

Pre-heat oven to 400 degrees. Prepare muffin tins or 8 x 4 loaf pan with light coating of cooking spray, even if using paper muffin cups.

Combine dry ingredients in small bowl. Stir in fruit, nuts or what ever you are going to add to the muffins/bread. Combine wet ingredients in medium bowl. Add dry ingredients to wet ones. Mix until all the ingredients are just combined

Bake for 15 - 20 minutes or until golden brown or 35 - 40 minutes for quick bread or until a tooth pick inserted comes out clean. If tops start to brown too fast, cover with a sheet of foil

lienspancakes

Lien of Notitie van Lien Klondike Pancakes made with her young starter, "Gollum". Gollum is about two weeks old and was born using this starter recipe!

Klondike Pancakes
Originating in a Alaska during the Gold Rush, this was popular in the late 1800s, when a sourdough starter was the common and reliable way to provide leavening for bread products.

Preparation begins the night before.

1 cup sourdough starter
1 cup all-purpose flour
1 cup warm water
1 large egg
1 tablespoon vegetable oil
1 tablespoon granulated sugar
1/2 teaspoon salt
1/2 teaspoon baking soda

Place the sourdough starter in a nonreactive mixing bowl, add the flour and water. Stir and leave, loosely covered, overnight in a warm place.

The following morning, stir the mixture and remove 1/2 cup, adding it to your sourdough starter in the refrigerator or on the counter (This is called "paying the kiddie).

To the prepped sourdough mixture, add remaining ingredients, stirring well. Wait 10 minutes for baking soda to activate. For each pancake, pour scant 1/4 cup batter onto a hot griddle. Cook pancakes until dry around edges and the bubbles formed on top have "popped". Turn and cook other sides until lightly golden brown.

Serve hot with butter and syrup (maple syrup or Lyle syrup)

Finally, if you want to try something really savory, go visit Tanna of My Kitchen in Half Cups and check out the onion rings she made with her starter.


Tanna hasn't shared her starter's name with us yet but it too was born from this recipe.

One last thing, speaking of names, tomorrow you can name your starter!!! Can't wait to read what you come up with for you little yeast beast on the counter...

Wednesday, March 26, 2008

Starter Watch Day Five: Top Starter Connecticut

I've been working on a bit of bread business tonight, a rye version of The Croc


that ironically started from some of Bob's toss off!


Today is Day Five with our starters. You may have noticed this morning it probably didn't have the huge rolling bubbles of the past few days.

starter_begday5

Also, if you didn't have a layer of hooch yesterday, your probably had one today.

starter_begday5hooch

The smell of the starter should also be definitely sour and vinegary. After you stir in the hooch and give him/her the first feeding, it will be bubbly but again probably not as foamy as in previous days. Don't worry, this is still all normal. As long as you don't have odd colors or really awful smells (spoiled chicken, wet gym socks) your starter is just starting to settle down while it adjusts to the AP flour.
starter_day5after2ndfeed

Before the second feeding, the starter may have developed another layer of hooch.

starter_day5b42ndfeed

Again, just stir it back in and give the starter its second feed.

starter_day5after1st

You will notice in my second feed that I didn't completely stir the flour smooth. The lovely thing about sourdough starters is even if the flour isn't stirred in smooth, the yeasties will still attack it. Take a look tomorrow morning! Not a lump of flour will be in sight.

Tomorrow, we'll talk about what to do with toss off because on Friday night you can prep it to make something on Saturday. I'm also going to answer a few questions from the comments on the previous Starter Watch posts.

OK, Judges Table on Top Chef Chicago is happening so time to kiss your starter good night.

Tuesday, March 25, 2008

Starter Watch: Four Days and Seven Hours Ago, Our Starters...

Were born. When our starters came into the world, they were 100% rye flour starters. Today is graduation day from rye flour to all AP flour. Today, our starters become toddlers.

When we woke up and took a peek at them, we probably noticed they were topped with a layer of tiny bubbles

starter_begday4

and we may have even noticed that hiding just underneath that top layer of bubbles was a layer of hooch!

starter_hoochlayerday4

This probably was your first layer of hooch.
starter_hoochtopday4

If you didn't have a layer of hooch, don't worry. It doesn't mean anything is wrong. It just means your yeasties aren't eating through the flour super fast. You will get some sooner or later. We want to stir any hooch back into the starter. This will make the starter very foamy and frothy.

starter_afterhoochday4

After feeding the starter its first full 1/2 cup feeding of all AP flour, your starter will get those big roiling bubbles we've become accustomed to with the rye flour feedings. What you may notice though is the "rise" doesn't seem to be as vigorous. It may take it longer to get the roiling bubbles.

starter_day4firstfeed

After we have a second feeding of all AP flour there will be few if any huge roiling bubbles. This is normal as the starter adjusts to AP flour.

starter_after2ndfeeding4th

Also notice how different in color the starter is from the first day

starter_beginningday2

A heads up, we are now entering a more placid and less active period the next few days while the starter finishes digesting the rye flour and begins to get used to an AP diet. Between now and through Day Seven and possibly until Day Ten, you may notice your little yeast friend isn't a lively as he/she has been. Don't worry that your starter has died, it's just going through a phase.

Just like a toddler gets used to solid food...

Monday, March 24, 2008

Starter Watch Day Three: Double, Double Toil and Trouble; Fire Burn and Cauldron Bubble

How's everyone's starter doing? I've been getting lots of good questions and comments and I'll try and reply to each and every one of you personally. If you don't hear directly from me, check the comments because I'm trying to answer there first as others who are in the process of birthing their first starters will probably have the same question.

Day Three of a healthy starter should bring you a real witch's cauldron of roiling bubbles and the beginning of a sour smell and taste.

starter_begday3

Yes, I said taste. I want you to taste your starter from time to time. Don't worry, it won't hurt you and I want you to know what a healthy starter tastes like at all the stages. Go ahead, dip your finger in and taste it. Wash your hands first. I'll wait. (doh, doh, doh, doh.....)

OK, that should have had a bit of a sour vinegary tang with a definite whole grain overtone.

So, about two hours after the first feeding you should have lots of bubbles and it should look like a rolling boil

starter_after1stfeed3rdday

It will settle down to foamy, tiny bubbles before the second feeding

starter_bfre2ndfeed3rdday

and then it will get big bubbles, like when you blow air through a straw in a milk shake after the second feeding.

starter_after2ndfeed3rdday

By now you should be feeding a mix of rye and AP flour. In the next three days we will be taking this starter completely to AP flour. In about ten days, there will be no trace of the rye flour left.

Notice, how in the next two days it gets lighter and lighter in shade.

Again, feel free to drop me comments or emails if you have any questions. If you want to send me photos of your starter, please compress them and zip them up before sending them to me.

I can't wait to hear about all your starters. Thanks a bunch!

Friday, March 21, 2008

Attention All Bread Baking Buddies! An Early Sneak Peek at May's Recipe: Sourdough Starter and Bread

May is my month to be the Host Kitchen for the Bread Baking Babes and I'm super excited because I'm offering up a bread choice near and dear to my heart, sourdough. But before we can make sourdough bread we have to have a sourdough starter!


My mother starter after a feeding

You are going to want to have about a month of time to nurse your starter and get it good and strong so that is why we are giving you a "heads up" about the May bread. You are also going to want some experience baking with a starter under your belt before we bake May's bread but first I want to talk a little about starters.

There are lots of places on the web, like Mike Avery and Darrell Greenwood's excellent sites, where you can get solid information about sourdough breads and starting a sourdough starter. You can even purchase a starter or get a starter for free. I am by no means an expert in the area of sourdough starters or even bread making for that matter, but from time to time I do get emails from folks asking me about sourdough bread and in particular how to start and care for a sourdough starter.

Over the past few months, I've shared with some of my fellow bread bakers in the Daring Bakers, who where interested in starting a sourdough starter of their own, a recipe that I've developed over the years for a pretty fail proof starter. Now, before I get all sorts of comments from the militant sourdough bakers out there about how this isn't a "real" sourdough starter because my recipe contains a pinch of yeast and sugar in the seed mixture, I'm going to share a little of my philosophy behind sourdough starters and baking bread in general.

Nothing breeds curiosity and the desire to learn more about bread baking than success at bread baking. I firmly believe the reason so many people are scared to death of baking with yeast, any type of yeast, is because they have tried before and failed or have heard horror stories about how hard it is to make bread. I think that is sad. Even sadder is that there is this whole group of bread bakers out there who pride themselves on ridiculing and talking down to beginners.

No place does this attitude seem to be more prevalent than in the world of sourdough bakers and some of the online bread and sourdough forums that cater to sourdough bakers; where I've seen all manner of rude, nasty, and evilness directed towards newbies. This is a shame because there is nothing more satisfying in this world, in my humble opinion, than ripping into a boule of your own sourdough bread and using it to slop up a great sauce you poured over some pasta or munching on a piece of your own sourdough toast with jam schmeered on it at midnight while the rest of the world is asleep.

There seems to be something about sourdough bread making that brings out the "cranks", militant bakers, and the ultra competitive my rise was higher than your rise; complete with pictures of cut loaves with rulers next to them, in baking forums and usenet groups. This includes an attitude of derision towards anyone whose starter isn't 100% wild. Maybe the zealots are right and maybe not but, over the years I've been baking with sourdough starters, I've seen so many novices get frustrated with the whole process when their completely "wild" starters fail that they never even try again.

About four years ago, after playing with several starter recipes, I developed a recipe for a starter that is super stable, easy to take care of and produces really nice breads with a gentle tang. This recipe is so stable, that I have one starter that came from this recipe that lives in the fridge at my mother's house in Michigan and only gets fed about two or three times a year. It perks right up and bakes beautiful breads for me when I'm home. Now, I'm not claiming this starter recipe is completely fail proof, all I'm saying is it is super stable and everyone I've shared this with has had success with sourdough bread. Basically, I consider this starter recipe the training wheels of sourdough starters.

A few things you need to know about this starter:

  1. You won't get really good loaves of bread until about Day 10 - 14 of this starter's life. However, after about Day 7, you can make quick breads and pancakes. I'll post recipes for both in a few days so you can have fun with your starter.

  2. Get used to "tossing off" (throwing away) part of the starter every time you feed it. Yes, this feels very wasteful but unless you are baking every day with the starter, all you will end up with by saving the toss off is a bunch of containers all over you have to keep feeding. (Trust me on this one. I speak from the experience of once having twelve containers around my kitchen of starters at various stage of proofing). If this really, really bothers you, see if you can find someone who wants a sourdough starter of their own but don't feel bad about just throwing the toss off away.

  3. While this has been debunked in some quarters of the sourdough world, unless you 1000% sure your utensils are not any other metal but stainless steel, do not use metal to store or mix your sourdough stater. Some metals will react with the acidity of the starter and cause the starter to go bad and/or the starter will corrode your metal bowl/utensil. I like those nice quart size snap and seal Ziplock containers for mine. All six of my starters live these starter condos and have for years.

  4. Never tightly seal your starter, either in the fridge or on your counter. If you do, the build up of gas will literally blow the lid off and you will have a mess all over the place. This is also a good way to "kill" your starter. After all, it is a living thing.

  5. A healthy starter should be bubbly and foamy about two hours after each feeding.

  6. Hooch is the liquid that forms on top of starters between feedings. This liquid is slightly alcoholic and is the 'waste product' of the yeast after feeding on the flour. There are two camps about hooch in the world of sourdough. Some people say it is bad and a sign your starter is starving. Others say, it doesn't mean a thing other than your yeast ate and you should just stir it back in and go forward. I happen to be in the later camp and unless your hooch is some strange color or has mold or something else weird about it, just stir it back in and feed away!

  7. If at any time you notice the following, throw out your starter and start over:
    -Strange colors other than gray
    -Strange smells other than sour or vinegar (i.e. wet gym sock, bad chicken)
    -Mold

  8. One last thing, after you have nursed your starter for one week, you can name it. Don't name it before because this considered bad luck and a sure way your starter will die. Don't ask me why, it is an old sourdough wives tale. Ironically, most starters I know are named after men even though the main starter you use to bake with is a called a "mother starter". My mother starter's name is Fred. I also have a Larry (my whole wheat starter), Curly (my rye starter) and Moe (my sour, sour, sour starter) along with Herman (who isn't a sourdough starter but is my Amish Friendship Bread starter), Gertrude (my sweet sourdough starter), and Bob, my newest baby whom I'm growing to help you out on this mission. With the exception of Bob, who is gurgling through his teenage years right now on my counter, my starters all live on the bottom shelf in the back of my fridge.


sdcinraisinbread

Loaves of sourdough cinnamon raisin bread made today with my sweet sourdough starter, Gertrude born from this recipe. My mother starter is almost 5 years old. This is young by starter years. I know some people baking with starters over a hundred years old. I only bake with it about once every other month but as you can see, hanging out in the fridge doesn't seem to hurt it.

Breadchick's Sourdough Starter or Training Wheels Sourdough Starter


Starter Recipe: All in ingredients should be room temperature

You will need both rye and unbleached all purpose flour for this starter.

1 cup warm water, 80 - 90 degrees
1 cup room temperature rye flour
1 pinch yeast
1 pinch sugar

Combine ingredients in new 1 quart ziplock container with lid or large wide mouth glass Ball jar. What every you store it in, you want it to be easy to feed it and pour it off with a wide mouth. Loosely fit lid on container and let sit 12 hours in warm place.

First Day Feeding:
Toss off 1/2 of the starter. Feed starter with 1 cup warm water and 1 cup rye flour, stirring until combined. Don't worry about lumps. Let sit in warm place for 12 hours. Stir in any hooch (the clear liquid on top of starter) and toss off 1/2 of starter. Feed with 1 cup warm water and 1 cup rye flour, stirring until combined. Let sit in warm place for 12 hours. Starter should be bubbly and frothy about 2 hours after each feeding.

Second Day Feeding:
Toss off 1/2 of the starter. Feed starter with 1/2 cup warm water and 1/2 cup rye flour, stirring until combined. Don't worry about lumps. Let sit in warm place for 12 hours. Stir in any hooch *clear liquid on top of starter* and toss off 1/2 of starter. Feed with 1/2 cup warm water and 1/2 cup rye flour, stirring until combined. Let sit in warm place for 12 hours. Starter should be bubbly and frothy about 2 hours after each feeding and smell like vinegar

Third Day Feeding:
Toss off 1/2 of the starter. Feed starter with 1/2 cup warm water and 1/8 cup rye flour and 3/8 cup All Purpose flour, stirring until combined. Don't worry about lumps. Let sit in warm place for 12 hours. Stir in any hooch *clear liquid on top of starter* and toss off 1/2 of starter. Feed starter with 1/2 cup warm water and 1/8 cup rye flour and 3/8 cup All Purpose flour, stirring until combined. Let sit in warm place for 12 hours. Starter should be bubbly and frothy about 2 hours after each feeding and smell like vinegar

Fourth Day Feeding:
Toss off 1/2 of the starter. Feed starter with 1/2 cup warm water and 1/2 All Purpose flour, stirring until combined. Don't worry about lumps. Let sit in warm place for 12 hours. Stir in any hooch *clear liquid on top of starter* and toss off 1/2 of starter. Feed starter with 1/2 cup warm water and 1/2cup All Purpose flour, stirring until combined. Let sit in warm place for 12 hours. Starter may be bubbly and frothy about 2 hours after each feeding or may not and smell like pickled vegetables or strong vinegar.

Do not worry if the starter isn't as bubbly as it was the first three days. This is normal for the 4 - 6th day of this starter's life. As long as the starter isn't strange colors like orange, pink, or green and doesn't smell like dead fish or wet gym socks you are fine.

Day 5 - 7 Feeding: Follow Day Four feedings

Day 8 Feeding:
Toss off 1/2 of the starter. Feed starter with 1/2 cup warm water and 1/2 All Purpose flour, stirring until combined. Don't worry about lumps. Let sit in warm place for 12 hours. Stir in any hooch *clear liquid on top of starter* and toss off 1/2 of starter. Feed starter with 1/2 cup warm water and 1/2cup All Purpose flour, stirring until combined. Let sit in warm place for 12 hours. Starter will be begin to be very bubbly and frothy about 2 hours after each feeding again and smell and taste very sour.

After Day 8, you can use it to bake and cook with. I suggest starting with pancakes and quick breads that don't require big rises.

Day 8 - Day 15 feeding:
Toss off 1/2 of the starter. Feed starter with 1/2 cup warm water and 1/2 All Purpose flour, stirring until combined. Don't worry about lumps. Let sit in warm place for 24 hours.

After Day 15 you should be able to make bread with the starter. If at any time during day 8 - 15 you notice any off smells or off colors (pink, green, orange, blue) or any mold. Throw away the starter, sterilize container and start over. If you notice the starter turning gray and lots of hooch, go back to 2X a day feedings for 2 days and then back to 1X a day feedings.

Day 16 - 20 feedings:
Toss off 1/2 of the starter. Feed starter with 1/2 cup warm water and 1/2 All Purpose flour, stirring until combined. Don't worry about lumps. Let sit in warm place for 24 hours.

After Day 20 you can put the starter in the fridge until you are ready to bake or cook with it. This is called a "Dormant Starter". We'll talk about baking with a dormant starter in a later post. First, let's get you going on having a starter on your counter, OK?

If at any time you have any questions or are wondering if your starter is doing OK, drop me an email and we'll talk about what is going on! If you want to send me pictures, please compress them.

With that said, Ladies and Gentleman.... Start Your Starters!!