Saturday, March 31, 2007

Cookbook Spotlight #3: The Life of a Steward for Me


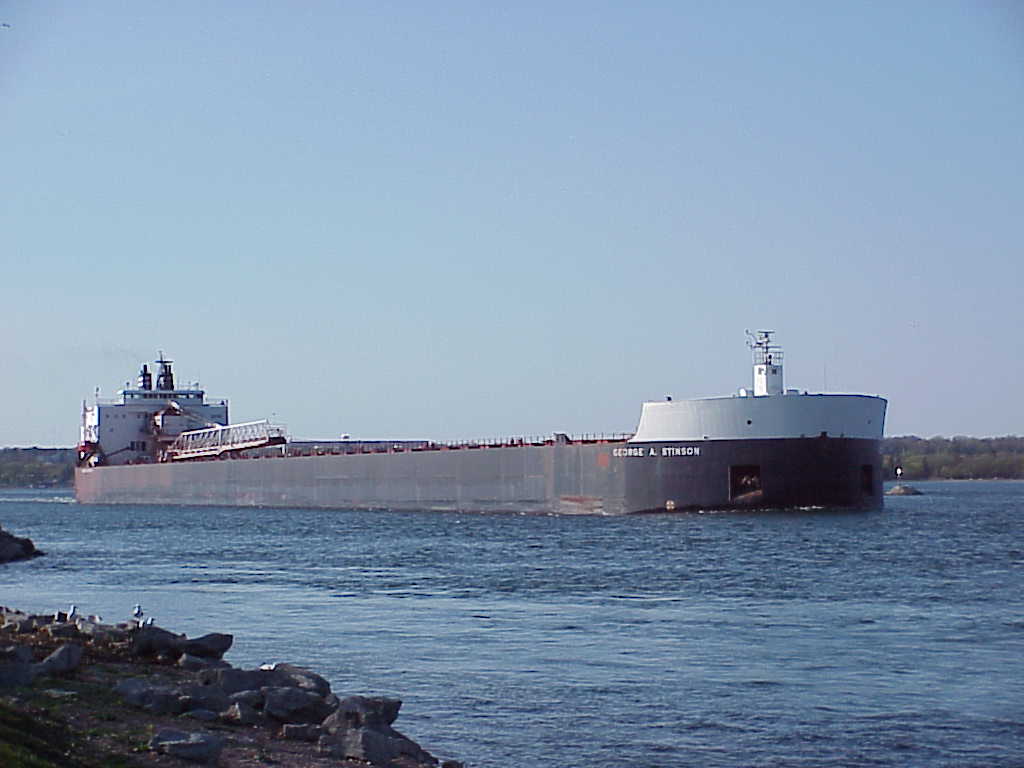
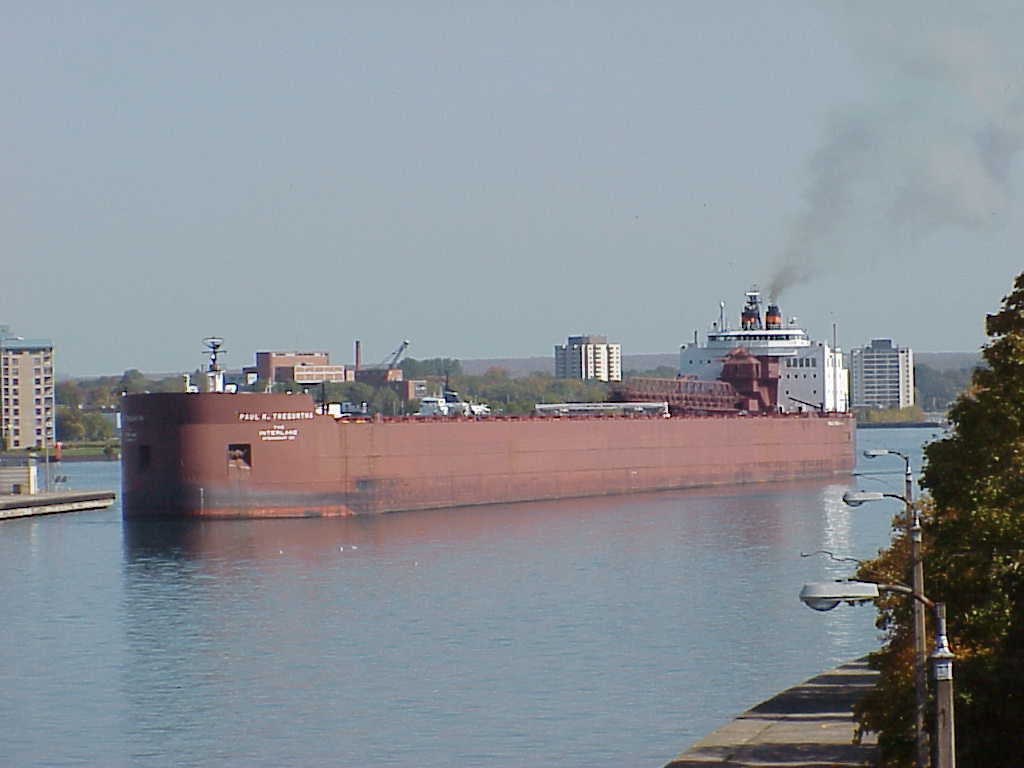
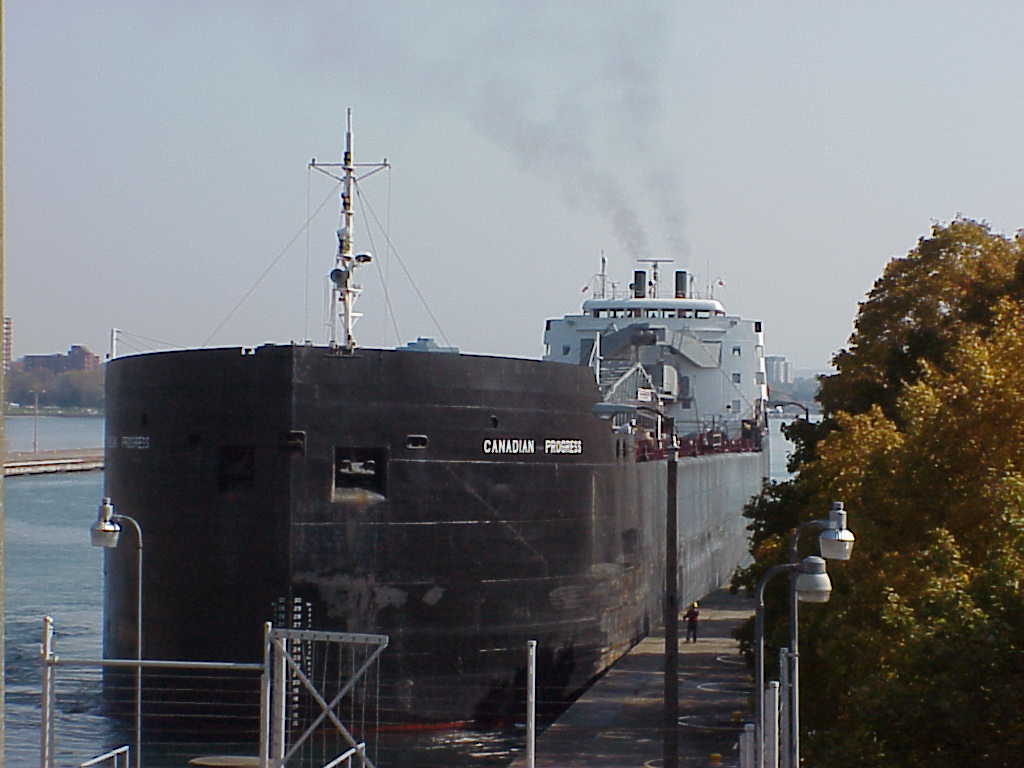
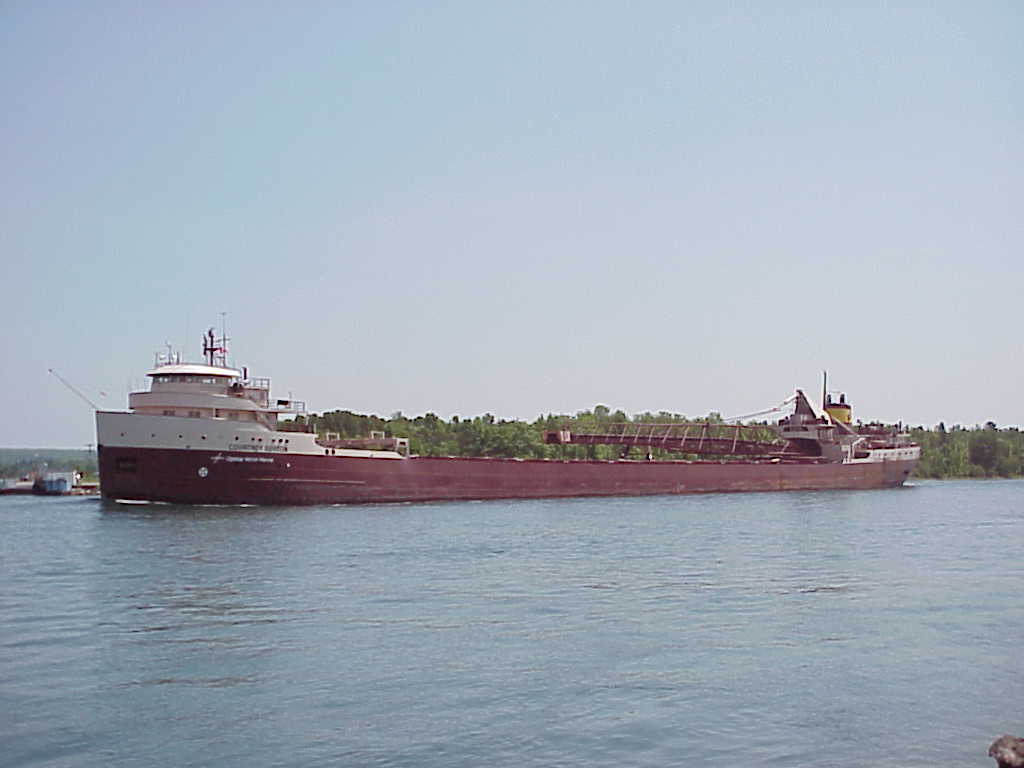
For "Weekend Cookbook Challenge #13: Cook From Your Newest Cookbook" I selected Ships of the Great Lakes Cookbook by Paula McKenna and made some absolutely sinful walnut bars. I also waxed poetic about the big iron ore freighters that ply the Inland Seas. There is something majestic and beautiful about these working boats (yes, they are called "boats" on the Great Lakes). I grew up literally chasing them down the beach as they would come in close to shore off my parents house before they made the turn into Whitefish Bay and headed down towards the Soo Locks. On foggy or stormy mornings, I would wake up and look out my window to see two or three of these grand ladies at anchor waiting out the weather. On mornings like this, the lake would play tricks with my eyes and it would almost look like I could stand on our dock and touch them.

So I was very excited when Paula McKenna contacted me after reading my post about Ships of the Great Lakes Cookbook and accepted Sara, the lovely mind behind I Like to Cook, Weekend Cookbook Challenge, AND Cookbook Spotlight, and my offer to be the featured cookbook for Cookbook Spotlight #3. We sent 10 copies of the cookbook to fellow food bloggers and we'll be hosting a round-up next weekend. But, being a co-hostess (and having blogged about SGLC already) doesn't absolve me of my duties to cook from the book for this event. Besides, it wasn't that hard to find a whole bunch more recipes to try.

Like many of my fellow Cookbook Spotlighters, I noticed that quite a few of the recipes in the book could feed an army or in the case of this book a very hungry crew of 32 on a freighter like the MV George A. Stinson (now the American Spirit) or the crew and passengers on a lake crossing ferry like the SS Badger. There have been mentions of 30lbs of chicken and 12 cups of flour for some recipes. And while I too wish that these recipes had been reduced for us home cooks (or maybe even shown in their original format AND then reduced), I understand the purpose is to show how much food is required to keep a ship running. I have a good friend who sails and he tells me that a ship doesn't run on fuel but on the crew's stomachs. After reading the list of ingredients for the now retired US Coast Guard Cutter Mackinaw's Italian Steak Wraps (20lbs of beef strip loin, 3 lbs provolone cheese, 1/2 gallon of mayonaise...) I think I believe him. But beyond that one little thing, the rest of the book is a wonderful mix of stories about tall ships, freighters, American and Canadian Coast Guard ships, passenger ships, and museum ships as well as the recipes served on board.

Since I had already made one dessert for WCC #13, I decided to try my hand this time at making a whole meal from the Ships of the Great Lakes Cookbook. On the menu tonight: Sour Dough Bread and Oven Roasted Baby Red Bliss Potatoes from the Schooner Manitou (I fed the Yeast Beasts this week so this was a "no brainer"), Braised Beef Ala Mode from the MV English River, and for dessert, I decided to test my rusty fractional math skills a reducing a recipe for Chocolate Brownies from the galley of the MV Ogelbay Norton. The sour dough bread and potatoes were out of this world. In fact, the little boule of sourdough bread I made was one of the best I've ever made so that recipe is a definite keeper.


I liked how simple the potatoes were to prepare too. Just toss them with olive oil, rosemary, garlic and salt and pepper and roast them in a 450 degree oven for about 40 minutes. MBH thought the braised beef ala mode was pretty darn good as well. I found the recipe to be a bit fussy and there are some confusing parts as the steward of the English River apparently did reduce the ingredients for the cookbook (with the exception of the beef which calls for 10lbs) BUT then left the large format instructions (ingredient list calls out 3 carrots then instructions tell you to cut up 12). All that aside, the beef was tender and flavourful. As for the reduced brownie recipe, I will have to wait for MBH to tell me how they turned out. I made them for his snacks this week while I am in Connecticut but they smell and look awful good and the batter was yummy...


Chocolate Brownies
From the MV Oglebay Norton
Note: the original recipe makes one baker's sheet pan. My reduction makes an 8 x 8 x 2 pan or about 9 brownies.

2 eggs
1 cup sugar
1/2 tsp salt
1 tsp vanilla
1 stick butter, melted
2 oz bitter or unsweetened chocolate, melted
3/4 cup bread flour
1/2 cup chopped walnuts (optional)

Combine eggs, sugar, salt, and vanilla and mix on medium low speed a stand mixer for 10 minutes. Combine melted butter and melted chocolate and add to egg/sugar mixture and mix for 2 more minutes. Mix bread flour and walnuts (if using) and add to batter and mix on low speed for 3 minutes. Pour batter into prepared 8 x 8 x 2 pan and bake for 25 - 30 minutes.


Thursday, March 29, 2007

And Now On With the Show...

Sorry for the quietness of late. As a few of you may know, I'm in a transition between jobs. Monday was my last day as a corporate middle manager of an engineering group at Company E and I've been a bit preoccupied of late trying to find a place to live M-F on the outskirts of NYC that won't cost me an arm, leg, upper torso, and LB before I start my new job as a Sr. Consultant with Company J on April 2.

I'm glad to report that yesterday I found a suitable place to rest my head at night that met 95% of my requirements and I could afford. I will be residing in a 100+ year old farm house outside of Fairfield, CT and taking the train to work. I have a gorgeous, fairly large room on the back of the house and has lots of windows to catch the breezes. There are two very friendly cats and a super friendly dog to keep me company if I desire (will make missing MBH and LB a bit easier to swallow). The room has all the things I need for the work week (bed, desk, closet, bathroom, high speed internet access and good cellphone coverage) with the exception of (are you sitting down for this?) A KITCHEN. Since the house is so old, my landlady (who is super nice) requests that the renters limit their appliances to a mini refrigerator and a microwave. Coffee pots, hot plates, and the like are "no-no's" because they could start a fire. I don't blame her, the electrical system in old houses really can be finicky.

So, the first order of business today was to purchase a Bodum thermal coffee press. I became a convert to French Press coffee last year during a few of my outings for Green LA Girl's Starbucks Challenges and since then occasionally get a French press during MBH's and my mornings at our local coffee shop. I was going to purchase a press a few months ago but decided I wouldn't take the time to make it at home. Now, it is the perfect solution to not being able to have a coffee pot and means I can take a nice hot cup of coffee on the train with me for my 45 minute trip into work.
Now, I'm on the lookout for a good microwave cookbook. Anyone have a suggestion?

p.s. As soon as I get all set with a new laptop, I'll be posting a final round up for food from our traveling correspondent who has returned from Stockholm but has been wondering if he just ate all that food he normally wouldn't have for naught...

p.p.s. I also know there are a few of you who I owe a reply to in email about things like bagel recipes, is my starter dead, and a whole wheat pizza crust. I haven't forgotten about this and I will be replying over the next day or two.

Monday, March 26, 2007

A Tale of Two Red Velvet Cakes and Sixteen Daring Bakers


This past January I noticed that several of my favourite food bloggers were making croissants... all at the same time and posting some of the funniest stories about their results. 'How much fun is that', I thought at the time. Then even more of my favourite food bloggers joined the group in February to make the most decadent of all chocolate cakes, flourless chocolate cake. 'Oh man...', I thought, 'I want to join a group like that!' Just as I was ready to send a pleading, begging, and food filled bribe to one of the founders of this merry band of bakers, I was was ever so nicely drafted (along with a few other fellow food bloggers) into the secret service of baking...known as The Daring Bakers! And what, pray tell, are we all baking this month? Red Velvet Cake!

I have always wanted to make Red Velvet Cake; especially after seeing the movie Steel Magnolias at at second run movie house in Ann Arbor, MI oh about thirty times in the early 1990's (Boy, did Kleenex have a windfall quarter that summer). There was something about the groom's cake in that movie, all blood red on the inside and shaped like a armored rat...I mean armadillo...that called to the Southern belle want-to-be in me. Later, I had a piece of Red Velvet Cake at a wake for the father of a friend of mine. He was from Texas and his favourite dessert was Red Velvet Cake. It was the first time I had ever seen one up close and I remember thinking to myself, 'I wonder how they get it that red?" Turns out it is red food dye...and lots of it! In the case of the first recipe offered by Peabody for the Daring Bakers to use in our cake-bake-athon it was an entire 5/8 ounce bottle of red food dye!


According to several food sites this wasn't always the case. Prior to the introduction of dutch processed cocoa, the interaction of the buttermilk, baking soda and vinegar with the natural cocoa used made the cake turn it's reddish hue.

Making Red Velvet Cake became even more personal for me a few weeks ago when MBH informed me that Red Velvet Cake is his father's favourite cake of all time. MBH's father suffered a stroke in November and has been slowly going down hill ever since. A once vibrant true Southern gentleman with a booming voice who always had a joke or corny story for me on the phone, he now can only haltingly talk in a soft voice and most days not even do that. So, making this Red Velvet Cake became a personal tribute to a man I adore as much as I adore his son.

Red Velvet Cake: Daring Bakers Style


I have to admit to being torn between two recipes for this cake. We got to choose a recipe to use and I liked the original recipe suggested by Peabody (from Mrs Wilkes Boarding House in Savannah, Georgia) but I had been drawn to the recipe printed on Valentine's Day in the New York Times. Since I couldn't decide which one to make, I combined the two recipes. I had a bit of disagreement with myself (in only the friendliest way) about the frosting and nuts. but ever the compromiser (or "waffler" as MBH calls me), I finally decided to use both! The only thing I didn't do was add them to the frosting but rather I sprinkled them between the layers and then on top of the cake.

Red Velvet Cake:
3 cups cake flour, sifted (cake flour is necessary; it provides the velvet texture)
1/3 cup cocoa (not dutch processed)
1 tsp salt
1 1/2 cups canola oil
2 cups sugar
3 eggs
3 Tbsp red food dye
1 1/2 tsp vanilla
1 1/4 cup buttermilk
1 1/2 tsp white vinegar
1 1/2 tsp baking soda

Pre-heat the oven at 350 degrees and prepare three 9" cake pans with butter, flour or cocoa (I used cocoa), and line the bottom of each pan with parchment paper. Whisk together the cake flour, cocoa, and salt and set aside. Using a stand mixer, combine the oil and sugar. Add the eggs one at a time and eggs and beat until fluffy. Add the red food dye and vanilla. Add the buttermilk and flour mixture; alternating between the buttermilk and flour mixture and ending with the flour mixture. Mix on medium speed until flour is combined scraping down the bowl as needed. Turn off mixer. In a small bowl, combine the vinegar and baking soda, turn back on the mixer at medium-low speed and add the vinegar/baking soda mixture. The batter should be slightly frothy and reddish maroon.


Divide batter equally into prepared cake pans and bake for 40-50 minutes or until tester comes out smooth. Let cakes cool completely before frosting.

Red Velvet Cake Frosting:

2 8oz packages of cream cheese, softened
1 stick butter, softened
1 1/2 lbs confectioner sugar
1 tsp vanilla
1/4 cup whole milk
1 cup chopped walnuts
1 cup chopped pecans

Combine nuts in a bowl and set aside. Using a stand mixer, combine cream cheese and butter until smooth. On slow speed, add confectioner sugar and mix until completely combined. Add vanilla and milk, beating on medium high speed until frosting is fluffy. Add more milk if needed to make frosting spreadable and creamy.

Assembling the Cake:
Trim off any "domes" to the layers (set aside to eat as a treat later with any left over frosting and nuts!). Spread a small amount of frosting in the center of a cake plate to anchor the bottom layer. Place one layer, bottom side down onto cake plate and spread a thin layer of frosting on top. Sprinkle with nut mixture. Frost the top of the second layer and invert on top of the nuts. Frost the bottom (now the top) of the second layer and sprinkle with nuts. Frost the top of the third layer and invert on top of the second layer of nuts. Frost the top of the cake (third layer's bottom) and side of the cake, filling in any gaps between the layers. Sprinkle the top with remaining nuts.


I was surprised when I cut into the cake how much the cake had darkened during baking. The batter was so red but the baked cake was more dark maroon and almost brown with a reddish tint.

So how did it taste? I took this cake to my weekly engineering meeting as my swan song to my current job (I start a new gig the first week in April). It was gobbled up quickly with comments like "Best cake you've brought" and "I love the frosting/nuts" and "Now who is going to bake cakes like this for us?". I thought it was good but a bit bland like a few of the gals have commented but it had a fantastic crumb and I did love the frosting!!

Wednesday, March 14, 2007

Baking Mix Day - Bisquick and The Incredible Impossible Pie

Mimi of the French Kitchen in America is hosting an one off event, Baking Mix Day on March 15. The theme is based around using baking mixes like Bisquick and Jiffymix to bake and cook with and she even has a recipe for homemade baking mix. As a good Midwestern girl, I grew up on Bisquick pancakes and shortcakes. The first coffee cake I made was the 90 second to make and 20 minute to bake coffee cake on the side of the Bisquick box.

It seems like Bisquick has been crossing my path a lot the past month or so. About the same time that Mimi announced Baking Mix Day, I was researching the Harvey House for the Weekend Cookbook Challenge #14: Salads. It was while reading the Harvey House Cookbook that I stumbled upon a section of Harvey House influence on popular American convenience foods and discovered that the inspiration for Bisquick came from a Harvey House chef .

According to Bisquick and Harvey House lore, in 1930 a General Mills executive named Carl Smith was traveling on the Southern Pacific (Havery House was the company that ran the food services for railroads from the late 1800 - 1960s) and ordered a late night dinner. He was served a hot meal that included two fluffly and freshly baked biscuits. Mr. Smith realized that the chef had used a pre-made mixture of shortening, baking powder, and flour to make the biscuits. All the way back to Minneapolis, Carl Smith was thinking how he could bring this concept of instant biscuit mix that wouldn't go rancid to every American kitchen. When he got back to Minneapolis, he brought his idea to the test kitchens of Betty Crocker, who is part of General Mills, and in 1931 Betty Crocker's Bisquick was born with the slogan "He Deserves Fresh Bisquick Biscuits Tonight".

Bisquick crossed my path again a few days later when I picked up "Finding Betty Crocker" by Susan Marks at our local public library. I had seen the book a few times at various bookstores and it was on my reading list but there was something about the cover showing every portrait of Betty Crocker that called out to me. There is a whole chapter dedicated to Bisquick and it's influence on 20th century cooking. Did you know that Bisquick was one of the products that helped Betty Crocker earn a service commendation from the US War Department during World War II? Because the Bisquick already had sugar in the mix, the women on the home front didn't have to use their sugar ration to bake pie crust, cakes, and biscuits. Bisquick was also one of the products that started off the great Kitchen Debate between Richard Nixon and Nikita Khrushchev during Nixon's 1959 visit to Moscow. Betty Crocker Test Kitchen Demonstrators where showing convenience food advances in the GE model kitchen during the U.S. Trade and Cultural Fair. Nixon and Khrushchev were standing looking at a full meal made from Bisquick when Khrushchev made the comment "The Soviet Union doesn't need this type of advances".

The final time Bisquick crossed my path this past month was about two weeks ago. I was on the phone with my mom and we were talking about baking pies (you may remember this year is the year I'm mastering pie making). I told her I remembered this great tasting coconut pie she used to make when I was a kid that had this crunchy top and an almost foamy crust and I wanted the recipe. "OH! You mean Impossible Coconut Pie", my mom said laughing. "Honey, that is on every Bisquick box in the store". You know what....she's right!

Impossible Coconut Pie
From the Test Kitchen's of Betty Crocker

1/2 cup Biquick
2 cups milk
1 cup flaked coconut
3/4 cup sugar
1/4 cup butter, softened
1 1/2 tsp vanilla (I used 1 tsp vanilla and 1/2 tsp coconut flavouring)
4 eggs

Preheat the oven to 350 degrees. Combine all the ingredients in a bowl and pour into a greased 9" pie dish.


Bake for 50 - 55 minutes until the top is golden brown. Chill and serve cold.


Yummy! Just like Mom's!

If you are interested in the book, "Finding Betty Crocker" by Susan Marks, I heartily recommend it. It is a fascinating look at the myth of Betty Crocker (people still burst into tears at the Betty Crocker Test Kitchens when they find out she isn't real) and the way America cooked in the middle/late 20th century and the marketing of convenience food products. There are some really fantastic early advertisements and some interesting products like an all in one box apple pie mix and of course...recipes!
Finding Betty Crocker: The Secret Life of America\'s First Lady of Food

Tuesday, March 13, 2007

Cookbook Spotlight #3: Ships of the Great Lakes Cookbook - Steaming into a Port Near You


Sara of I Like to Cook and hostess of Weekend Cookbook Challenge hosts another event called Cookbook Spotlight. A publisher donates a few new cookbooks for Sara (and sometimes a co-hostess) to send out to some fellow food bloggers to cook several recipes from and then post a review. So far this group of bloggers has reviewed Mitchell Davis "Kitchen Sense" and Dorie Greenspan's "Baking: From My Home to Yours".

The next spotlight is on the horizon, off the starboard side, in the form of the cookbook I used for Weekend Cookbook Challenge #13: Cook from Your Newest Cookbook, The Ships of the Great Lakes Cookbook by Paula McKenna. I was thrilled when Sara agreed to use this book for her next spotlight and to let me co-host!

We've asked 10 fellow food bloggers to post by March 26th about cooking from this interesting cookbook and how the food fit for captains, first-mates and deckhands turned out for their home-port crews.

Keep a sharp look out from the crow's nest for the round-up of Cookbook Spotlight #3 : Ships of the Great Lakes Cookbook. We should be docking the first week April here and over at Weekend Cookbook Challenge; just in time for the ice in the shipping lanes to clear on Lake Kitchi-gummi and freighters to start moving iron ore from Duluth to Cleveland with the galleys of the "Lake Boats" humming with activity and the smell of good, hearty cooking.

Friday, March 09, 2007

Kitchen in a Box

If you woke up one morning and every appliance (with the exception of the refrigerator and stove), utensil, gadget, and cooking pot had disappeared from your kitchen, what would you choose to replace and why?

Just to make this more interesting you can only choose three appliances, three utensils, three gadgets and three pots.

And they all have to fit in a banker's box.

AND to make this little game even more interesting you only have $150.00 US to spend.

I can't wait to read your responses!

Sunday, March 04, 2007

Weekend Cookbook Challenge #14: All Aboard for Salads

This month's installment of Weekend Cookbook Challenge is being hosted by Tami of Running with Tweezers. She is filling in for Sara, our regular hostess, who is vacationing in the sun and surf of Hawaii. Tami picked a great theme for this month: salads. Now, this may sound like a strange theme for the month of March but I liked the idea of thinking about warm weather foods while the wind, snow, sleet and ice were all reminding me that despite what the groundhog said it was still winter here in New England. I am kind of piggy-backing on last month's WCC theme of cooking from one of my newest cookbooks. You may remember that I had a very hard time choosing a new cookbook to use last month so since I still haven't cooked from half my new cookbooks, I decided to use another for this month's WCC. It was also while preparing for this month's edition of WCC, I realised that I had a little personal mini-theme going: food from modes of transportation. Last month, it was food from ships in the form of Great Lakes Freighters. This month it is food from trains as I'm making New England Scallop Salad from The Harvey House Cookbook.

The Harvey Houses were a chain of restaurants founded by Fred Harvey in the late 1850's in the American West to serve the railroads, specifically the Atchison, Topeka and Santa Fe Railroad. Fred Harvey brought the idea of fine dining at a reasonable price to the burgeoning Wild West and by the 1880's Harvey Houses were known for their fine china, linen, good food and most especially for their waitresses, The Harvey Girls. Harvey Girls and how they helped civilize the West are probably best remembered in the 1946 Judy Garland musical "The Harvey Girls" that featured the Johnny Mercer song "On the Atchison, Topeka and the Santa Fe" (you should be humming that about right now). Like most people my age, I missed out on the golden era of passenger rail service in the United States but I did have exposure to the Harvey House chain of restaurants in the early 70's at the Kent County Airport in Grand Rapids, MI where the Harvey House operated the restaurant. I remember eating there several times waiting for my grandparents to fly in from their latest world travels. Even in the final years of the Harvey Houses, the restaurants presented "elegant" dining option in many ways; at least to a little girl from Northern Michigan. I knew because there was a white table cloth and crystal salt and pepper shakers on the table, I better mind my "P's and Q's". In the late 30's, Harvey Houses expanded beyond food service for trains to include opening restaurants at resort hotels, for airlines/airports, and even an attempt in the late 50's to have a line of refrigerated rail cars. By the late 60's, the age of rail travel had been bypassed by air travel and the Interstate Highway System. With this change in the way America traveled began the end of the Harvey Houses. Today, only a handful of "Harvey Houses" are still open as restaurants with the most authentic probably being the Harvey House at El Tovar Hotel in the Grand Canyon National Park.

The Harvey House Cookbook recipe for the New England Scallop Salad reflects the times it was invented, the late 30's. It offered an usual combination of "exotic" ingredients like cucumber, pimentos, mushrooms, green olives, celery, and French dressing. The salad was the Specialty of the House on the lunch menu at the Victor Hugo Inn in Laguna Beach, CA (the restaurant is still in operation as the Las Brisas). I used the recipe in the Harvey House Cookbook for the French Dressing. I didn't really like it as it had a very oily taste and, since I don't use dressing very often on my salads preferring instead to use a little fresh ground pepper and a squeeze of lemon or lime juice, so I chose not use it on the salad. What really appealed to me in this salad was the scallops as they are my all time favourite sea food. We are the tail end of the scallop season here in New England and while the scallops aren't as sweet as they were in December and January, they are still like eating candy. I chose to use huge, fresh Georges Bank sea scallops and not cut them up as the recipe instructs. I made one final adjustment to the printed recipe ingredients; I skipped the pimentos and celery since I don't like either ingredient. Lastly, I plated the salad ala a Cobb Salad (little piles of ingredients) vs intermingling the ingredients.


New England Scallop Salad
Adapted from the Harvey House Cookbook

1 small head of Heart of Romaine lettuce
1 Tbsp salted butter
3 - 4 large sea scallops
2 large white button mushrooms, sliced
1 small English cucumber (seedless cucumber), sliced thin
5-6 mixed olives (from the olive cart at the deli)
1 tablespoon sun dried tomatos, diced
2 wedges of lemon
salt, pepper, garlic powder to season scallops and saute mushrooms

Wash and dry lettuce. Using one leaf at a time, place in single layer on a medium plate. Wash, dry and season scallops with salt, pepper and garlic powder. Over medium heat, melt butter and season with garlic powder. In small saute pan, saute mushrooms in single layer, allowing each side of the mushroom to get golden brown. Remove from heat and place on paper towel to absorb any butter. Using same pan, sear scallops about 2 - 3 minutes per side until golden brown and translucent. Remove from pan and place on paper towel. Place scallops in center of plate of lettuce. Arrange sliced cucumbers, mushrooms, olives, sundried tomatoes, and lemon wedges on plate. Season to taste with fresh squeezed lemon juice, salt and pepper.

Harvey House French Dressing
From the original Harvey House in Topeka Kansas

One part tarragon vinegar
Four parts olive oil
Paprika, salt and Pepper to taste

Combine the ingredients in a bowl; blending with an ice cube in the bowl. Remove ice cube before using on salad.

Thursday, March 01, 2007

Incentive Programme

I've gotten a few requests from some folks for an update on how things are going on the 30/90 Plan. For those of you who have been long time readers, you know that in January my doctor gave me an ultimatum: lose thirty pounds in ninety days or she was going to put me on drugs for high blood pressure and high cholesterol. That was enough to motivate me to do something I as well as MBH and my family had been wanting me to do, lose the weight that several years of sedentary office work had put on. So, I began a regime of recording every calorie I consume, more exercise (LOVE yoga), and adjusting some of my cooking/snacking habits (why oh why does the guy who comes to the office three times a week keep taunting me with those kit-kat bars??!!).

Well, I'm very happy to announce that almost two thirds into my 90 days I have lost 22lbs!

I can't believe how much better I feel and how nice it is to see my cheeks again (not THOSE cheeks but I suspect there is some improvement on that end as well) and to have to say "Honey, I need new belts. There aren't enough holes on these anymore and I can't get them small enough". I've started cooking four meals a week exclusively from Cooking Light and I can't say that either Mr. Pickypants nor I have noticed all that much different from a taste standpoint; other than the chicken soup I made a few weeks ago had less salt. Ok, so he wasn't that impressed with the Beef Goulash or the Saffron Shrimp Pasta (I liked both of them). In addition, I'm enjoying learning to lighten up our favourite dishes and still pack a lot of punch into the meals.

And besides not having to go on prescription medicine, I have one added carrot being dangled in front of me as an allurement to lose the weight. In January MBH publicly declared that if I lost the 32 pounds in the time allotted he would purchase me the KitchenAid stand mixer of my dreams: The Professional 5 Plus 12 cup Bowl Lift Mixer. I think "Empire Red" will look very nice on my counter...

Saffron Shrimp Pasta
Adapted from Cooking Light
Serves 6

1/4 cup dry white wine
3/4 cup low sodium chicken stock
1 tsp tumeric
1/2 teaspoon saffron threads
1/2 teaspoon sea salt
2 garlic cloves, minced
2 pounds large shrimp, peeled and deveined
1/4 cup chopped fresh flat-leaf parsley


Combine first six ingredients in a large nonstick skillet; bring to a boil. Cook 5 minutes; add shrimp. Cover and cook 2 minutes or until shrimp are done, stirring occasionally. Serve over whole grain bow tie pasta and topped with chopped parsley.

Serving Size: 1/2 cup pasta and 5 oz shrimp with 1/4 cup of sauce

Calories: 391; Fat: 3.8g; 428mg; Carbs:45.5 (2.7 for the shrimp alone)

Note: This is fantastic cold over a bed of lettuce the next day!

Sunday, February 25, 2007

The Great Asiago Cheese Bread Challenge

About two weeks ago, Lis over at La Mia Cucina and I were exchanging emails back and forth with a furious pace about important topics like fruit in sourdough starters, growing up along the Great Lakes, and 80's Hair Bands. Lis was sick with that awful head/throat/upper chest cold so many of us in this merry little band of food bloggers have been fighting on and off all winter. So naturally, our missives turned to foods we crave when we are sick. Mine included, of all things, McDonald's Big Macs and their vanilla shakes (Who would have thought that Wikipedia would have an entry for Big Mac??!!). Lis had only two foods she wanted, sweet potatoes and Panera's Asiago Cheese Bread toasted. She waxed very poetically about the crumb and the crunchy, cheesy top of the bread and how the zing of the cheese was perfectly matched with the sweet of the dough. A little digging on her part on the Panera website produced a complicated recipe for the bread based around a grape sourdough starter with overnight ferments and fussy steps. The recipe, while completely authentic and correct, was lots of work with lots of time involved; especially for someone not feeling well and just wanting their feel good bread. So, I offered to see if I could find a quick, easy, down and dirty way to short-cut the Panera recipe for a novice bread baker.

Studying the Panera recipe, I made a few assumptions about how to make the bread without having to go through creating a starter and long, overnight ferments but I would need to do some actual taste testing on the Panera bread to be 100% sure I was on the right track (darn). So off to my local Panera I went to purchase a few "control" specimens: two asiago cheese bagels and one asiago cheese loaf. Consuming one of the bagels on my drive home confirmed some of my hypothesis: the bread was very soft and chewy with a sweet tang undertone and that a sponge method probably would produce similar results in chewiness and texture. With a few ideas of how to shorten the time, all that was left was to figure out the exact proportions and ingredients.

Knowing that potato bread is a favourite for sandwiches because of its soft and chewy texture and has a golden colour, I decided to use as my base the potato bread recipe from Rose Levy Beranbaum's The Bread Bible. Other recipes I took some inspiration from are Rose Levy Beranbaum's cheese bread from The Bread Bible and the cheese bread recipe from The King Arthur Flour Baker's Companion: The All-Purpose Baking Cookbook. It took two attempts at making this bread before I was satisfied I had a recipe that was fairly easy to duplicate and had the same taste and texture as the Panera asiago cheese bread.

The first attempt was basically the potato bread recipe from The Bread Bible verbatim but with 1 1/2 cups of grated asiago cheese and 1/4 cup less liquid (to account for the moisture the cheese would add). It was tasty and soft with the right look but didn't have the chewy texture of the Panera bread nor enough of the tang. For the second loaf, I decided to make some adjustments to the ingredients and proportions as well as the sponge ferment time. The first adjustment I made was to increase the amount of potato starch in the recipe. Potato starch adds chewiness to bread which is why you will see ingredients like instant potato flakes and potato water in Canadian white bread recipes (not breads from Canada that are white but a "type" of heartier white bread popular in the US that is denser than traditional white bread). Not wanting to add more liquid to the recipe, I decided to stir into the potato water 3 tablespoon of mashed potatoes and then strain the water to get out any undissolved bits of potato. I also decided to add bread flour for more gluten (more gluten = bigger chew) and dry milk (softer crumb). Letting the sponge ferment longer than called for in the potato bread recipe would mean the yeast had more time to develop tang from the release of gasses. I also added 2 Tbsp of plain yogurt to get instant zing; a trick from a fellow sourdough baker who likes really zippy sour in his bread. The results this time were an almost perfect copy of the Panera Asiago Cheese Bread; chewy and dense with a super soft crumb and more tang.

Basically making this bread has six steps: Sponge, Make Dough, First Rise, Shape Loaf, Second Rise, Bake. Each one of these stages has a few mini-steps. Also, while this is shorter than the Panera Bread recipe which takes 12 -16 hours plus, making this bread takes about 7 total hours.So, here we go!

Breadchick's Copycat Asiago Cheese Bread
inspired by Panera Bread and Lisa of La Mia Cucina. With special thanks to Rose Levy Beranbaum and as always King Arthur Flour (Sounds like an Oscar acceptance speech doesn't it??)

Sponge
1 medium high starch potato (I used Yukon Gold)
1 cup plus 3 Tbsp unbleached all purpose flour
3/4 cup potato water
3 Tbsp mashed potatoes
1 Tbsp honey
1/2 tsp instant/rapid rise yeast

Step 1: In a large glass bowl or 2 1/2 quart plastic container with lid, combine flour and yeast and set aside.

Step 2: Peel potato and dice into small cubes, place in medium sized sauce pan. Add to 2 cups cold water and bring to boil. Let boil for 20 minutes. Don't worry if the cubes break down, we're going to mash the potatoes and we want lots of starch in the water. Strain the potatoes, reserving the water. Mash the cubes into a very fine mash using a food mill or potato ricer (or lots of elbow grease). Let potato water cool to 110 degrees and stir in 3 Tbsp of mashed potatoes until potatoes are dissolved. Using a very fine strainer over a liquid measuring cup (coffee filter in a strainer works if you don't have a fine mesh strainer), measure out 3/4 cup of potato water. Set aside remaining potato water, you may need to add more liquid during the dough stage.

Step 3: Add potato water and honey to flour mixture and mix thoroughly so there are no lumps of flour. Cover your glass bowl tightly with plastic wrap or if you are using a plastic bowl/lid combination, make sure the lid is on tightly. Place in a warm place (70 - 90 degrees. I like to use my oven with the oven light on for my warm place). Let ferment for 2 hours or until tripled. The sponge will be extremely bubbly and look like a billowing cloud.


Dough/First Rise
1/2 cup plus 2 Tbsp unbleached all purpose flour
1/2 cup plus 2 Tbsp bread flour (12% gluten or more)
1 Tbsp dry non-fat milk
1 Tbsp instant mashed potato flakes
3/8 tsp instant yeast
3/4 tsp salt
2 Tbsp plain (not vanilla) yogurt
1 1/2 cups of grated Asiago cheese (reserve 1/4 cup for top of bread)
1/4 cup grated Parmesan cheese

Step 1:Combine flours, dry milk, potato flakes, yeast and salt into a medium bowl and add the fermented sponge (Since I use a 2 1/2 quart plastic bowl/lid combo for my sponge container, I use my sponge bowl as my mixing bowl/proofing box so I add the dry ingredients directly into my sponge). Stir until almost all combined. This will look dry. Do not add any liquid though.

Step 2: Stir in yogurt and cheeses. Dough will be sticky but shouldn't be runny. If runny, add more all purpose flour, 1 Tbsp at a time until dough is sticky but not oozy. If still dry, add more potato water, 1/2 Tbsp at a time.

Step 3: Turn dough out onto a well floured surface and knead for 5 minutes. Dough will feel lumpy due to cheese but will have some "spring" when done kneading. Let dough rest for 10 minutes to relax the gluten. Pull the dough into a ball. The dough should feel moist but not sticky. If still sticky, knead a bit more flour into the dough, 1 Tbsp at a time. If you add flour, let dough rest for 10 minutes and test for moist firmness again.

Step 4: While dough is resting, clean out sponge container and smear unsalted butter all over the container and lid (if using container with lid). Gather rested dough into round ball and place back into prepared sponge container. If using glass bowl, smear some butter on top of dough ball to prevent dough from sticking to plastic wrap at end of rise


Reseal sponge container or tightly cover glass bowl with plastic wrap and return dough to warm place to rise for 1 1/2 hours or until double.


Shape the Loaf/Second Rise:
Step 1: Remove risen dough from warm place and very gently deflate by placing fist in middle of risen dough and pushing down. Do not "punch" dough, we want some air to remain in the dough. This is what creates "holes" in the finished bread.

Step 2: Turn dough out onto very lightly floured surface. Dough will be very springy and bouncy to the touch. Gently press and stretch dough into a rectangle about 6 1/2" wide by 12" long. If dough keeps springing back, stretch dough a little, let it rest about 5 minutes, stretch dough a bit more, let rest and repeat until dough is about right size. (This is the gluten in the dough acting like a rubber band. Gluten is what gives bread its chew).

Step 3: With the dough rectangle oriented like this:


Starting at the top, fold 1/3 of the dough down towards you like a 3 fold business letter.


Fold bottom third of dough up and away from you to cover the first fold.


Place in buttered 8 1/2" by 4 1/2" glass loaf pan, seam side down. Brush melted butter on top of dough, cover loaf pan tightly with plastic wrap and return to warm place. Let rise for 1 hour or until dough begins to touch plastic wrap. Remove the plastic wrap and let dough continue to rise until about 1/2" above edge of loaf pan.


Baking the Loaf:

Step 1: If you are using your oven for your warm place, remove the risen loaf from the oven. Pre-heat the oven at 350 degrees.

Step 2: Gently brush top of risen loaf with and egg white wash (1 egg white and 1/2 tsp water combined). Sprinkle reserved grated asiago cheese on top of risen loaf


Step 3: Bake bread for 40 minutes or until golden brown. An instant thermometer inserted into the center of the bread will read 210 degrees when bread is done.

Step 4: Warning!! This is the hardest part of this recipe. Let bread cool COMPLETELY on a wire rack. If you cut into this bread while it is even slightly warm, it will get all gooey and soggy. If you want it warm when you eat it, heat it for 10 - 15 seconds in the microwave or toast it!

So you can see how my copycat loaf compared in looks to the Panera loaf, here are some pictures. The Panera "control" loaf is sitting on top of my bread.
Crumb and texture:


Crust and Colour:

Wednesday, February 21, 2007

One Last Paczki Post

While I work out a few "issues" with posting pictures from remote locations so I can finish up two requested posts (Yes, Lisa THAT post) you can feast your eyes on more Paczkis, including a big, huge live one...

Paczki Power in Northern Michigan

Neil Rubin sings to the love of a "jelly filled donut"

Tuesday, February 20, 2007

How Did it Get to Be Fat Tuesday?

Ok, so how did I miss that today was Fat Tuesday?

I had great plans this year to make a King Cake and bring it into work.

And I forgot to tell my mom to go to Rogers City over the weekend to get me a Paczki.

Sigh....

Oh well. Happy Paczki Day (that's Fat Tuesday to most of you!)

Paczki
Note: I'm republishing this recipe from last year's Paczki Day Post
1 1/2 packages active dry yeast
10 egg yolks
1/3 cup sugar
3/4 ounce rum or whiskey
1/4 cup lukewarm milk
1/2 cup melted butter
3 1/4 cups all purpose flour
1 1/2 cups canned prune filling or cherry jam
(Note: you can substitute any flavoured jam to your liking, just be careful to avoid the really sweet ones as they will be overpowering. Some recipes I’ve found also use poppy seed paste)
1/2 cup milk, scalded & cooled
1 teaspoon salt
powdered sugar

Step 1: Make the sponge

Activate the yeast by dissolving in the 1/4 cup lukewarm milk( milk will become slightly bubbly and frothy in about 5-10 minutes). Scald the 1/2 cup milk while waiting for the yeast to become activated and gradually add the flour into the scalded milk (I sift my flour before adding it to the scalded milk). Add the yeast mixture and stir until smooth. Cover and let rise until very bubbly (about 1/2 hour)

Step 2: Make the dough

Beat the salt into the egg yolks. Then add the sponge to the egg yolks and salt. Mix very well until smooth. Add the sugar and rum again mixing well. Knead in the bowl until a nice smooth dough ball forms. Next, form a well and pour in the melted butter and combine with your hands until thoroughly mixed. Place in a greased bowl, coat with nonstick cooking spray, cover with plastic wrap and let rise until doubled (about 1 - 1 1/2 hours). When dough is doubled, punch it down and let rise until double or triple (about 2 hours).

Step 3: Form the paczki:

Divide dough in half, set one half aside in covered bowl so it doesn’t dry out. Roll out the half you are working into a rectangle that is about 1/4 inch thick. Using a biscuit cutter or the mouth of a glass (2″ or larger) cut as many rounds as possible. Place a about 3 tsp of filling in the center of one round. Brush edge of round with egg white and cover the filling with another round. Seal edges very well so filling won’t leak out and rounds won’t separate during last rise. Place the filled paczki greased baking sheets. Leave about 4 inches of room between each paczki to allow for rising. Repeat the process until all the dough is used (this recipe will make between 10 - 12 good sized paczki depending on amount of dough). Lightly cover with greased plastic wrap and let the paczki rise until doubled (about 1 hour).

Step 4: Fry the paczki
(note: if you have a deep fryer, make sure you change the oil if you have fried anything other than pastries)

Pour a neutral tasting oil into a deep fryer or deep pan (about 7 inches if you are using deep pan ). Heat the oil until it is about 360 to 370 degrees. Deep fry the paczki for about 3 minutes per side or until golden brown on both sides and it floats to the top. Let drain on cooling rack covered with paper towel to absorb any excess oil (flip over after about 2 minutes or so) Dust with powdered sugar when slightly warm. Let cool completely before serving as filling will be very hot otherwise.


Wednesday, February 14, 2007

My, What Beautiful Buns You Have!

The weather was absolutely frightful in Boston today. It couldn't make up its mind whether it wanted to snow, blow, rain, sleet, or ice...so of course it did all those things and sometimes all at once. I was out in our driveway three times today pushing the wettest, heaviest snow I think I've ever had to shovel. All this meant that I didn't go into work but rather "worked" from home.

And exactly what did I work on? I worked on my buns...


Beautiful Burger Buns
Adapted from King Arthur Flour Baker's Companion
Makes 8 Large Buns

8 oz water
2 Tbsp melted unsalted butter
1 large egg
1 tablespoon instant yeast
2 3/4 cup unbleached all purpose flour
1/2 cup bread flour
1/4 cup potato flakes
1/4 cup sugar
1 tsp salt
1/2 tsp onion powder (optional)
sesame seeds, poppy seeds, or minced dried onion (optional)
1 egg white and 1 tsp water for egg wash

Sponge: Combine water, 1/2 Tbsp yeast, and 1 1/2 cup all purpose flour and 1/4 cup bread flour into a glass bowl. Cover with plastic wrap and let ferment in a warm place for 1 1/2 hour or until tripled.

Dough: Add melted butter, sugar, egg, remainder of yeast, salt/onion powder (if using), and potato flakes to sponge. Mix thoroughly. Add remaining bread flour and 2 1/2 cups of flour. On well floured surface, knead in remaining flour. This dough will be very soft and sticky. Knead, adding additional flour 1 Tbsp at a time if necessary until dough is firm and smooth but still soft (about 5 minutes). Let rest for 10 minutes. Knead 3-5 additional minutes adding flour again 1 Tbsp at a time if dough is still too sticky. Place in buttered glass bowl and let rise for 1 hour or until doubled.

Forming and Baking Rolls: Gently "punch" down dough and on lightly floured surface, divide dough into 8 pieces. Shape each piece of dough into a ball about 4" in diameter, making sure not to compress too much. Brush the top of each ball with egg wash then roll top into seeds or onions. Place on greased baking sheet about 4" apart and cover with plastic wrap (spray plastic wrap with cooking spray to prevent it from sticking to risen buns). Let rise in warm place for 30 minutes or until doubled. Pre-heat oven at 375 degrees and place baking pan filled with 1" of water in the oven while pre-heating.

Bake buns for 12 minutes or until golden brown on top.

Note: You can shape this dough to be any type of bun you want (sub, hot dog, etc.)

Saturday, February 10, 2007

Blog Party #19: Take Comfort...in Foods from My Home State

After last month's formal affair, our hostess of the Blog Party, Stephanie of Dispensing Happiness has declared February's theme to be Take Comfort. Considering the frigid weather we have been having in the northeast for the past two weeks, comfort food made bite size for and a warm drink will be perfect to share with friends new and old while we stand beside a roaring fire in the winter gloaming.

For this month's little shindig, I've decided to bring a dish from my home state of Michigan, Mini Yooper Pastys or Pasties depending on what part of the Upper Peninsula (UP) you go to buy your pastys (and NO...not those kind of pasties, jheesh).


To wash these flaky but filling little meat pies down, I've also brought along another Michigan original, Vernor's Ginger Soda!


It is much spicier than your normal ginger ale and the bubbles will make you sneeze. You can either have it straight up and ice cold (the way I like it) or served as a drink called a Hottness (I've got the spiced vodka right here in my hip flask) and if Stephanie has some vanilla ice cream somewhere in her freezer, you can make a Boston Cooler. Finally, if you are really talented (and deranged) you can make a Michigan Tech Boilermaker (beer in a pint glass, shot glass of Vernor's dropped to the bottom of the glass upright with Vernor's still in shotglass).

Pastys are originally from Cornwall, England where they were made for Cornish miners to take into the mines as meals. They were brought to the UP in the late 19th century by Cornish miners who came to work the iron and copper mines. Every miner's wife had her own recipe she used. Some were filled with sliced meat, others with ground meat. Some had purple turnips, some had rutabagas, some had only potatoes and carrots. My great great grandfather on my father's side was a miner in the Keweenaw Peninsula and the recipe I use is the one that my great great grandmother used except I don't use suet or lard but Crisco. Her pasty was filled with diced turnips, onions, potatoes, and ground venison. Over the years, the meat has changed to ground beef or a mixture of ground venison and beef. Normal sized pastys are huge!! (They were meant to fuel a miner for a 12-14 hour shift). They are about the size of one half dinner plate and are normally served smothered in gravy.

For our finger food version, we are going to roll out the dough to form a circle a little bigger than a dessert plate. Using a saucer as a pattern, we will cut out a circle that is about 6" in diameter. Using our rolling pin as a support for one half of the dough we'll evenly place about 3 Tbsp of diced turnips, onions and potatoes that have been seasoned with salt and pepper in the center.


Making sure there is a border of about 1 1/2" on the filling side, we'll then place 2 Tbsp of ground beef seasoned with salt, pepper and parsley that has been formed into a little half moon shape on top of the diced veggies.


We'll then place a little sliver pat of butter on top the meat and fold over the top crust, tucking it around the filling. We'll finish up by wrapping the 1 1/2" border up, over, and tucked down to make a really tight seal. A little prick on top to let the steam out and a bit of a milk wash complete the pasty.


Into a 400 degree oven for 40 minutes and out comes a golden pasty, ready to be placed on a little party plate with a side of gravy for dipping!


Mini Yooper Pastys
Adapted from my great great grandmother Burgess

Serves 8

Crust:
3 cups all purpose flour
1 1/8 cup Crisco
1/4 tsp salt
6-7 Tbsp cold water

Combine salt and flour in large bowl. Cut Crisco into small chunks and using a pastry blender, cut Crisco into flour mixture until flour mixture looks like tiny peas. Don't worry about keeping the Crisco in large chunks. This crust should be a hardy crust not super flaky. Add cold water, one Tbsp at a time, until the dough is almost play dough consistency. Pull dough into a round ball and cover with towel. Let sit for 10 -15 minutes. Make the filling.

Filling:
1 1/2 pound ground beef
1 medium purple turnips finely diced
2 medium potatoes (Yukon Gold), finely diced
2 medium carrots (fat ones work best), finely diced
1 medium yellow onion, finely diced
salt
pepper
parsley
butter

(note: I have no idea how much salt, pepper, and parsley is really in this recipe. I learned to make these by watching my grandmother. She always used about a quarter size dollop of salt in her palm x 2 and a quarter size dollop of pepper. For me, a quarter size dollop is about a tsp).

In medium bowl, combine turnips, potatoes, carrots and onions. Season with about 2 tsp of salt and 1 tsp of pepper. Set aside. In another medium bowl, mix ground beef with about 2 tsp of salt, 1 tsp of pepper, and 1 1/2 tsp of parsley (1/2 tsp = a nickel). Set aside.

To make a pasty:

Turn dough out onto lightly floured surface. If dough is really sticky, knead in a bit more flour (1 Tbsp at a time) until the dough is moist but not stiff. Divide dough into 8 pieces. Roll each piece out into a circle about 7" in diameter. Using a saucer as a pattern and a sharp paring knife, cut out a circle about 6" in diameter (set aside the scraps to patch any torn pastys). Using the rolling pin to support one half a dough circle, spread about 3 Tbsp of veggie mixture on the the opposite side of the dough circle; leaving 1 1/2" border on the filling side of the dough (see pictures above). Take about 2 Tbsp of ground beef mixture, shape into a little half moon and place onto top of veggies. Place a pat of butter on top of the ground beef. Fold over the top half of the dough and tuck/seal around filling (if dough tears, use scraps to patch). Tuck over the top half seal, the 1 1/2" border crimping and sealing tightly. Prick top of pasty with a sharp knife to create a steam hole. Place on cookie sheet lined with parchment paper in pre-heated 400 degree oven. Bake for 40-45 minutes until crust is golden brown. Serve warm with gravy for dipping.

Thursday, February 08, 2007

Retro Recipe Challenge #6: The Way to a Man's Heart...

This month's Retro Recipe Challenge, hosted every month by the lovely Laura Rebecca, has us cooking something for our honey for Valentines Day. This is a bit tough for me since we celebrate "anti-Valentines Day" in our house. Which actually is really nice because I never know when MBH is going to decide to hold an "Anti-Valentines Day" and surprise me with a small token of his affection like the package of pocket sized Moleskines he got for me a few weeks ago to jot down book titles, recipe ideas, and random thoughts or the Digital Food Photography book he gave me to celebrate the launch of Breadchick.com. Thus, I wasn't really planning on participating this month as I cook something special for MBH every day.

Until that is I stumbled upon a section in the McCall's Show-off Cookbook published in 1965 as part of the McCall's Cookbook Collection called "Cook Your Way Into His Heart with Our Man-Tested Menus". After finding this gem of a section, I knew I had to rethink my whole plan of not cooking for this RRC. I mean how can any 21st Century woman resist trying out a "Man-Tested Menu"??!! Especially when enticed by this wonderfully crafted opening paragraph:

"If it's true that the way to a man's heart is through his stomach, then all a girl needs to achieve that end is a working kitchen and our man-tested menus. All planned with malice aforethought, these recipes are designed specifically with your man in mind. We can almost guarantee that you can cook your way into his heart - and live happily ever afterward."

WOW! With a statement like this I just HAD to try something from one of the "Man-Tested Menus"!

As you may recall from an earlier post, I use food as a motivational tool at work (ok, it really is a bribe). I knew this week's special project engineering meeting was going to be a particularly tough meeting. I have several projects with tight deadlines that need to have custom product developed for the projects. I also know that our engineering group is stretched to the max on the type of projects they can take on right now. So, as the only woman in the entire engineering group, I did what any self respecting woman of the 50's and 60's would do...I baked a cake. Not just any cake either but the Old-Fashioned Coconut Cake from the "Man-Tested Menus"!!

Girls, let me tell you this cake is four layers of pure coconut heaven. It is a classic all white cake with all white frosting with generous amounts of shredded coconut pressed into the frosting and liberally sprinkled between the layers AND IT IS TO DIE FOR. It is everything you expect a coconut cake to be: moist and dense, with a good dose of coconut flavouring with every bite. This cake isn't a start from a white cake mix type cake either. This is a whipping six egg whites, sifting cake flour, creaming butter, and adding the flour/milk in four parts starting with the flour and ending with the flour, don't go running through the house because the cake might fall type of cake. The frosting isn't for the faint of heart either. This frosting is the full on, bring the sugar and egg whites to soft-ball stage while you stand over a double boiler with your egg beaters going Seven Minute Boiled Frosting.

And I'll tell you what...if the reaction I got this morning during the engineering meeting when I opened the cake carrier and started handing out slices of this beauty are any indication of the results of using a Man-Tested Menu, then I say ladies, go get your man (and your egg beaters)!!!


Old Fashioned Coconut Cake
From McCall's Show-Off Cookbook (1965)

Cake:
3/4 cup egg whites (about 6)
2 3/4 cups sifted cake flour
3 tsp baking powder
1/2 tsp salt
1 1/2 cups sugar
3/4 cup soft butter
1 tsp vanilla extract
1/2 tsp almond extract (I used coconut extract)
1 cup milk

In small bowl of electric mixer, let egg whites warm to room temperature (note: let ALL your ingredients come to room temperature, they conveniently leave that little nugget about baking cakes from scratch out because they assume you know this because you always bake your cakes from scratch and your mother taught you this!). Meanwhile, preheat oven to 350 F. Grease well, flour and layer with a circle of wax paper three (8 by 1 1/2 inch) or two (9 by 1 1/2 inch) cake pans. Sift flour with baking powder and salt into a medium bowl and set aside. At high speed, beat egg whites until foamy. Gradually beat in 1/2 cup sugar, 2 Tbsp at a time, beating well after each addition. Beat until soft peaks form when beater is slowly raised. Set aside. In large bowl of electric mixer, at speed, cream butter with rest of sugar and the extracts until light and fluffy. At low speed, beat in flour mixture (in fourths) alternately with milk (in thirds), beginning and ending with the flour mixture. Beat in egg whites just until batter is smooth, about 1 minute. Pour batter into prepared pans (about 1/2 full); bake 25 minutes or until surface springs back when gently pressed with fingertip. Cool in pans for 10 minutes. Remove from pans; cool throughly on wire racks.

Frosting:
1/4 cup egg whites (about 2)
3/4 cup sugar
1/2 tsp cream of tartar
dash salt
1 cup heavy cream
1 tsp vanilla (I used 1/2 tsp vanilla and 1/2 tsp coconut extract)
2 cans (3 1/2 oz size) flaked coconut (I couldn't find this in a can, so I used bagged flaked coconut)

In top of double boiler, combine egg whites, sugar, cream of tartar, salt, and 2 Tbsp water. With portable mixer or rotary egg beater, beat about 1 minute to combine ingredients. Cook over rapidly boiling water (water in bottom should not touch top of boiler), beating constantly about 7 minutes or until stiff peaks form when beater is slowly raised. Remove from boiling water. Transfer frosting to medium bowl; cool completely. In small bowl, whip cream and vanilla until cream is stiff enough to hold its shape. Fold cream mixture and one can (1 cup) of coconut into cold frosting, with rubber scrapper, using an under and over motion and mixing until blended.

Putting the Cake Together:

Slice any "peaks" off the tops of the cakes so each cake is fairly flat (save this for a treat for the kids or for a dessert) Slice each cake into two layers. Starting with a bottom on the bottom, put a layer of frosting on top and sprinkle with coconut. Repeat until all the layers are used, finishing with a bottom with the flat part on top. Fill and frost the sides of the cake and then frost the top. Using a cupped palm, lightly press loose coconut into the sides and sprinkle any remaining coconut on top of the cake. Chill for one to three hours before serving.

Serves 10

Sunday, February 04, 2007

This Isn't Your Mother's Microwave


What do you get when you combine chocolate, coconut, almonds, and graham crackers with a microwave?

Instant Gooey Satisfaction...

Chocolate Almond Coconut Bars
adapted from Introduction to Cooking with the Amana Radarange Microwave Oven

6 Tbsp butter
1 1/2 cups graham cracker crumbs
1/3 cup sugar
1 cup toasted almond slivers
10 oz sweetened condensed milk
1 3/4 cup flake coconut
1 12oz pkg semi sweet chocolate chips

Melt butter on high until melted in a 8" x 8" x 2" glass baking dish. In small mixing bowl, mix graham cracker crumbs and sugar. Add graham cracker and sugar mixture to melted butter. Combine and press evenly and firmly into bottom of baking dish. Microwave on high for 1 to 1 1/2 minutes or until firm. Sprinkle almonds evenly over graham cracker crust. In same mixing bowl used to mix graham cracker crumbs and sugar, combine the coconut and condensed milk. Using a spatula, spread on top of almonds. Microwave on high for 4 minutes or until firm (if your microwave doesn't have a carousel, turn 1/2 way through cooking time). In medium glass bowl, melt chocolate chips in microwave and spread on top of coconut layer. Cool until chocolate is hard. Cut and serve.

Friday, February 02, 2007

Random Food Musings from a Commute

WHEW! We made it to Friday!!!

It has been a long week for both MBH and I. My new boss was in town from our corporate headquarters the first part of the week meaning long days at the office and little cooking went on at our house. MBH had a flurry of interviews and I am very excited to report that starting Monday he will be gainfully employed again!!! I'll be fixing one of his favourite meals tonight to celebrate.

I'm not sure if it was the busy week we both had or the cold weather but my creative food juices seem to have gone on Holiday (If they are smart, they went to Nevis or St. Lucia to laze around on the beaches in quiet solitude). I wandered around the kitchen on autopilot most of the week with the exception of Wednesday night when I made an interesting dish I'll be posting about over the weekend. Otherwise it was some old standbys and one night of take out.

I stumbled upon and was directed to a few interesting food sites this past week but by far my favourite was Airline Meals.net; a review site of the food offered on the airlines of the world. The site encourages travelers to take food pictures of the meals they are served and rate them. There was even a section for the crews to rate the meal the 'company' provides. No surprise that US airlines ranked very low in the reviews, since unless you are in First Class (and even then not always) in the US Airlines don't offer much in the way of food any longer. If you have ever wondered what they serve for meals on Aero Mongolia, you can find it here. I loved looking at what other parts of the world serve as breakfast on airplanes.

A few of my favourite food bloggers all got together this past weekend and embarked on the Mount Everest of pastry making: flaky croissants. You've heard of movable feasts and dessert runs right? Well, these fine ladies, lead by Lis of La Mia Cucina, have a little cooking bee every month. If you haven't read these posts, I completely encourage you to visit over at their sites and read about their adventure with puff pastry. Make sure your mouth isn't full of coffee, tea or anything else though whilst reading their "round-up". Speaking of which....does anyone know how to get tea gunk off your monitor??

I think it is time to pull out the sweet starter from the fridge and bake with it either Sunday or Monday. I'll do that tonight when I get home and before I embark on MBH's celebratory dinner. I haven't baked with it in about five months so it will need two days to get going again. I've also been toying with the thought of making a "Herman" but every time I get close, I think I need another starter in my fridge like I need another hole in my head. Any thoughts on what I should bake with my sweet starter?

I can't wait until tomorrow. Not only is it Saturday but I've been craving dim sum. I see Boston's Chinatown in my future...

Saturday, January 27, 2007

Weekend Cookbook Challenge #13: From My Newest Cookbook - a Bit o' Lake Fare

For this month's installment of the Weekend Cookbook Challenge hosted by Sara of I Like To Cook, we are asked to cook a recipe from our newest cookbook. If you know me well, you will know this a very appropriate and ironic theme. As a cookbook-aholic, I acquire a new cookbook on average every 5.7 days and every once in a while go on a huge bender! Since Sara posted this month's challenge theme, I have purchased or been given fourteen new cookbooks. Given the speed with which I accumulate cookbooks, I am always in the state of cooking from a new cookbook. Since I couldn't honestly decide which new cookbook to use for this challenge, I gathered the bounty from the past month, tossed them onto the guest room bed, closed my eyes and grabbed one and...


I couldn't have been happier with the winner of my grab-a-cookbook, Ships of the Great Lakes Cookbook!


I received the Ships of the Great Lakes Cookbook as a Christmas present from my folks this year. This book is about two of my hobbies...um make that passions: cooking and being a boatnerd (a person who follows almost rabidly the comings and goings of Great Lakes freighters or Lakers ). Lakers are famous for their hearty, filling and delicious food. Next to the captain and the chief engineer, the most important person on the crew is the cook (also know as the steward). They feed up to 29 men three full meals a day; no matter the weather or the mood of the Lakes plus make sure there are plenty of treats, snacks, and left-overs so that the crew of these behemoths of the Lakes (average size of a Laker is over 700' long) can always get something to eat. One of the best chocolate chip cookies and definitely the coldest milk I ever had in my entire life came from the galley of the Paul R. Tregurtha, a 1,000 Footer that makes trips during the sailing season (late March until late January) between the iron ore mines along the western shores of Lake Superior to the steel mills located in Gary, Indiana on Lake Michigan and the mills in Ohio along the southern shores of Lake Erie. To learn a bit more about the galleys of Great Lakes freighters you can go listen to an episode of "Hidden Kitchens", a series from the Kitchen Sisters heard on NPR radio.

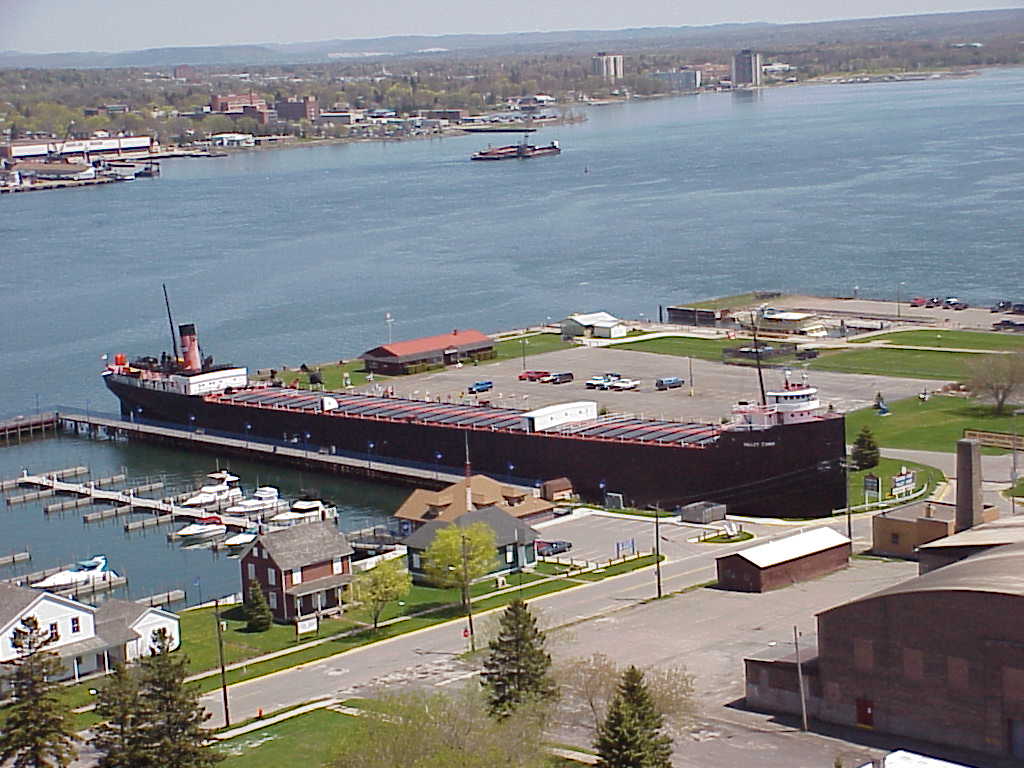
Ships of the Great Lakes Cookbook features recipes actually used in the galleys from not only the Lakers but also from some tall ships that ply the lakes, passenger ships and ferries from a long gone by era, Coast Guard cutters assigned to the Lakes, and "retired" ships that are now museum ships like the Valley Camp and the Mather. Some of the recipes have been cut down to make servings for the home but quite a few are published just as they are written. So a home cook would have to do some adjusting; unless of course you DO want to make 24 servings of the Hungarian Beef Goulash served on the M.V. Canadian Progress or eight loaves of white or rye bread from the M.V. Oglebay Norton (now the American Integrity). There is even a tongue in cheek recipe for the "Best Fruit Cake Ever!" contributed by a wheelsman from the S.S. Courtney Burton (now the American Fortitude) that calls for 1 to 2 quarts of whiskey and has directions like "check the whiskey" every few steps. As the recipe for the fruit cake progresses directions like "add 1 babble spoon of brown uger or what ever colour you can find" followed by another "check the whiskey" begin to appear. Each section of the cookbook features a little history about the ships, the crew, and most importantly the cook on board whose recipes are printed. There are pictures of the galleys, reprints of menus from Thanksgiving and Christmas (the two biggest meals served during the sailing season). Recipes range from very basic soups to extremely elaborate dishes like beef wellington. There are also recipes for quite a bit of regional fare like tourtiere (a French-Canadian meat pie), broiled Lake Superior whitefish, and Miracle Whip devil's food cake.

Trying to find a recipe to cook was hard, but I finally settled on the Walnut Bars from the galley of Dawn Weymouth, the steward on the M.V. Indiana Harbor at the time Ships of the Great Lakes Cookbook was published (stewards like most of the crews with the exception of the captains move from boat to boat each season depending on the company assignments).


There are quite a few women who have made cooking for the crews of Lakers their career and Dawn is one of the best known. I made the Walnut Bars to take work for my weekly Thursday engineering meeting. They are a layered bar cookie with a shortbread crust and then a baked topping of walnuts, brown sugar and flaked coconut. After the bar cools, you frost it with an orange/lemon flavoured frosting. I made the bar portion of the recipe on Wednesday and then frosted them Thursday morning before going to work. I doubled the shortbread crust to provide a thicker base for the walnut filling. The recipe was easy to follow and in about one hour I had the bar part of the cookie done. I let the bar cool a bit and since the filling was toffee like, I cut the cookie into bars before I let them cool in their pan completely. These bars are fantastic! They are so buttery and rich but sturdy and the frosting is a perfect flavour foil for the sweet filling and shortbread crust.


I was told after our meeting that in no uncertain terms they were to go into my regular rotation of bribes. After tasting these wonderful treats I can definitely see why the walnut bars are a crew favourite and as the story about the Indiana Harbor's galley says they "don't last long on board either!"

Walnut Bars
From the Galley of Dawn Weymouth, Steward of the M.V. Indiana Harbor

Crust: (I doubled this for a thicker crust)
1 cup flour
1/2 cup butter
2 Tbsp powdered sugar

Filling:
2 eggs, beaten
1 1/2 cup brown sugar
2 Tbsp flour
1/4 tsp baking powder
1/2 tsp salt
1 tsp vanilla
1 cup walnuts, chopped
1/2 cup flaked coconut

Frosting:
1/2 cup powdered sugar
2 Tbsp butter
2 Tbsp orange juice
1 tsp lemon juice

Pre-heat the oven at 350 degrees. To prepare the crust, combine all the ingredients and press into the bottom of a 9 x 13 baking dish. Bake for 12 to 15 minutes or until slightly golden. Combine the filling ingredients and mix together well. Spread the filling over the warm crust. Return the pan to the oven and bake an additional 25 minutes; check after 18 minutes as the bars may be ready. (The filling will be golden brown and look like hardened lava). Let cool about 15 minutes and cut into bars. Let bars finish cooling completely before frosting. To make the frosting, combine all the ingredients and beat until very smooth. Spread over the cooled filling.

Great with a cup of espresso or a tall glass of very cold milk!

Note about this post: A special Thanks! (and a Salute) go to fellow Boatnerd, Dick Lund who let me link to his awesome site for the pictures of the boats and links to the "Boats" mentioned in this post.

1/30/07 Update: I received a very wonderful email this morning from the author of "Ships of the Great Lakes Cookbook", Paula McKenna. It was very nice of her to send a note of thanks, especially since she is a fellow cookbook-aholic, boatnerd and publisher of cookbooks as well as a cookbook author (Can you say DREAM Job!) If you are interested in ordering "Ships of the Great Lakes" you can order it from her company's website: Creative Characters Publishing. They are updating the webpage right but there is phone number you can call to place your order.

Friday, January 26, 2007

Fiery Food for a Frigid Friday

Finally!! I do believe that winter has come to Boston. Today the high was a whopping 10 degrees Fahrenheit (-12C). When you factored in the wind chill, it was bone chilling -5. It was so cold this morning during my commute that my toes never got warm despite the woolen socks and heavy trousers. In other words the perfect weather for homemade chili!

We had a chili a few weeks ago when it wasn't very cold, only coolish out. That batch was made by MBH and was O.K, but we both thought it could have been better. Maybe we just needed a nice blast of arctic air. Whatever the reason, tonight's batch was exactly what we both needed to warm up from our toes to the tips of our nose!

We use a package mix as a base for our chili and about a pound or little bit more of 93% lean ground sirloin along with a can of kidney beans, half an onion, a can of tomato sauce and if we are going to go for a little spice a can of diced tomatoes and chilies.


We've tried a couple different brands of mixes but the one we like the best is the Wick Fowler's 2 Alarm Chili Mix. It contains seven packets of seasonings: red pepper, chili powder, cumin and oregano, paprika, dried onion and garlic, salt, and masa harina.


I also like to add a little additional cumin, chili powder, and cinnamon to the chili (about 2 tsp of each) while I'm browning the ground beef. Adding these three spices at this step infuses the meat with a spicy smoky taste. After draining the ground beef (normally very little fat is left to drain with 93% lean ground beef), I toss in the chopped onions and let them cook until soft and translucent, the spices combining with the onions for a very flavourful mixture.


Next step is to put all the packets of seasonings from the mix in with the exception of the salt, red pepper, and masa harina. I save these for the very last minutes of cooking. This is also where I add the can of beans (undrained), the tomato sauce, the can of chopped tomatoes and chilis and one can of water (use the tomato sauce can to measure the water). I put a lid on the pot and let it simmer slowly. I keep a second can of tomato sauce handy in case I want to lighten out the taste of the spices and a refilled can of water if I need to add more liquid. I taste the chili several times during this simmer to make any adjustments to the seasonings and liquid. After it has simmered for about twenty minutes, I make any last additions to the seasoning. This is where I add the salt and the red pepper if we are going for 3 Alarm strength. I don't use the whole salt packet, just enough to punch up the spices. I let the chili simmer for about ten more minutes. While the chili is simmering for the ten minutes, I mix the masa harina with about 1/4 cup of warm water to make a thick batter. I stir in about 2/3 of this mixture into the chili to make it "spoon stand-up" thick and put the lid back on to let the chili simmer for an additional 10 minutes. This allows the masa harina to cook and all the flavours to really come together!

Sometimes I make a batch of yellow cornbread to go with our chili but tonight I went for little round white corn chips and a sprinkle of cheese on top.


Both MBH and I cleaned our bowls and agreed chili was exactly the right food of warmth for this very chilly night...

Fiery Food for a Frigid Friday

Finally!! I do believe that winter has come to Boston. Today the high was a whopping 10 degrees Fahrenheit (-12C). When you factored in the wind chill, it was bone chilling -5. It was so cold this morning during my commute that my toes never got warm despite the woolen socks and heavy trousers. In other words the perfect weather for homemade chili!

We had a chili a few weeks ago when it wasn't very cold, only coolish out. That batch was made by MBH and was O.K, but we both thought it could have been better. Maybe we just needed a nice blast of arctic air. Whatever the reason, tonight's batch was exactly what we both needed to warm up from our toes to the tips of our nose!

We use a package mix as a base for our chili and about a pound or little bit more of 93% lean ground sirloin along with a can of kidney beans, half an onion, a can of tomato sauce and if we are going to go for a little spice a can of diced tomatoes and chilies.


We've tried a couple different brands of mixes but the one we like the best is the Wick Fowler's 2 Alarm Chili Mix. It contains seven packets of seasonings: red pepper, chili powder, cumin and oregano, paprika, dried onion and garlic, salt, and masa harina.


I also like to add a little additional cumin, chili powder, and cinnamon to the chili (about 2 tsp of each) while I'm browning the ground beef. Adding these three spices at this step infuses the meat with a spicy smoky taste. After draining the ground beef (normally very little fat is left to drain with 93% lean ground beef), I toss in the chopped onions and let them cook until soft and translucent, the spices combining with the onions for a very flavourful mixture.


Next step is to put all the packets of seasonings from the mix in with the exception of the salt, red pepper, and masa harina. I save these for the very last minutes of cooking. This is also where I add the can of beans (undrained), the tomato sauce, the can of chopped tomatoes and chilis and one can of water (use the tomato sauce can to measure the water). I put a lid on the pot and let it simmer slowly. I keep a second can of tomato sauce handy in case I want to lighten out the taste of the spices and a refilled can of water if I need to add more liquid. I taste the chili several times during this simmer to make any adjustments to the seasonings and liquid. After it has simmered for about twenty minutes, I make any last additions to the seasoning. This is where I add the salt and the red pepper if we are going for 3 Alarm strength. I don't use the whole salt packet, just enough to punch up the spices. I let the chili simmer for about ten more minutes. While the chili is simmering for the ten minutes, I mix the masa harina with about 1/4 cup of warm water to make a thick batter. I stir in about 2/3 of this mixture into the chili to make it "spoon stand-up" thick and put the lid back on to let the chili simmer for an additional 10 minutes. This allows the masa harina to cook and all the flavours to really come together!

Sometimes I make a batch of yellow cornbread to go with our chili but tonight I went for little round white corn chips and a sprinkle of cheese on top.


Both MBH and I cleaned our bowls and agreed chili was exactly the right food of warmth for this very chilly night...